
We will teach you how to install and configure Addrwatch on a network. In this way, we will be able to detect anomalies regarding IPs and MACs.
Addrwatch helps you identify possible middleman actions within your network. To do so, the tool maintains a log record indicating the MAC and IP of the machines that communicated within the network.
In this way, Addrwatch’s ARP request log history can help to unravel configuration problems on your network or even identify an anomaly caused by a man-in-the-middle attack.
Addrwatch can be installed on a Linux machine. In this way we will carry out the entire procedure of installing and configuring using a machine with Ubuntu.
Addrwatch Interesting Points:
- Monitor and generate history of IPv4 and IPv6 usage.
- Monitor multiple interfaces.
- Monitor VLAN(802.1Q) packets.
- Log history can be done in stdout, plain text file, syslog, sqlite3 db, MySQL db.
Install Addrwatch
To install Addrwatch, go to the link below.
https://github.com/fln/addrwatch
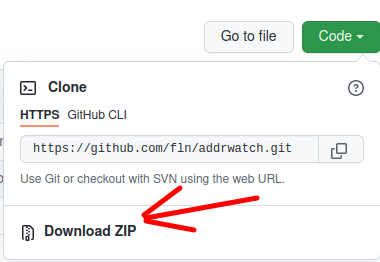
Next, we will select the “Code” button and then we will download the ZIP file.
After downloading, we will extract the contents of the file to a folder of your choice.

Now let’s install the necessary packages for Addrwatch to work. It is worth mentioning that we are using a machine with Ubuntu 20.04 and therefore it was necessary to install the packages below.
sudo apt-get update
sudo apt-get install libpcap-dev
sudo apt-get install libevent-dev
sudo apt-get install autoconf
sudo apt-get install gcc
sudo apt-get install gawk
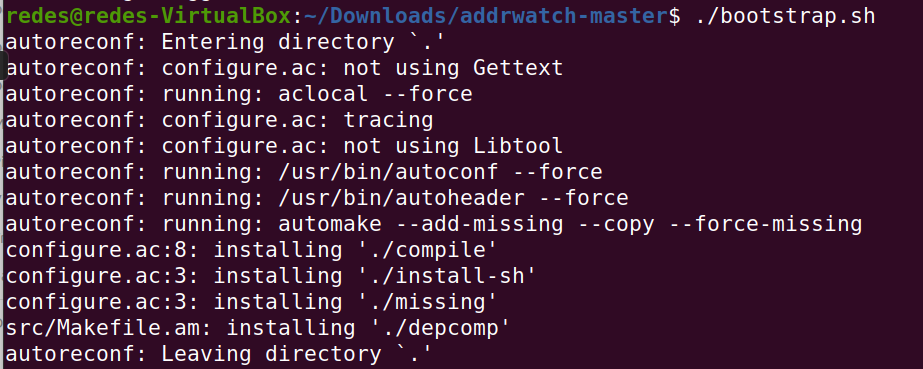
sudo apt-get install makeAfter installing the packages, let’s enter the directory where you extracted the Addrwatch files and run “./bootstrap.sh”. To do this, let’s type the command below.
./bootstrap.shAfter executing the command, you will see a screen similar to the figure below.
That way, if we type the command “ls”, we can see the new files created inside the Addrwatch folder.

Now, let’s run “./configure” and then run “make”. If you want Addrwatch to be installed on the system, we will also use “sudo make install”. After that, you will have Addrwatch installed.
./configure
make
sudo make install
Installing with output to SQL
Alternatively, if you want to install with output to mysql, we can compile using the commands below.
./configure --enable-mysql
make
sudo make install
Running addrwatch
To get started with Addrwatch, let’s use the “sudo addrwatch” command. That way, we can wait a little while and then we’ll start noticing messages from Addrwatch.
sudo addrwatch
In the figure above we have some normal addrwatch logs. In this case we are seeing an “ARP_REQ”, which means an ARP request originating from MAC “08:00:27:ab:1b:b5” asking who has IP 10.0.2.9. In this case the IP 10.0.2.9 is the gateway IP of that machine.
Right after that, we have the ARP response “ARP_REP”. This ARP response comes from the MAC “52:54:00:12:35:03”, which is the MAC of the gateway.
So we have a typical example of an ARP communication taking place on a common network. In the figure below we have a snippet of a Wireshark printscreen. This figure shows the moment when wireshark captured the ARP request and the ARP response.

Other types of history events
ARP_REQ – ARP Request packet. Generates IP and MAC information of the origin that made the ARP request.
ARP_REP – ARP Reply packet. Generates IP and MAC information from the origin that made the ARP response.
ARP_ACD – ARP Address collision detection packet. Generates IP and MAC information of the source host.
ND_NS – Neighbor Solicitation packet. Generates information about Origin link-layer address (NS option) and IPv6 address.
ND_NA – Neighbor Advertisement packet. Generates information about the target link-layer address (NS option) and IPv6 address of the source.
ND_DAD – Duplicate Address Detection packet. It generates information about the source MAC and the target address (NS header).
Addrwatch Log Limiting Options
We can use ratelimit to prevent the logs from getting polluted with repeated messages. For this we can use “-r NUM” or “–ratelimit=NUM”. The “NUM” in this case is the number of seconds that will be used to suppress repeated information from Addrwatch.
sudo addrwatch -r 300
Note- even if the ratelimit suppresses repeated information, if you have any new information it will be inserted in the log history. That way, we won’t lose new pairs of IPs and MACs that are associating on the network.
Testing Addrwatch
Now, let’s create a test environment using two more virtual machines. The figure below demonstrates the topology we are going to use for testing.

In the above scenario, we are using virtual machines connected by a VirtualBox “Internal Network”. The interesting thing about using a virtualbox internal network is to be able to guarantee communication isolation. In this way, only the entities participating in the tests can have access to each other.
How to create an internal network in VitualBox “Internal Network”: https://youtu.be/-yQ-FD1f4QQ
The first machine is using ubuntu 20 and has Addrwatch installed.
The second machine has the Kali operating system installed.
Install KALI in VirtualBox: https://youtu.be/nT6Dr6vgcjw
The third machine has an Apache server and hosts a WEB page.
Install APACHE: https://youtu.be/z4v397M-1xA
Testing with Ettercap
Now let’s use kali’s Ettercap tool to perform an ARP spoofing. The idea is to use a middle man attack.
(Note)- Remembering that any kind of action like this using the Ettercap tool must be done in a controlled environment and that you have permission to perform. So, in this case we are only using it on a virtualized internal network inside VirtualBox.
So we are going to use Ettercap to respond both for the machine that has the WEB Server and also for the machine that has Addrwatch. That way, when the machine with Addrwatch tries to access the WEB server, the Kali machine will intercept the communication.
The Ettercap tutorial can be found at: https://youtu.be/KYjyqlQxJzY
We can see in the figure below that the machine with KALI is responding for the machine “192.168.11.33” and for the machine “192.168.11.22”. That is, the Kali machine is also responding to the WEB Server machine. That way, when we make a request to the WEB server, the data will be intercepted by the Kali machine.

So we can verify that the Addrwatch tool informs the use of IPs and MACs within the network. This means, we can check the moment when there was some abnormal behavior within the network using the Addrwatch logs.
The figure below shows the ARP table of the machine running Addrwatch. We can see that the ARP table is indicating that to reach the IP of the WEB server “192.168.11.22” we must send it to the MAC of the KALI machine “08:00:27:19:d5:47”. This means that Ettercap was able to pretend to be the WEB Server machine.

Comparing Addrwatch and Arpwatch
In comparison, I believe that Addrwatch is more interesting to use as a tool that will keep logs of IP and MAC usage within your network. That way, if there is an abnormal event, the network administrator can check the Addrwatch logs and take appropriate action.
The Arpwatch seems to be more suitable for an immediate response to the incident. This is because you can use Arpwatch’s alarms to alert the Network Administrator when the anomaly is occurring.
Which is better Addrwatch or Arpwatch?
It depends, it would be interesting to use Addwatch if we have some other tool to notify the administrator when there is any anomaly in the network regarding IPs and MACs. Therefore, I consider using Addwatch in case already have some tool like a Snort analyzing the network. Arpwatch is a more complete tool, as it allows you to identify anomalies in real time and even send an email to the network administrator.


