In this tutorial, we will demonstrate how to install the OpenVPN client on Windows and we will also show you how to configure the OpenVPN client.
We will use a lab scenario to allow the reader to learn and replicate what is presented in this tutorial. In addition, we explain during the tutorial what should be changed for a real production scenario.
We’re assuming you already have an OpenVPN server installed. If not, we have an Install OpenVPN Server tutorial:
Installing the OpenVPN client
Initially we go to the OpenVPN page and we are going to download the openvpn client installer. For that we will type the link below.
https://openvpn.net/community-downloads/
After downloading the OpenVPN client installer, let’s run the file we just downloaded. To do this, let’s double-click with the mouse.

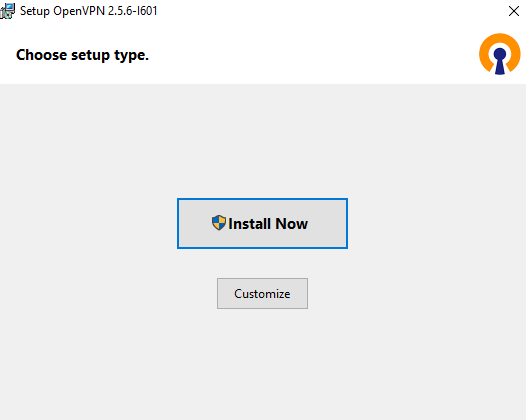
Then the screen below will appear. Let’s click on “Install Now”.
After that, let’s give the OpenVPN installer permission to access the disk.
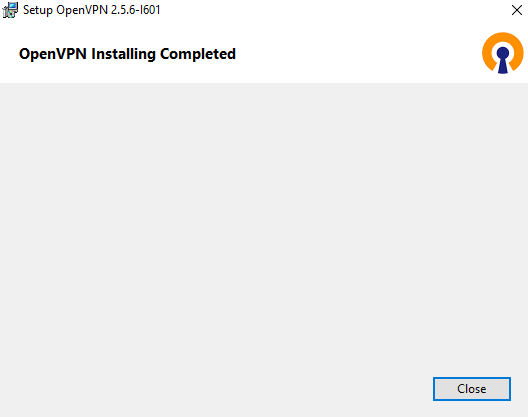
After the installation we can see the message below. So, let’s click on “Close”.
Editing the OVPN file
Now, let’s edit the client’s ovpn file. In this case, let’s change the server IP and uncomment the lines below.

After the change, the lines will look like this:
user nobody group nobody Now let’s change the OpenVPN server IP. For this, we need to check the IP of our OpenVPN server. In our case, we are accessing within an internal network and the OpenVPN server IP is “192.168.11.2”.
However, you will likely have a public IP from your OpenVPN server or the public IP from your edge router that port forwards to your OpenVPN server.
remote 192.168.11.2 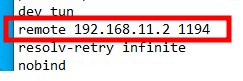
Adding an Alternate DNS
If you have not specified a DNS server for your VPN interface. You can insert in the client file the option “dhcp-option DNS”.
This command line allows the client to use the DNS specified in the OpenVPN client configuration. In our case, we are using a google DNS “8.8.8.8”. You can choose the DNS that best suits your purposes.
dhcp-option DNS 8.8.8.8 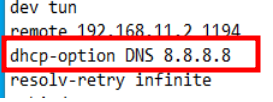
Running the OpenVPN Client
Now let’s run the OpenVPN application.

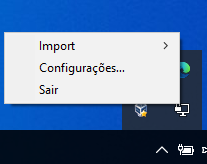
Once started, go to the lower right corner and right-click on the link with the symbol in the figure below.

By clicking with the right mouse button, we will see the “Import” option. So, let’s click on “Import” and let’s choose the location where we save the client’s OVPN file.

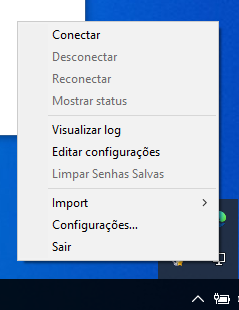
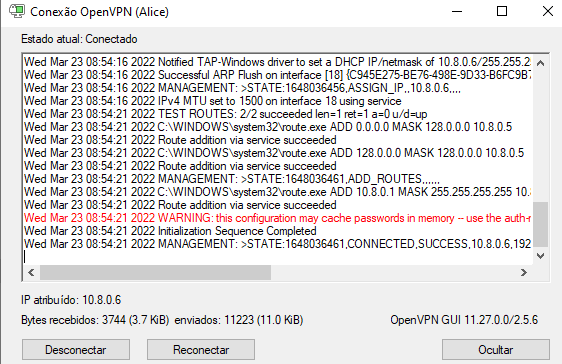
After importing the OpenVPN client file, we can right-click the OpenVPN icon and click “Connect”. Then OpenVPN will start creating the tunnel.
Testing the OpenVPN Client
To test the OpenVPn client on Windows, you can browse the Internet or use the windows tracert command. This command, tracert, is the same as the linux traceroute command.
So the tracert command will allow you to check the hops to the host you are searching for.
In our case, the first hop is the OpenVPN connection and then it goes to the default Gateway of the OpenVPN server. In this way, we have proof that the customer is using the VPN satisfactorily.
tracert www.google.com 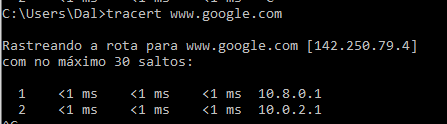
Downloading the client OVPN file (Optional)
Now let’s get the client configuration file. There are several ways to do this. In this tutorial, we are going to get the client file using SFTP. However, you can send it by email, flash drive…
To download via SFTP, let’s connect to the server. For this, we need to know the IP of the OpenVPN server. In our case the OpenVPN server has the IP 192.168.11.2. However, check your OpenVPN server IP.
Also, if you are already using OpenVPN in a production environment, the OpenVPN server IP will likely be a public IP.
To access the OpenVPN server with SFTP, click on the start menu and click on run and then type cmd.

You now have a terminal. In this terminal, type the command below:
sftp redes@192.168.11.2 The command consists of the application that we are going to use, in this case it is “sftp”. Next we have the OpenVPN server user, in this case our user is “networks”.
After that we have to inform the address of the OpenVPN server. In our example, this address is “@192.168.11.2”.
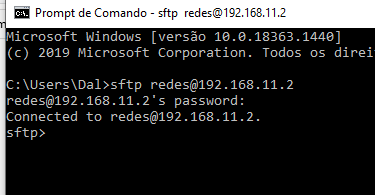
After that, you will enter the password of the user of the machine that has the OpenVPN server.
Now, let’s go to the directory where our user’s “OVPN” file is stored. In our case our client user Alice’s files are stored. For this we will use the command “cd /home/redes/vpn_clients/alice/”.
Remember to use the directory where you stored your Openvpn client files.
cd /home/redes/vpn_clients/alice/ 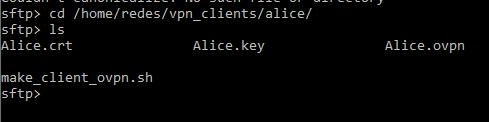
Now let’s use the “get” command to download the “Alice.ovpn” file.
get Alice.ovpn The figure below shows the Alice.ovpn file being copied to the Windows machine.


Juliana Mascarenhas
Data Scientist and Master in Computer Modeling by LNCC.
Computer Engineer
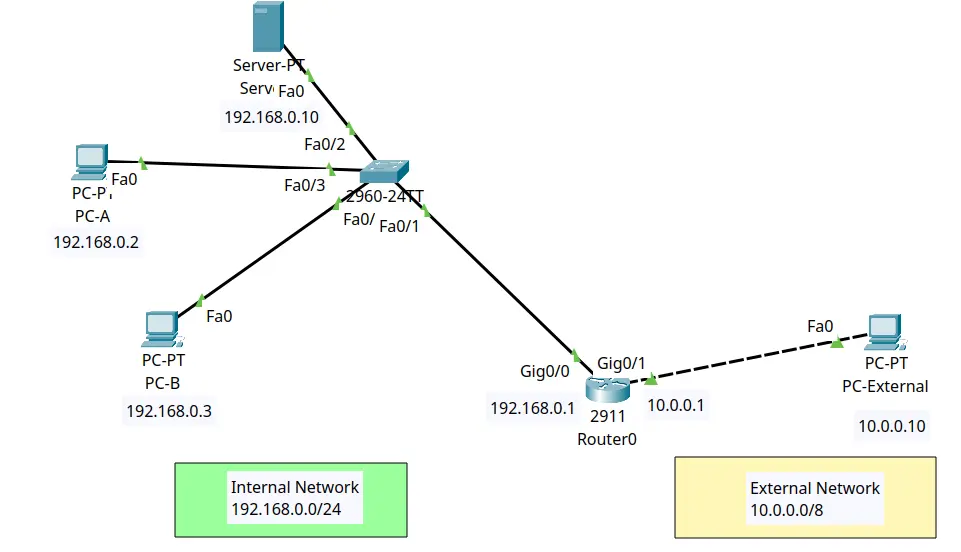
Tutorial: Using Port Forwarding in Packet Tracer

Tutorial: Web Server in Packet Tracer (Client-Server)

Email Server & Webmail Setup: Postfix, Dovecot, SnappyMail
Install Ubuntu Server 26 on VirtualBox (Step-by-Step)

How to Configure NAT in Packet Tracer (Step-by-Step)