In this tutorial we will teach you how to monitor a Windows machine using zabbix. To do this, we will use the zabbix agent on the Windows machine.
This tutorial is focused on monitoring a Windows machine and we will show the steps to install and configure the zabbix agent on Windows.
We also have another tutorial that teaches you how to monitor a Linux machine (Click Here).
Ddownload the zabbix agent for windows
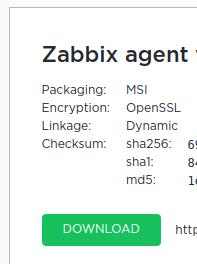
First, let’s access the zabbix download page and choose the operating system Windows.
Also, let’s choose the newest version of zabbix.
For encryption, we will choose OpenSSL and MSI packaging.

Then, further down the page, we will see the DOWNLOAD option.
Installing the zabbix agent on windows
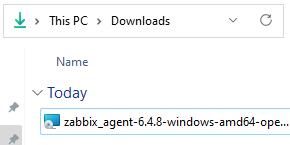
Now, let’s go to the folder where we downloaded it and double-click on the installer.
We will then see a screen asking if we want to continue with the installation.

Soon after, comes the license and the question if you agree.
After continuing, we will see the screen that asks where the installation will take place. For this tutorial, we will use the standard installation and therefore click on “Next”.

Now let’s enter the Zabbix server IP both in the “Zabbix server” field and also in the “active checks” field.
If you are using a Zabbix proxy, you can enter the proxy IP in the “active checks” section.
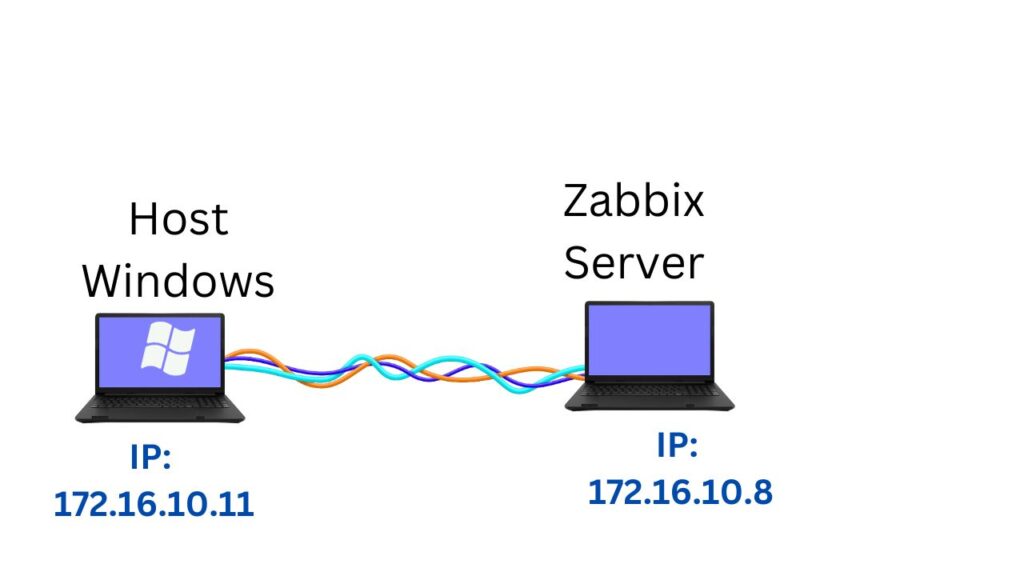
In our case, our zabbix server has the IP “172.16.10.8”.
Let’s leave the agent listening on the default port “10050”.
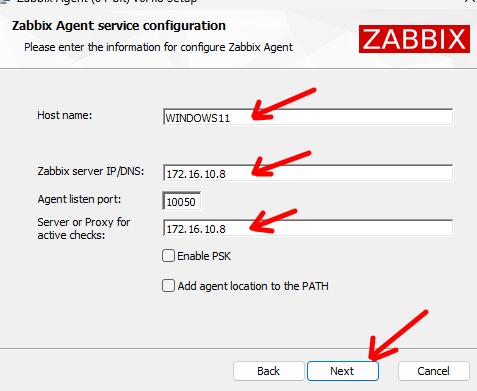
To make this tutorial simpler, we will not cover PSK configuration.
If you wish, we can make future tutorials including PSK.
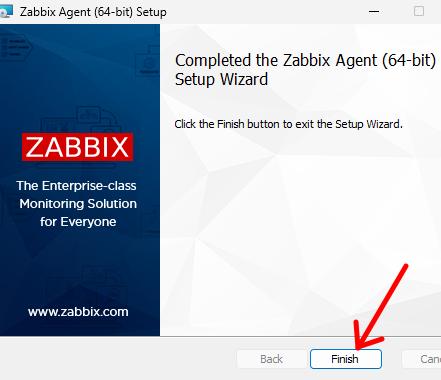
After that, we can finish the installation.
Allow Zabbix Agent in Firewall
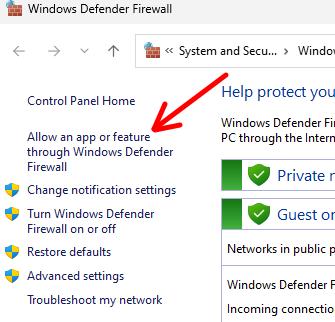
Check if the Windows firewall is allowing communication with the Zabbix Agent.
To do this, we will click on “Allow na app or feature…”
Next, let’s check if the “Zabbix Agent listen port” has permission in the Private and Public fields.
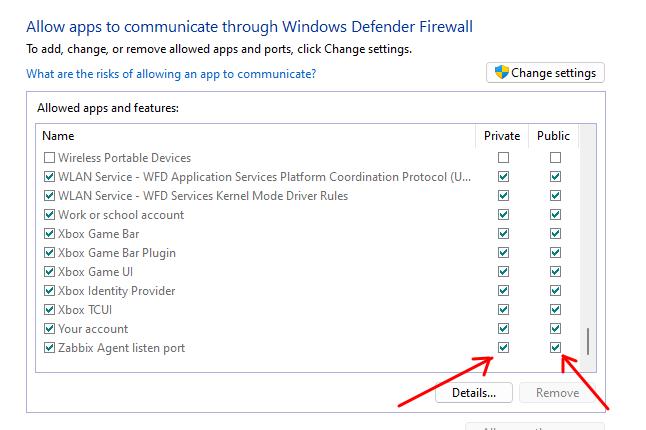
If it is as in the figure above, it means that the Windows firewall will allow communications with the zabbix agent port. If this is not the case, you need to include this permission in the Windows firewall.
Monitoring on the zabbix server
Now let’s configure the zabbix server to monitor our zabbix agent that is running on the Windows machine.
If you don’t already have a Zabbix server, see here how to configure Zabbix Server.
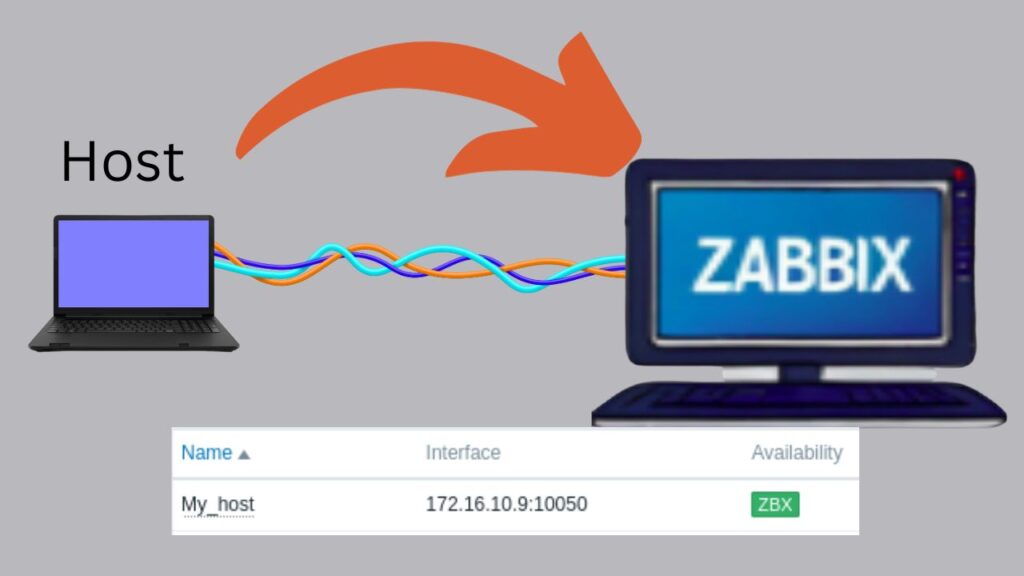
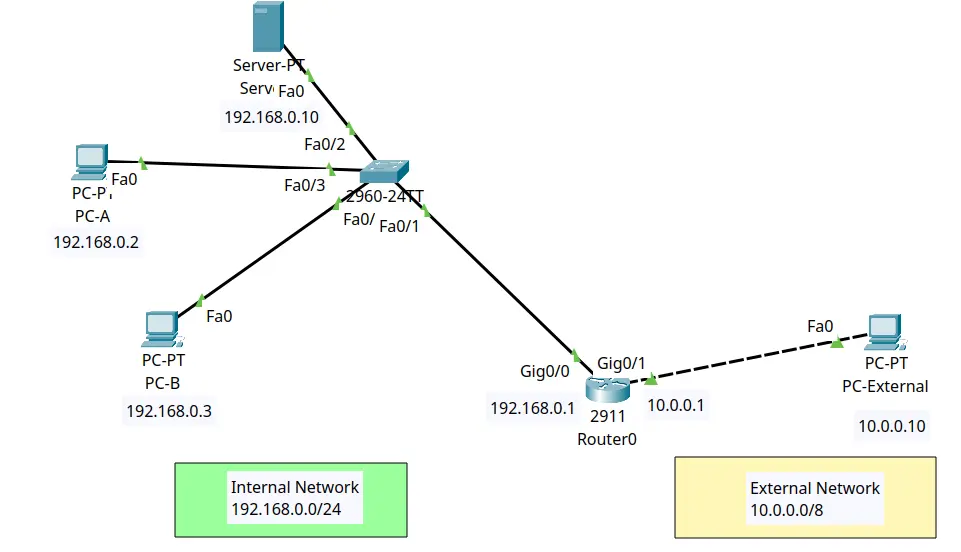
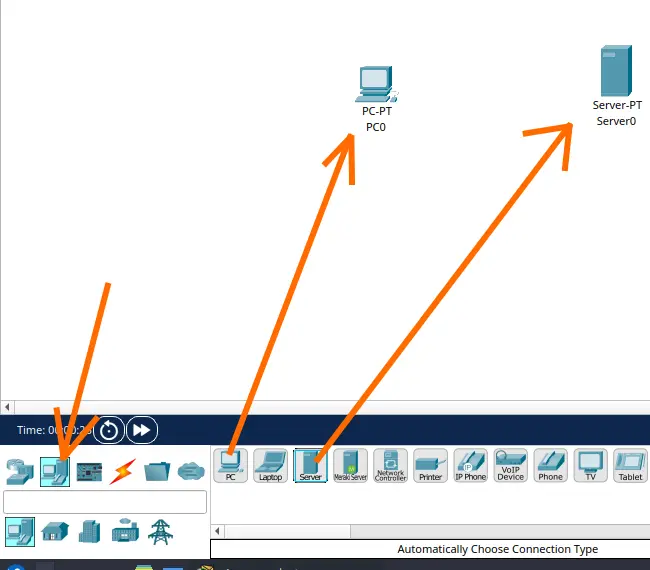
The scenario we used for this laboratory is shown in the figure below. We have the WINDOWS host machine and the Zabbix server machine connected.
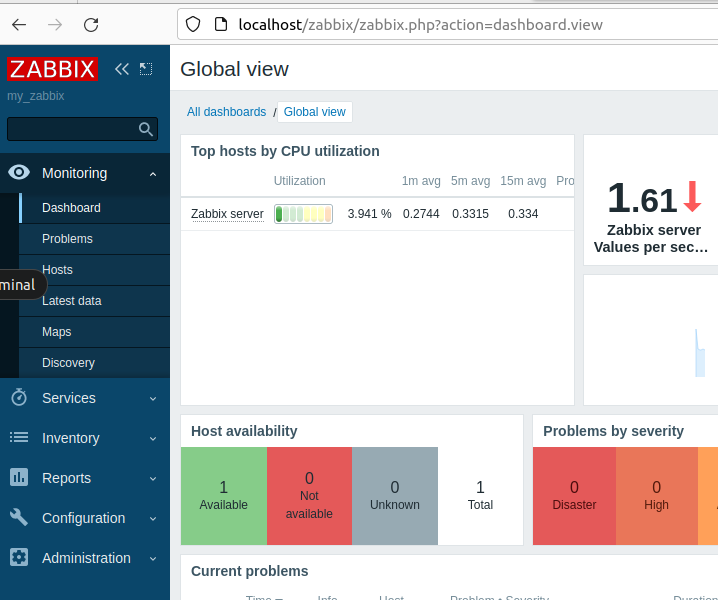
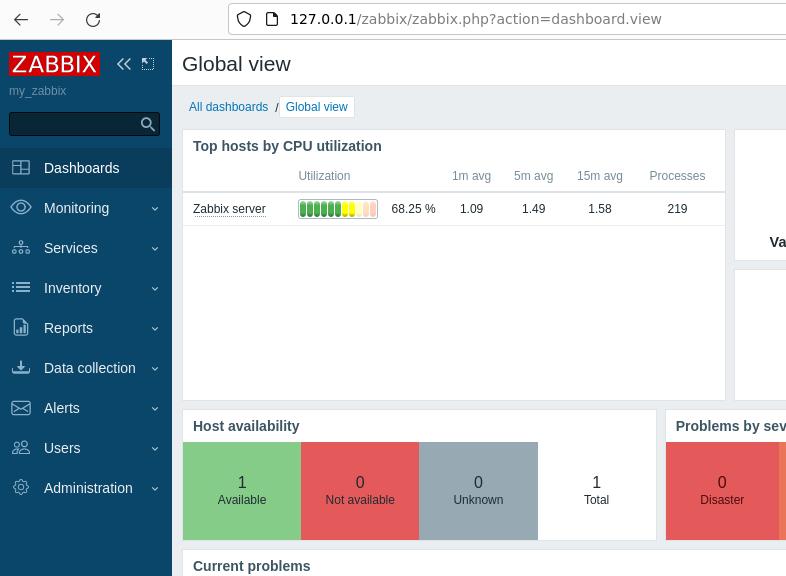
Let’s log into the machine where the Zabbix server is running and we can use the loopback IP “http://127.0.0.1/zabbix”.
http://127.0.0.1/zabbix
Note. We can use another IP of the machine where the zabbix server is located to access the zabbix server’s WEB interface using another device. (In this case it would not be the loopback IP).
Next, let’s see the main screen of the Zabbix server as in the figure below.
Creating new WINDOWS host on Zabbix Server
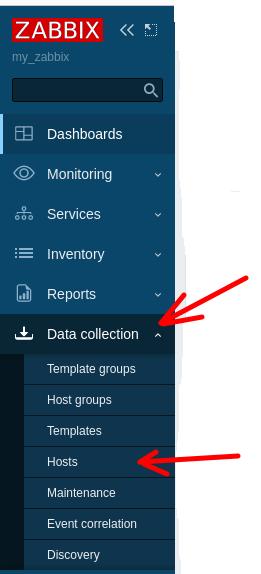
Now let’s start the process of adding a host to zabbix. To do this, we will click on “Data Collection” and then on “Hosts” in the menu on the left.
Next, at the top of the screen, we will click on “Create host”.

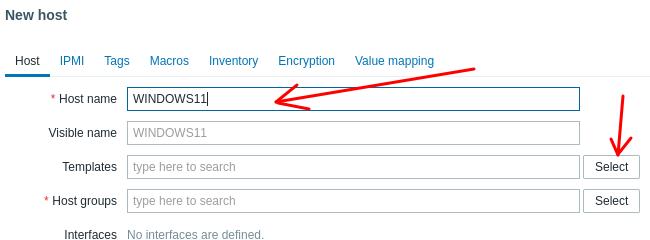
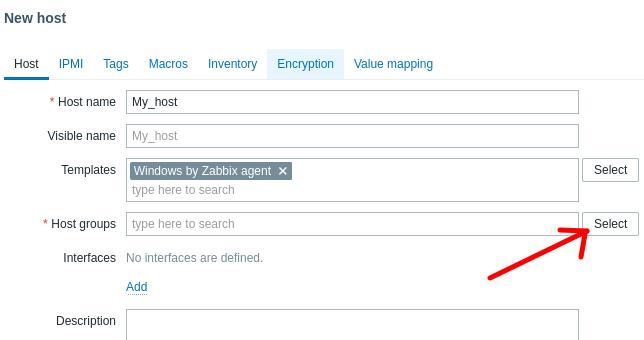
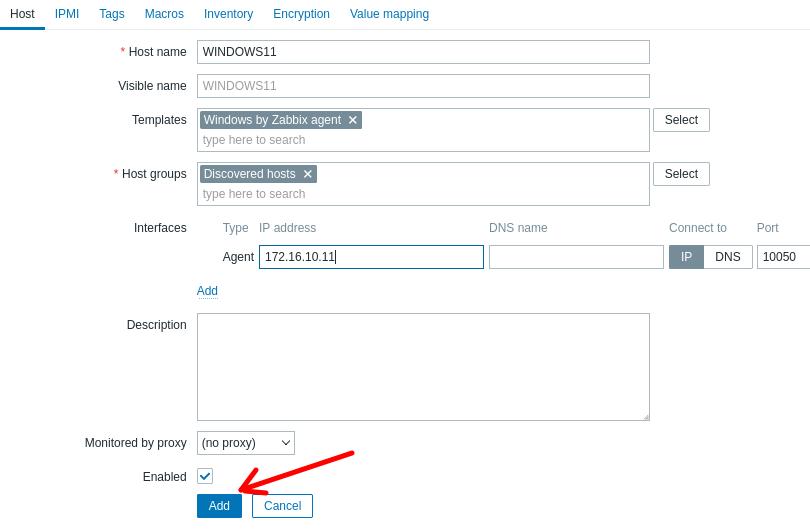
Now let’s see the hosts insertion screen. On this screen, we will give a name to the host we are going to monitor.
Here we will insert the name we gave to the machine in the zabbix agent. In our case, we use the name WINDOWS11 and we will use that same name here.
Next we will select the template and to do this we will click “Select”.
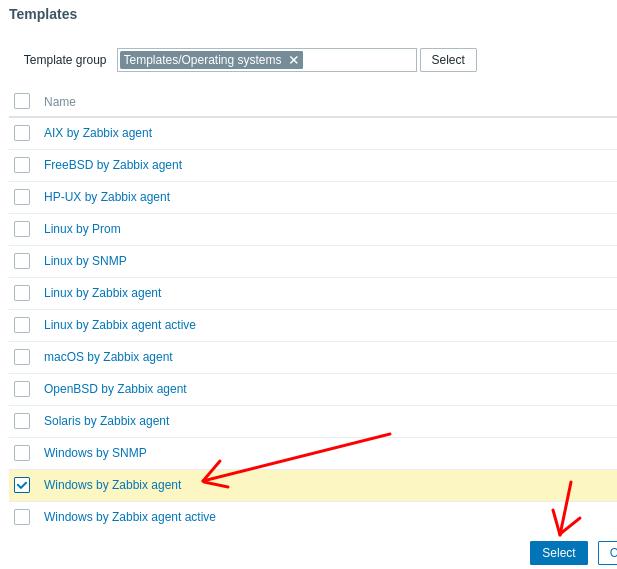
Let’s choose the type of template we are going to use. In our case, we are going to monitor a common machine and so we will choose to monitor based on the operating system. To do this, we will click on “Templates/Operating systems”.
Now, let’s select the “Windows by Zabbix agent” template and click on “Select”.
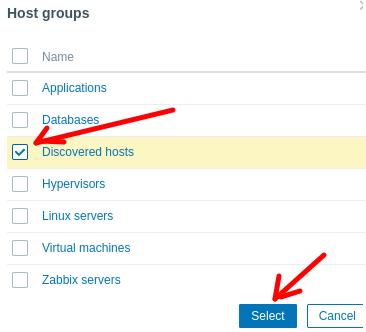
Now let’s add the host group that the new host will belong to. To do this, we will click on Select in the “Hosts groups”
Next, we’ll choose a group for our host. In this case, we will choose the “Discovered hosts” group and then click on “Select”.
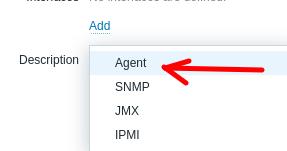
The next step is to add the interface. To do this, we will click on “Add” in the “interfaces” field.

As we are going to use the zabbix agent on the host, we will choose the “Agent” option.
Now let’s enter the IP of the WINDOWS host we want to monitor. In our case, the host IP is “172.16.10.11”. After entering the host IP, we will click on “Add”.
We can see that the WINDOWS11 host appears in the list below. However, we can check the “Availability” field is still not showing the host status in green.
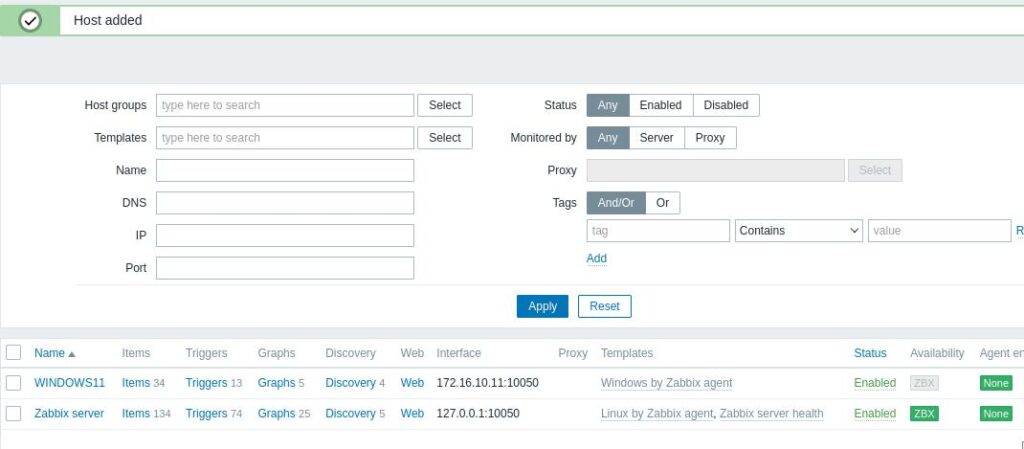
To show the “Availability” field in green, press the F5 key or refresh the page.
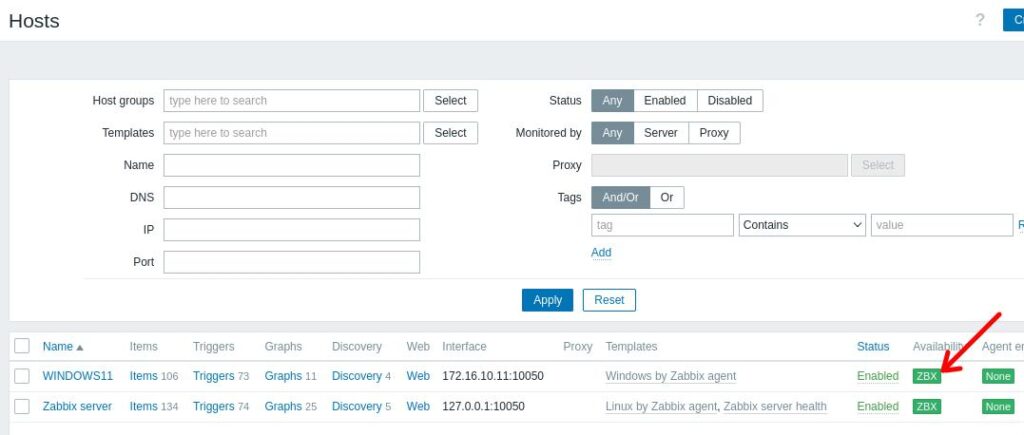
And we have completed the tutorial for adding and monitoring a Windows machine in Zabbix.
How to install Zabbix on Raspberry Pi

Juliana Mascarenhas
Data Scientist and Master in Computer Modeling by LNCC.
Computer Engineer
Tutorial: Using Port Forwarding in Packet Tracer
Tutorial: Web Server in Packet Tracer (Client-Server)

Email Server & Webmail Setup: Postfix, Dovecot, SnappyMail
Install Ubuntu Server 26 on VirtualBox (Step-by-Step)

How to Configure NAT in Packet Tracer (Step-by-Step)