This is a tutorial that teaches you how to install and configure an SSH server on a Windows 11 machine.
We will present the tutorial in a simple way and with many figures that will help you follow the steps to install the Open SSH server on your Windows.
To follow this tutorial, it is important that the Windows machine is connected to the Internet to allow the OpenSSH Server App to be downloaded and installed.
Installing Open SSH Server
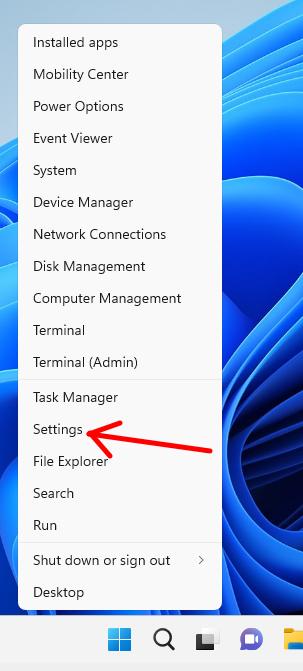
To install the SSH server on our Windows 11, we will right-click on the window icon that appears in the bottom menu of Windows.

Next, we will click on the “Settings” option that appears in the new menu.
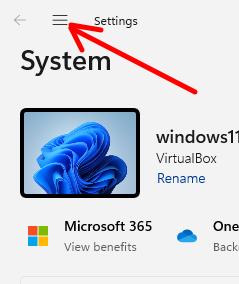
In the next menu that appears, click on the icon shown in the figure below.
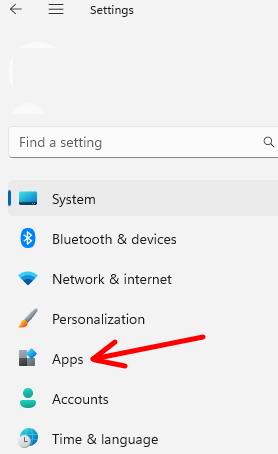
Now, let’s click on “Apps” as shown in the figure below. This icon will allow us to access some apps for installation on Windows 11.
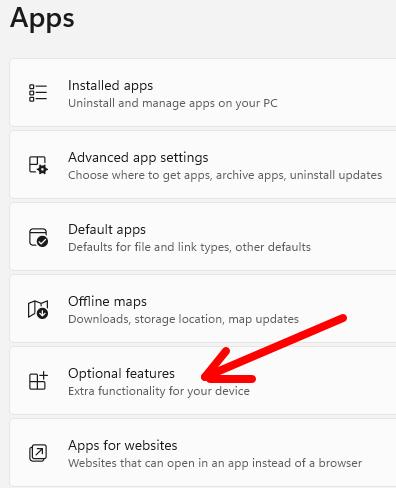
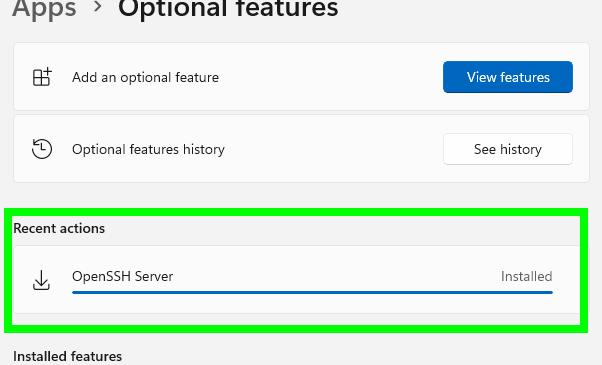
The next step is to click on “Optional features”, following the example in the figure below.
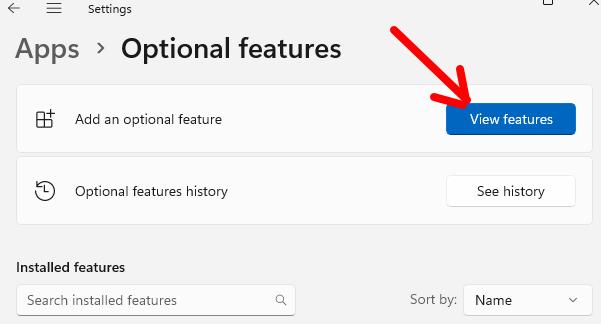
Next, we will click on “View features” as in the figure below. This option is within the same tab as “Add an optional feature”.
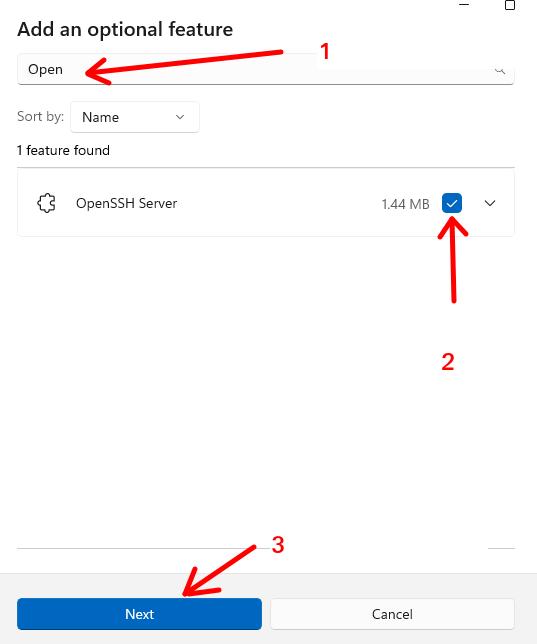
In the first search field of this menu, we will type Open and then click on the “OpenSSH Server” checkbox. After that, we will click on “Next”.
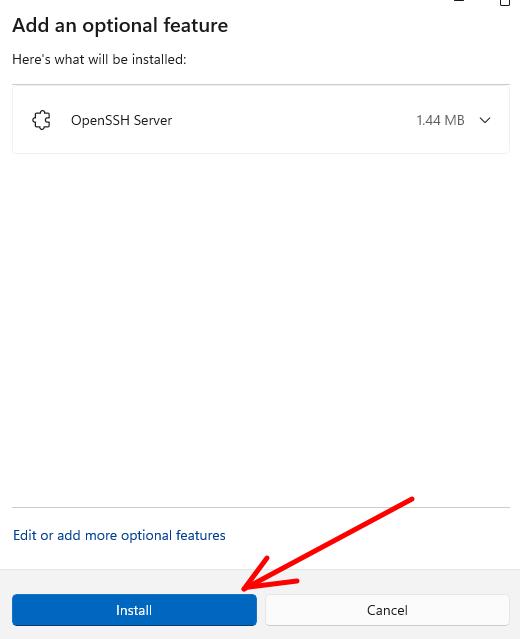
Then, we will see a screen like the one in the figure below and click on “Install” to confirm that we want to install Open SSH Server on Windows 11.
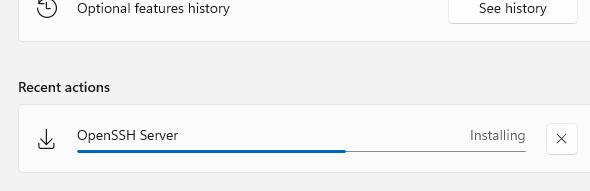
After clicking “Install”, we will see a screen that demonstrates the OpenSSH Server installation process. Let’s wait until it is installed as in the pictures below.
Starting SSH server in Windows 11
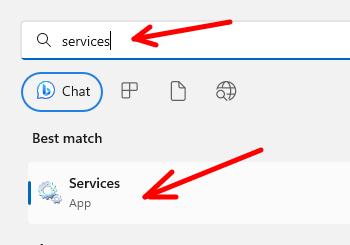
To start the SSH server on our Windows, we will click on the magnifying glass that appears in the bottom menu.

Next, we will type Services and we will see that a Services icon appears just below the menu as shown in the figure below. So let’s click on Services.
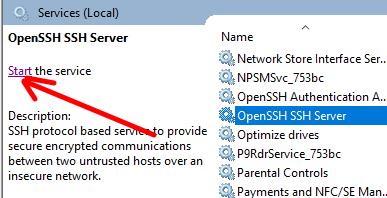
Now, let’s look for “OpenSSH SSH Server” and when we find it, click and we will see the “Start” option on the left part of the menu. Let’s click on Start so that the SSH server starts on our Windows 11.
Configure OpenSSH Server to boot alongside Windows
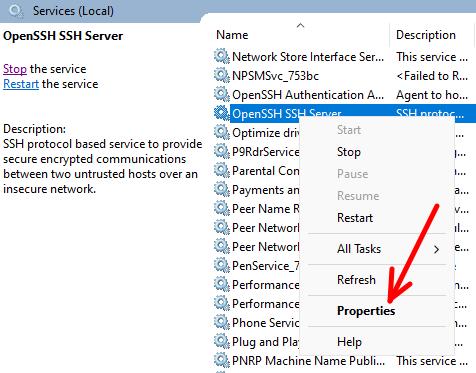
To make the OpenSSH server start every time Windows starts, let’s right-click on “OpenSSH SSH Server”. When clicking with the right mouse button we will see a menu and within that menu we will click on “Properties” as in the figure below.
Next, we will change the “Startup type” option to “Automatic”, following the figure below. This way, every time the Windows 11 machine starts up the SSH server will start up too. Then we will click on “OK”.
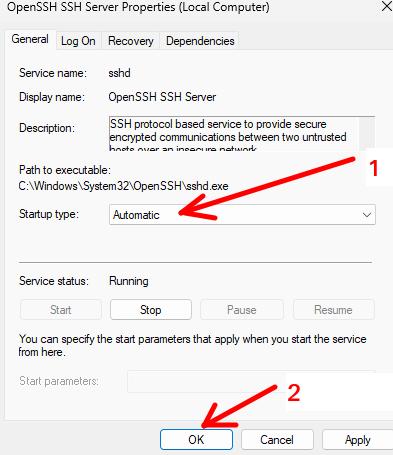
We can see that the OpenSSH SSH Server service is now Running and is also in Automatic mode.

Testing SSH Server on Windows 11
We are going to do some tests to identify whether our SSH server is working correctly within Windows 11. If some of the tests do not occur as expected, it may be necessary to create a rule in the Windows Firewall or create a common user to be able to access the server SSH.
Checking if SSH server port 22 is open
Now let’s see if port 22 on the ssh server is open waiting for connections.
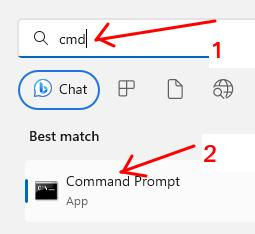
To do this, we will click on the magnifying glass that appears in the bottom menu.

Next we will type cmd and click on the “Command Prompt” icon.
After clicking on the “Command Prompt” icon we will see a terminal. Inside the terminal, let’s type the command below to check the ports that are open. Our objective is to check if port 22 is open as in the figure below.
netstat -an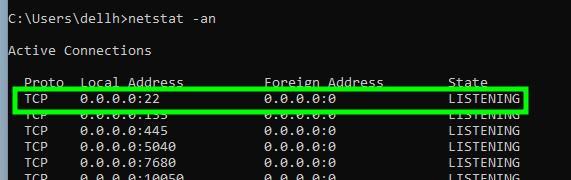
We can see that port 22 is open and waiting for connections.
Note. It may be that after executing the command “netstat -an” you need to go to the top of the screen at the moment you gave the command. This is because we gave you the command in a simplified way and will show several connections on your Windows machine.
Checking the internal IP of the Windows machine
Within the same terminal that we used to check port 22, we can use the following command to find out the IP of the machine.
ipconfig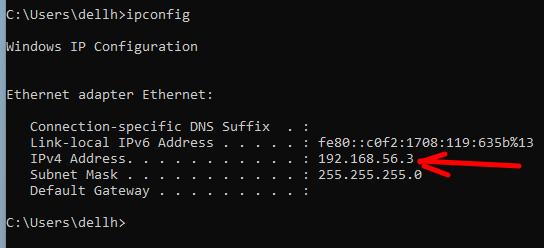
By typing ipconfig we can see several IPs. However, let’s look for the IP that belongs to our internal network. In our case, the internal network is 192.168.56.0/24 so the IP we are interested in is IP 192.168.56.3.
In your case you need to check which IP is within your internal network.
Testing SSH access within the server
Within the terminal we just used, we can use the command below to test the connection to our SSH server.
To test access to the ssh server within the Windows machine, we will use the command ssh + our user + loopback IP . The loopback IP is an internal IP that machines have and we generally use “127.0.0.1”. In this command we will use a user called “test” that we created to carry out tests with the Windows SSH server. Therefore, we will use the command below.
ssh test@127.0.0.1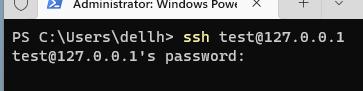
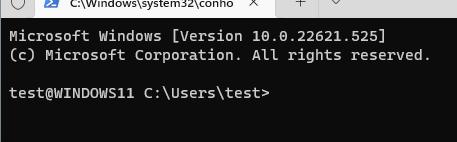
After entering the user password, we will have the screen below showing that the connection was successful.
To exit the SS connectionH
To exit a connection to the Windows SSH server, we can use the exit command.
As in the example below, we were logged in and simply typed exit and pressed ENTER.
exit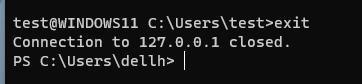
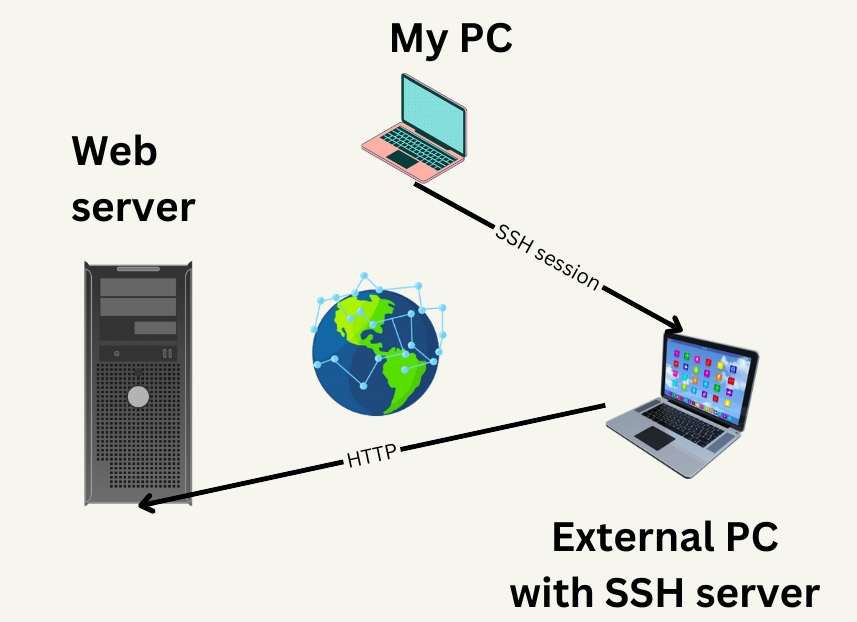
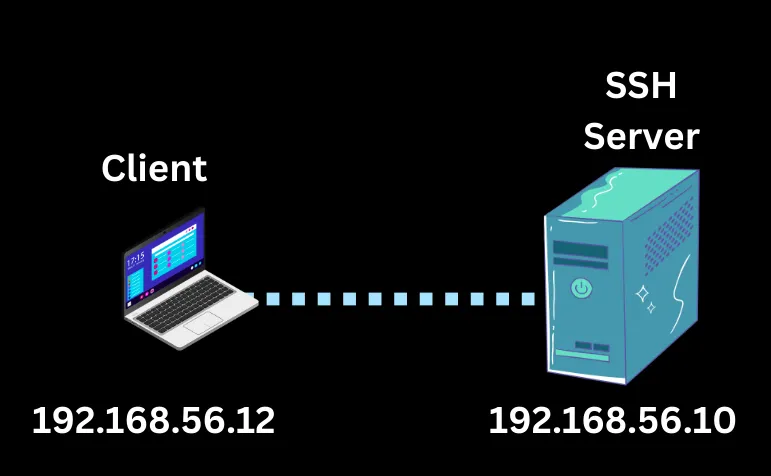
Using another machine to access the Windows SSH server
On another machine on the same network, we can open a terminal and type “ssh user@windowsIP”.

In our case we will use the user is test and the IP is “192.168.56.3”, so we will use the command below. Remembering that the test user is a user of our Windows machine and this machine has the IP “192.168.56.3”.
ssh test@192.168.56.3
The first time you access server SSH you will have to answer yesto continue. After that, enter your Windows user’s password.

Note. Use the username of your Windows machine and use the IP of your Windows machine.
After entering the password, you will see a screen like the one below that indicates that you have logged into Windows.
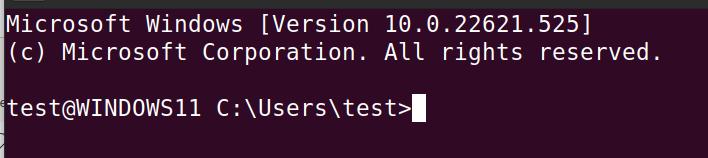
And congratulations, you have completed the installation and configuration of the SSH server on a Windows 11 machine.
Configuring Windows Firewall for SSH Server
In many cases it is not necessary to create the rule in the firewall, this is because when we install OpenSSH Server on Windows 11 the firewall is already configured to allow access to the network.
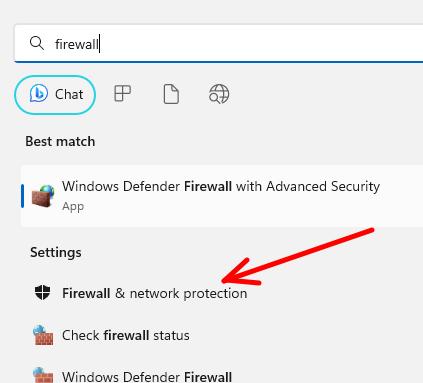
However, it is worth checking whether the OpenSSH Server has network access. To do this, click on the magnifying glass in the bottom menu.

And then we will type firewall and then click and m “Firewall & network protection”.
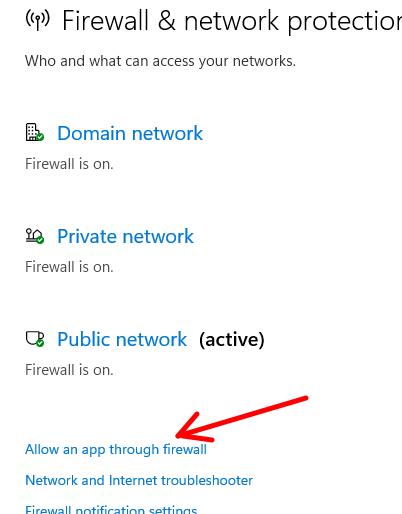
Next, we will click on “Allow an app through firewall”.
Now, let’s look for the OpenSSH Server app and check if the Private and Public boxes are checked.
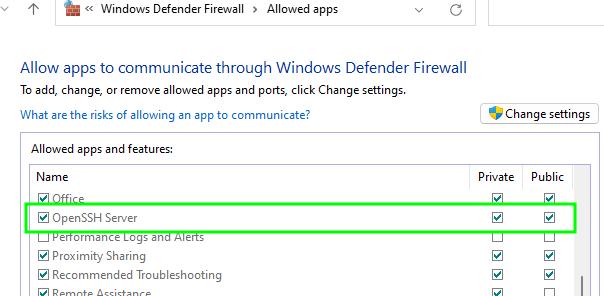
In our case, the Private and Public boxes were already checked and there was no need to do anything. However, if it is not checked in your case, you will click on “Change settings” and you will be able to check the Private and Public boxes and then click OK.
Creating a user to access the SSH server on Windows
To access the OpenSSH server on Windows 11, we need a local user on Windows. In this case, we can use a standard user, or we can create a user to access the SSH server.
Below we will demonstrate how to create a new user to access using the SSH server.
To do this, let’s click on the magnifying glass in the bottom menu.

Next we will type terminal and then we will click with the right mouse button on the terminal icon and we will click on Runs as administrator .

Inside the terminal, let’s type the command below to create a user test and the password test123.
net user test test123 /add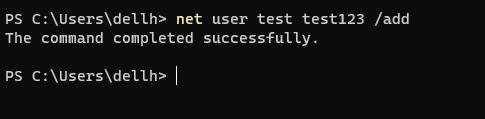
And that’s it, now you have a new user to test with your SSH server on the Windows 11 machine.
Important Points When Using an SSH Server on Windows
Let’s talk here about some points that I consider important to consider when we are planning to install an SSH server on a Windows machine.
The Administrator Password for the SSH server
Ah, the passwords… Choosing a good password for your OpenSSH server administrator is like choosing the winner on a reality show: it has to be strong, memorable, and preferably not the same name as your dog. Use a combination of letters, numbers and symbols. And, of course, avoid the classic “123456” or “password”. If you do this, even my great-great-grandfather, who never used a computer, will be able to access your server.
Updates: Why Not Every Reminder Can Be Ignored
Keep your system and OpenSSH up to date. Ignoring security updates is like forgetting your best friend’s birthday: sooner or later, it’s going to lead to problems. The updates contain fixes for vulnerabilities that, if left unaddressed, could turn your server into a party house for non-peaceful beings.
Firewall: The Digital Bodyguard
Configuring the firewall is essential. It’s like having a bodyguard for your server, only he won’t ask for a raise. Make sure that only the necessary ports are open, especially the SSH port (usually 22), to avoid unwanted visitors.
Backups: The Plan B Everyone Forgets About Until You Need It
Make regular backups of important settings and data. Backup is that plan B that everyone forgets about until plan A collapses, like that umbrella you never remember to take until you get caught in the rain.
Key Authentication: Why Sometimes Less Is More
Consider using key authentication instead of passwords. It’s safer and avoids the daily spectacle of trying to remember which password you used. Plus, it’s like having a VIP pass: only those who have the key can enter.
In short, treating your OpenSSH server like a castle can not only bring some fun to the world of computing, but also ensure that the main bases of security and efficiency are covered. And remember, in the world of technology, timing is everything!
See more:
Install OpenVPN Client on Windows
Update OpenVPN Client on Linux
Install and Configure OpenVPN Server on PfSense
OpenVPN and PfSense Site to Site
Access Internet through site to site VPN

Juliana Mascarenhas
Data Scientist and Master in Computer Modeling by LNCC.
Computer Engineer
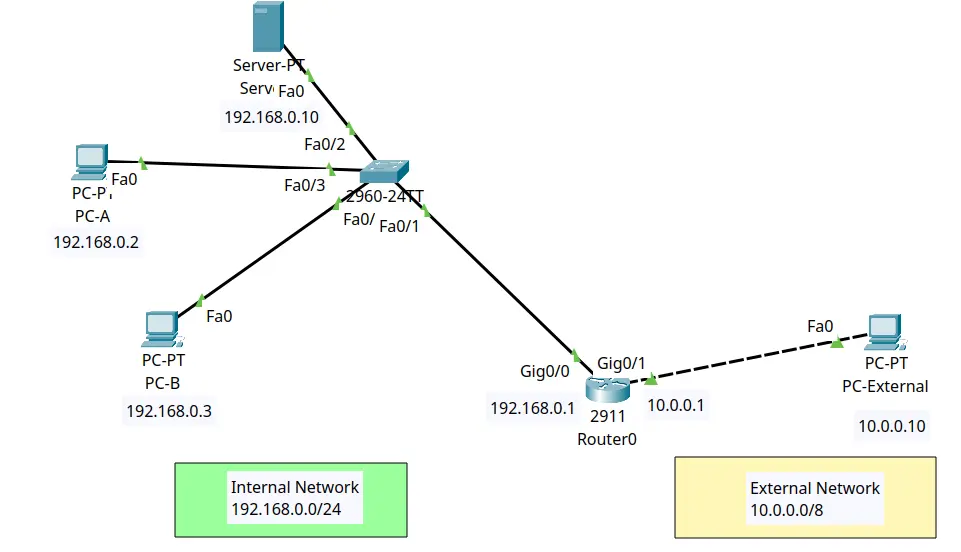
Tutorial: Using Port Forwarding in Packet Tracer
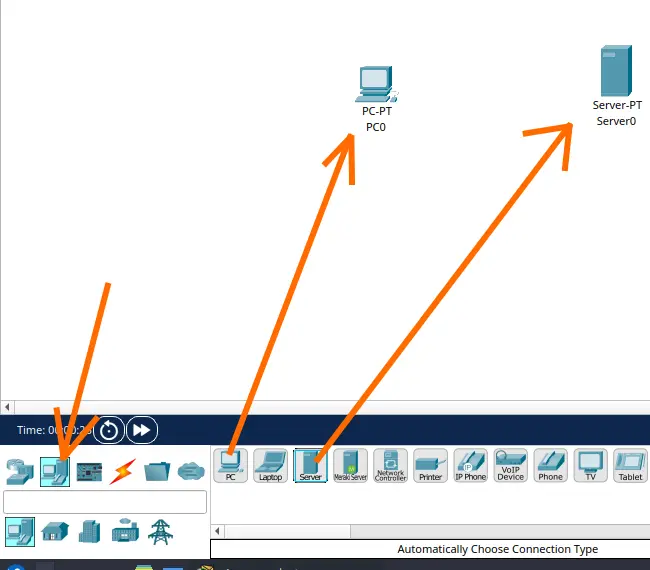
Tutorial: Web Server in Packet Tracer (Client-Server)

Email Server & Webmail Setup: Postfix, Dovecot, SnappyMail
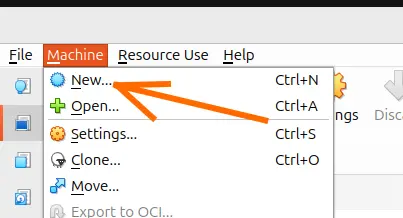
Install Ubuntu Server 26 on VirtualBox (Step-by-Step)

How to Configure NAT in Packet Tracer (Step-by-Step)