Today we will demonstrate how to install Ubuntu server on VirtualBox. Virtualizing the Ubuntu server can be interesting for various applications and also for testing environments.
Ubuntu Server Download
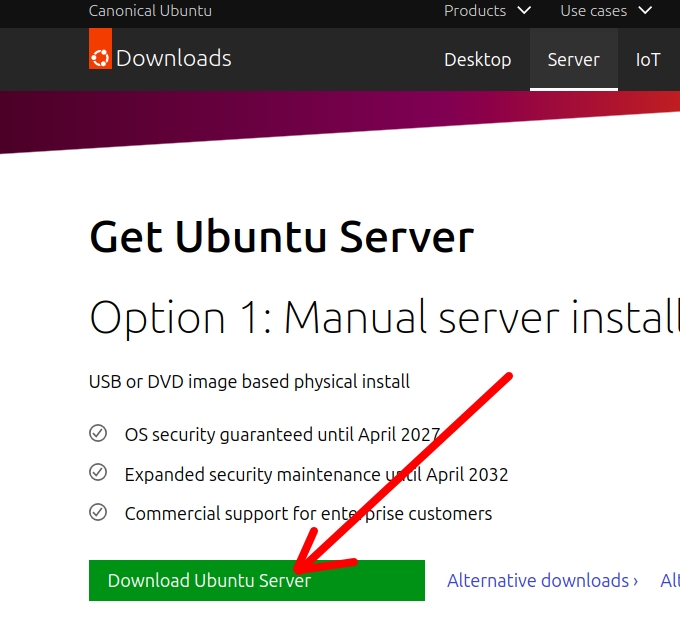
Initially, let’s access the website below to download the Ubuntu Server image.
https://ubuntu.com/download/server
Next, we will click on Download Ubuntu Server. After that, choose the location where you will download the “.ISO” image of Ubuntu Server.
Create Ubuntu virtual machine in VirtualBox
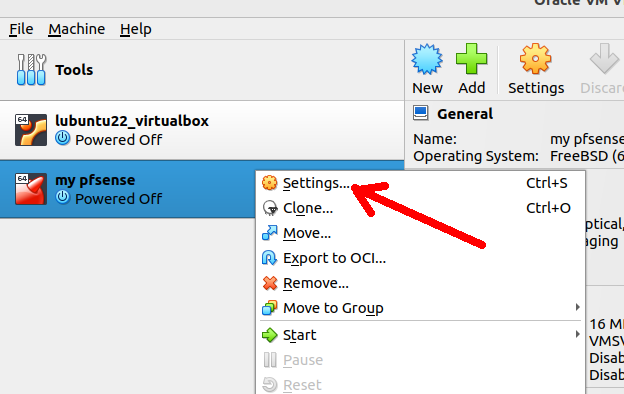
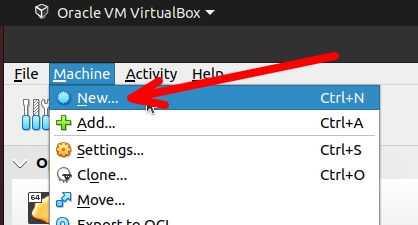
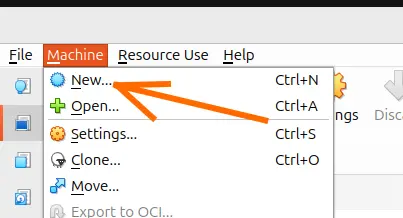
Now let’s start VirtualBox and then click on the machine “Machine” and then “New”.
Name and operating system
The first part of the menu we will use is “Name and Operating System” in which we will enter data such as the name of the virtual machine and information about the operating system.
Below are descriptions of the fields we need to enter information in.
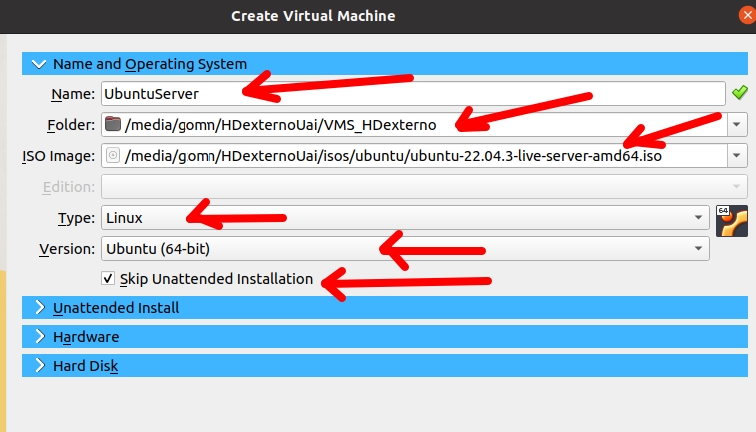
Name: Name of your virtual machine. In our example, we are using the name UbuntuServer.
Folder: The directory where we will store the Ubuntu Server virtual machine.
ISO Image: Let’s select the Ubuntu Server “.ISO” image file that we downloaded.
Type: this will be the type of the operating system. In our case it is Linux.
Version: version of Linux, in this case we are using Ubuntu (64-bit).
Skip Unattend Installation: Let’s check this option to be able to do the manual installation.
Hardware
Now let’s click on “Hardware” and enter the information below.
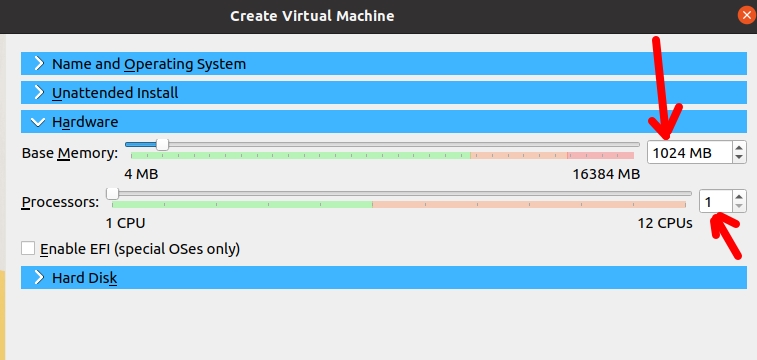
Base Memory: the minimum memory RAM that will be allocated to the virtual machine. In this case “1024 MB” is enough for our purposes. Remember that you can increase according to your demand.
Processors: The amount of virtual processor core allocated to our Ubuntu Server’s virtual machine. In this case, we will only use “1” core, but you can increase it depending on your needs and the capacity of the host hardware.
Hard Disk
Now let’s choose the size of the virtual disk. In the mode we are configuring, the maximum disk size will be 25 GB. However, this is only the maximum size and will only be used if you install several applications or enter enough data to occupy this space. size.
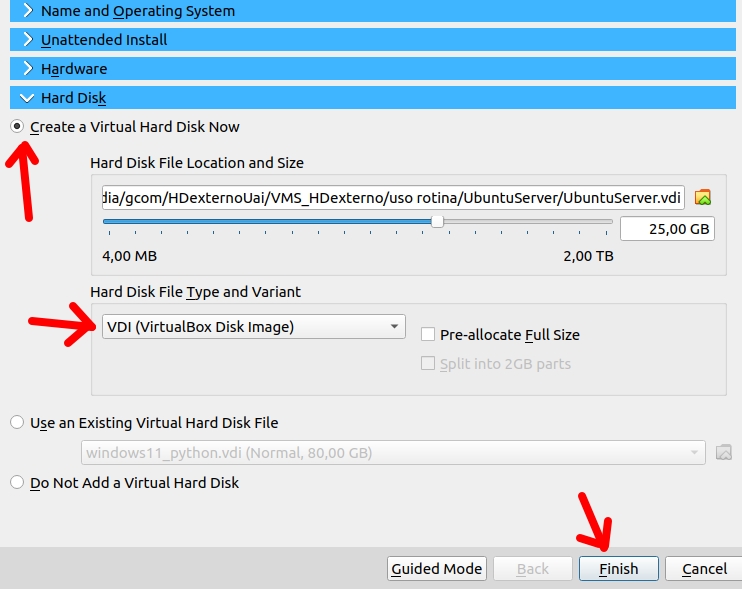
We will use the VDI (Virtual Disk Image) type for our VirtualBox machine.
After making the settings in the figure below, we will click on “Finish”.
Installing Ubuntu Server on VirtualBox
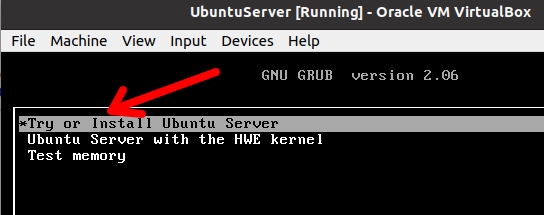
Now that we have prepared the virtual machine, let’s start installing Ubuntu Server. To do this, let’s double-click on the Ubuntu Server machine we created.

Next, we will see a screen like the figure below. On this screen, we will click on the “Try or Intall Ubuntu Server” option.
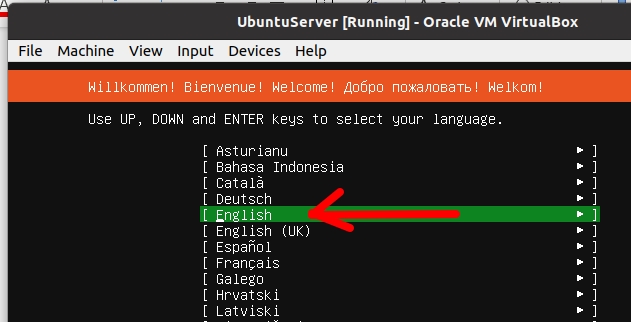
Choosing language and keyboard
After that, we will select the language that we will use in the Ubuntu Server virtual machine.
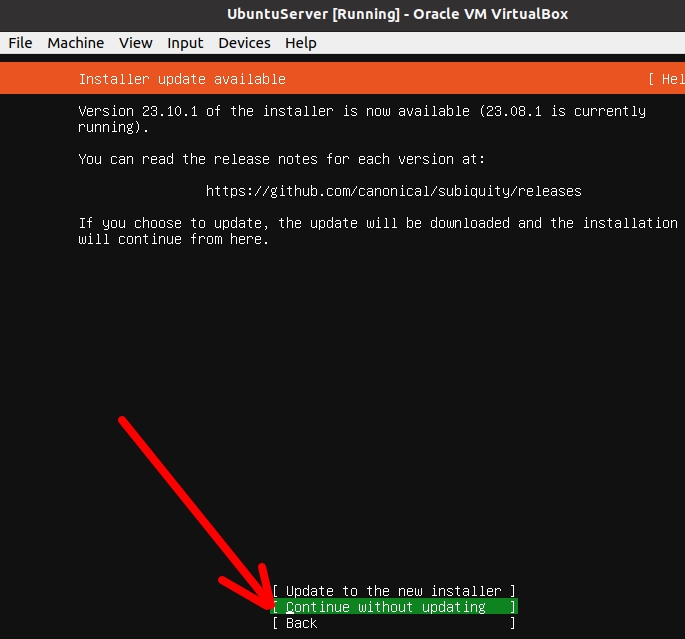
Next, we will see a screen like the figure below that asks if we want to update to a new installer.
In this case, we do not want to update and, therefore, we will click on “Continue without updating”.
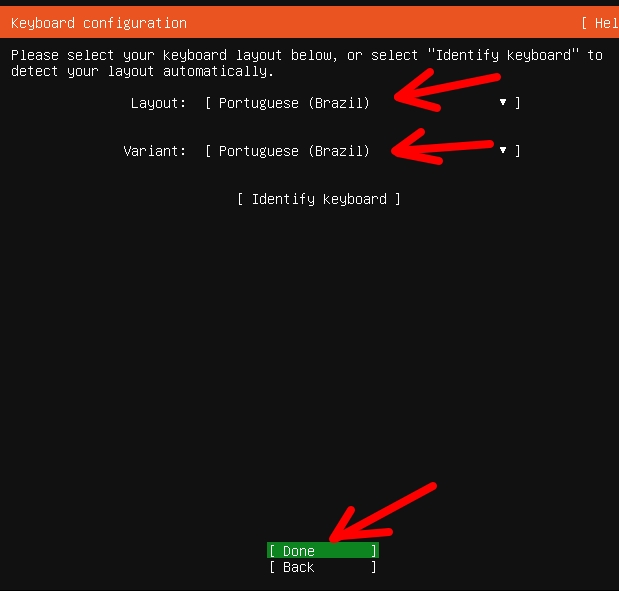
Now, let’s choose the type of keyboard that will be used in our virtual machine. In our case, we will choose the keyboard compatible with Brazil and then select “Done”.
Ubuntu Server Installation Type
Next, we will choose the type of installation we are going to do.
We can use a standard installation of Ubuntu Server with the list of packages that will provide us with greater comfort in configuration or a minimalist installation.
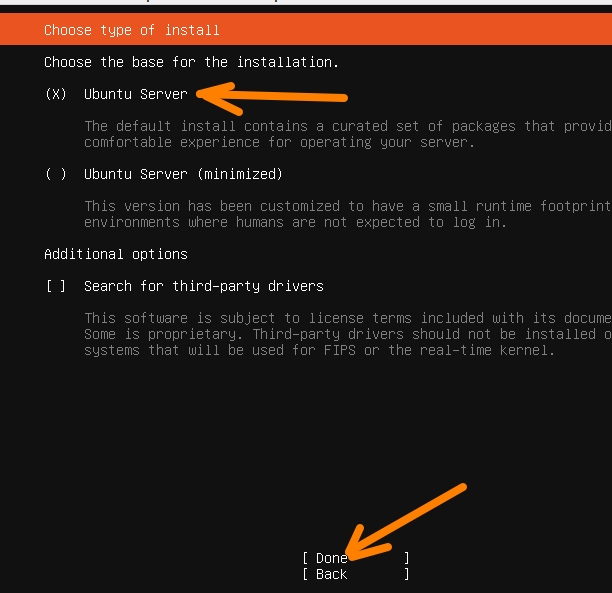
In this case, we will use the default Ubuntu Serve installation and then select “Done”.
Configuring the Ubuntu Server network
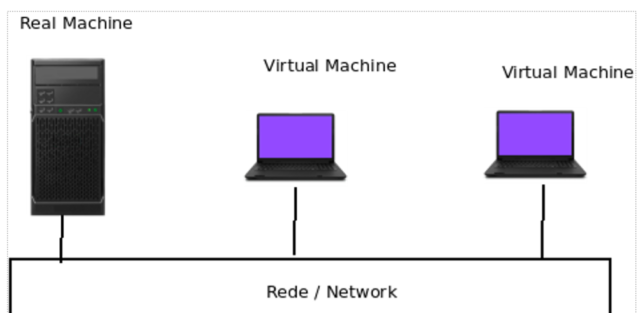
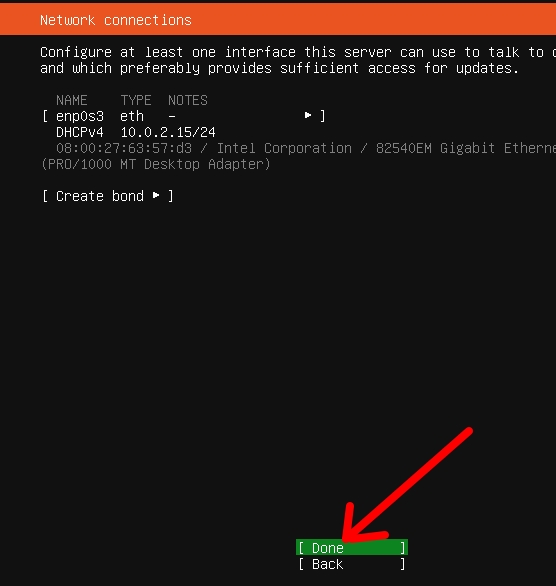
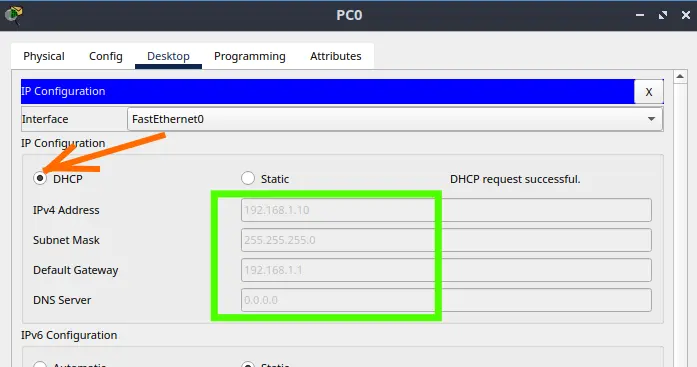
In this step, we will configure the Ubuntu Serve network in VirtualBox. In this case, the default configuration option is receiving IP via DHCP from our virtual machine’s network interface.
This is happening because the network we are using in this virtual machine is in VirtualBox NAT mode and, therefore, is already receiving an IP referring to this network.
In this case, we will accept the IP assigned to us and click on “Done”.
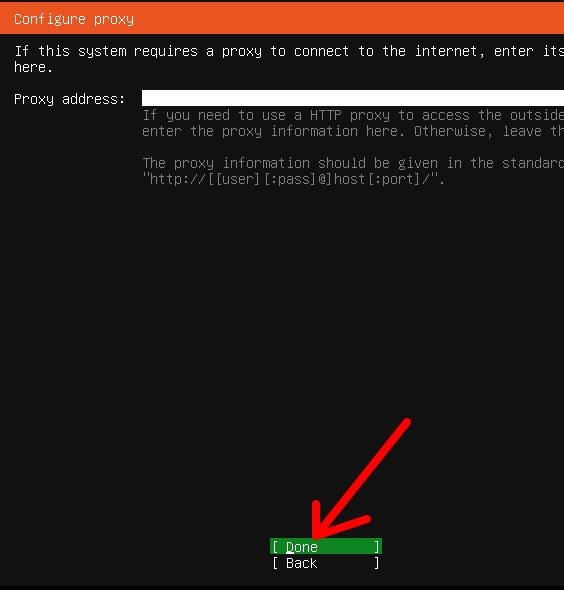
The next step presents the proxy configuration option. In our case, we are not using a proxy and so we will leave the “Proxy address” option blank.
After that we will click on “Done”.
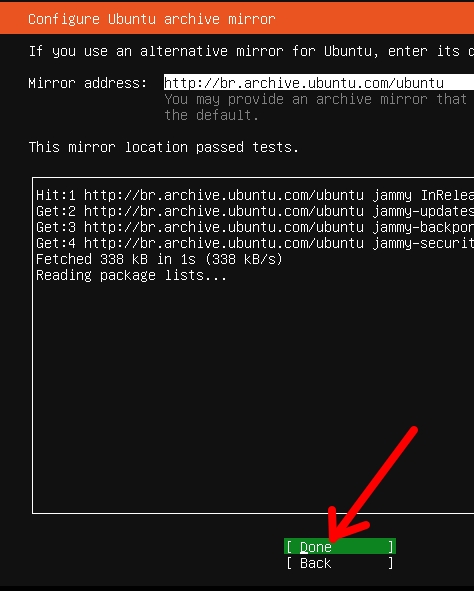
Now the Ubuntu Server chooses a mirror to start the installation and in our case we will leave this default mirror configuration. So let’s select “Done”.
Ubuntu Server Partition Configuration
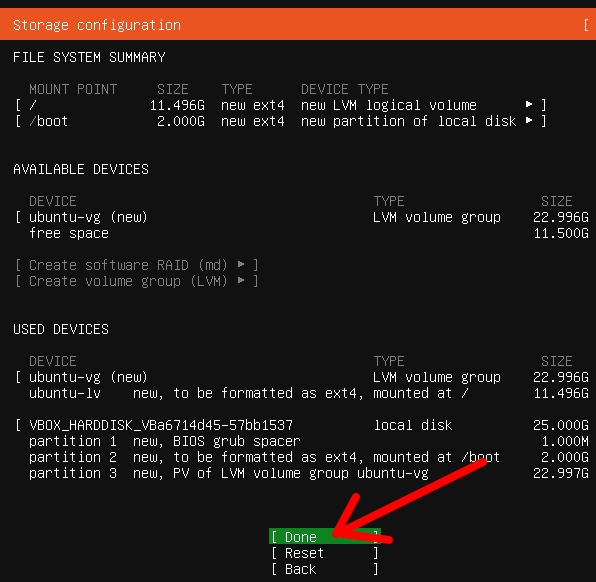
For the Ubuntu Server partition configuration, we will choose to use the entire virtual disk “Use an entire disk” and we will also choose the option to use “LVM group”.
Using LVM allows you to create logical volumes of any size and shape and adjust them as your needs change.
Then we will select “Done”.

Now, let’s confirm the partition settings we chose. To do this, we will click on “Done”.
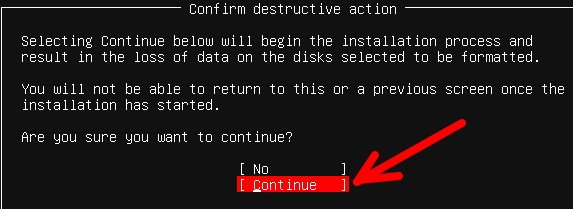
Next, we will have a screen asking if we want to continue with the installation and we will select “Continue”.
Creating username and password
Now let’s enter the information below to configure our virtual machine al with Ubuntu server.
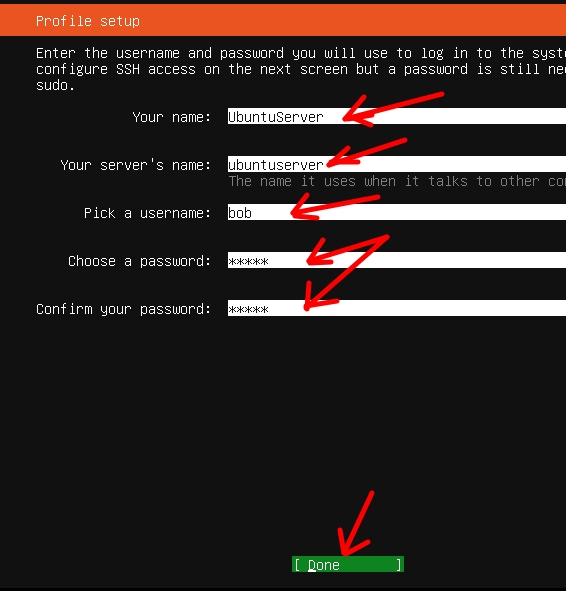
“your name”: We can enter our name or a name we want.
“Your server’s name”: Here we will enter the name of our ubuntu server machine.
“Pick a username” : Let’s choose a username, in this case we choose “bob”.
“Choose a password”: let’s enter a password for our user “bob”.
After entering the information, we will select “Done”.
Now we will see a screen asking if we want to upgrade to Ubuntu Pro. In our case, we will not do so and so we will select the option “Skip for now”.
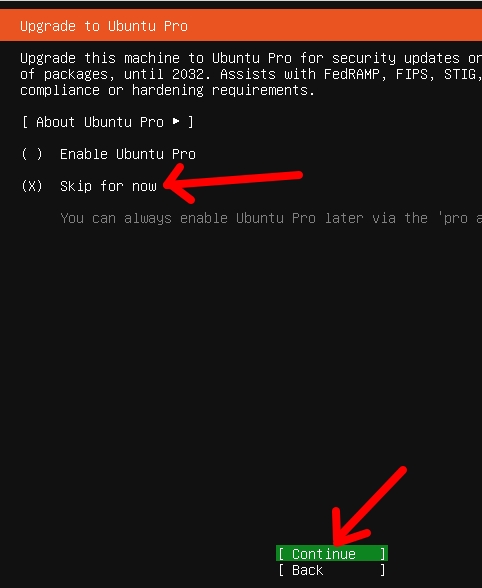
After that, we will select “Continue”.
Enabling the SSH server
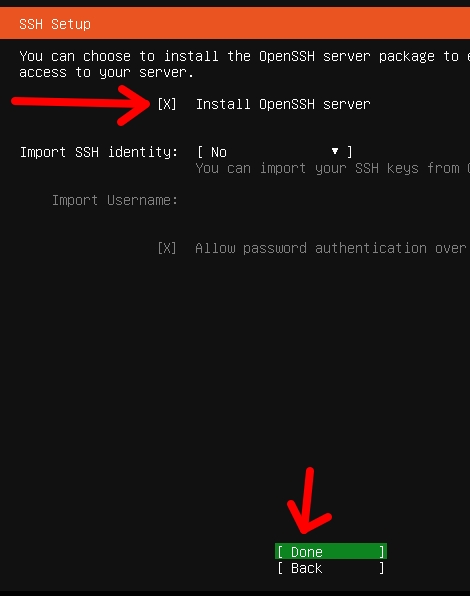
In this step, we will enable the SSH server on our Ubuntu Server in VirtualBox.
The SSH server will allow us to access our Ubuntu Server remotely using our host machine or other machines.
To enable the SSH server, click on “Install OpenSSH server” and then select “Done”.
Choosing Snaps for Ubuntu Server
In this step, we can choose some Snaps for our Ubuntu server. If you want to install any Snap from the list, check the desired Snaps.
However, we will not choose Snaps for this installation.
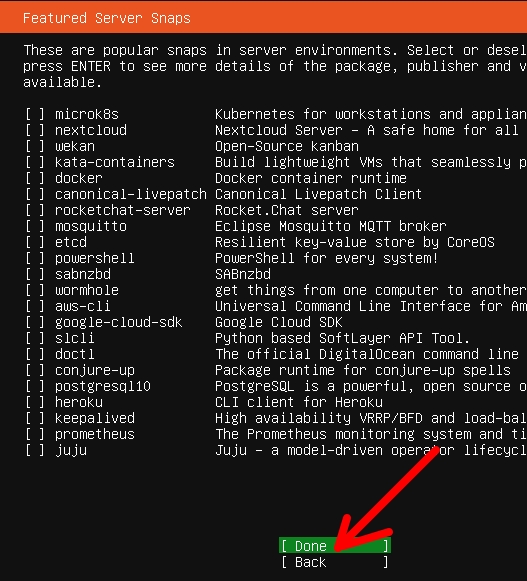
Let’s select “Done”.
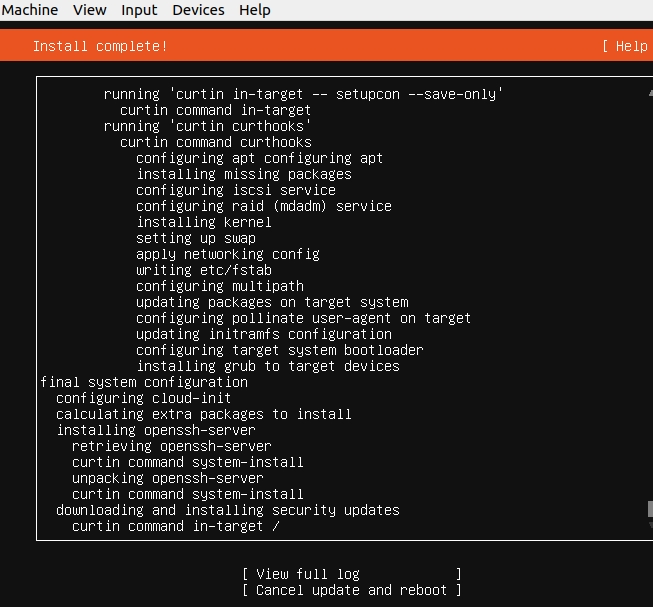
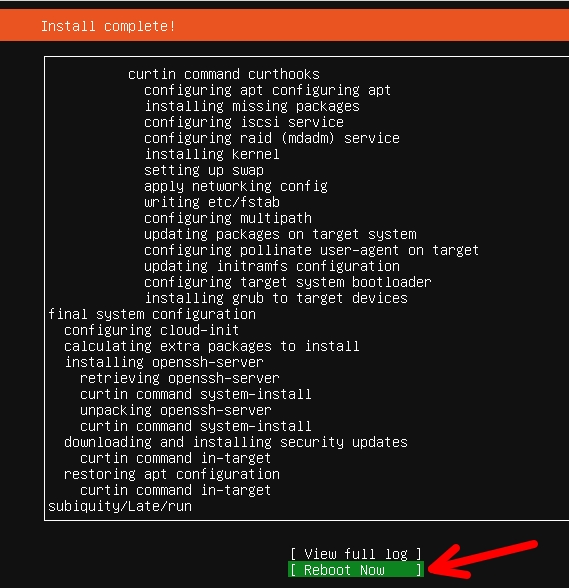
Updates during installation
Now, we will see that Ubuntu Server launches some security updates. Let’s wait for the updates to end.
Finishing the installation of Ubuntu Server
After finishing the installation, we will select the “Reboot Now” option.
Login to Ubuntu Server
After the Ubuntu Server virtual machine has been initialized in VirtualBOX, we will enter our username “bob” and the password that we defined previously.
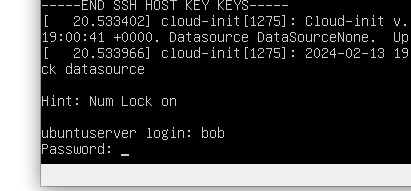
After entering the username and password, we will see a screen like the one shown below.
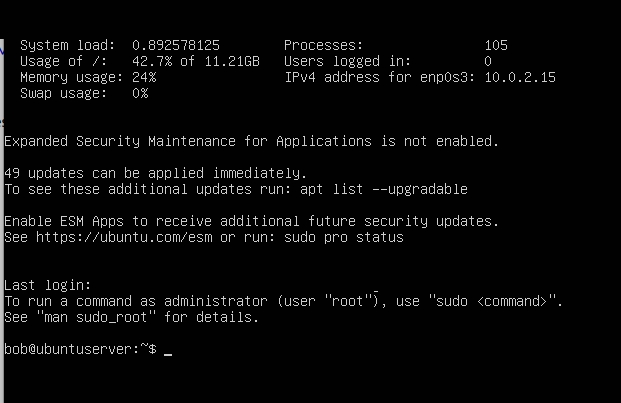
Finally your Ubuntu Server has been installed correctly in VirtualBox.
See More:
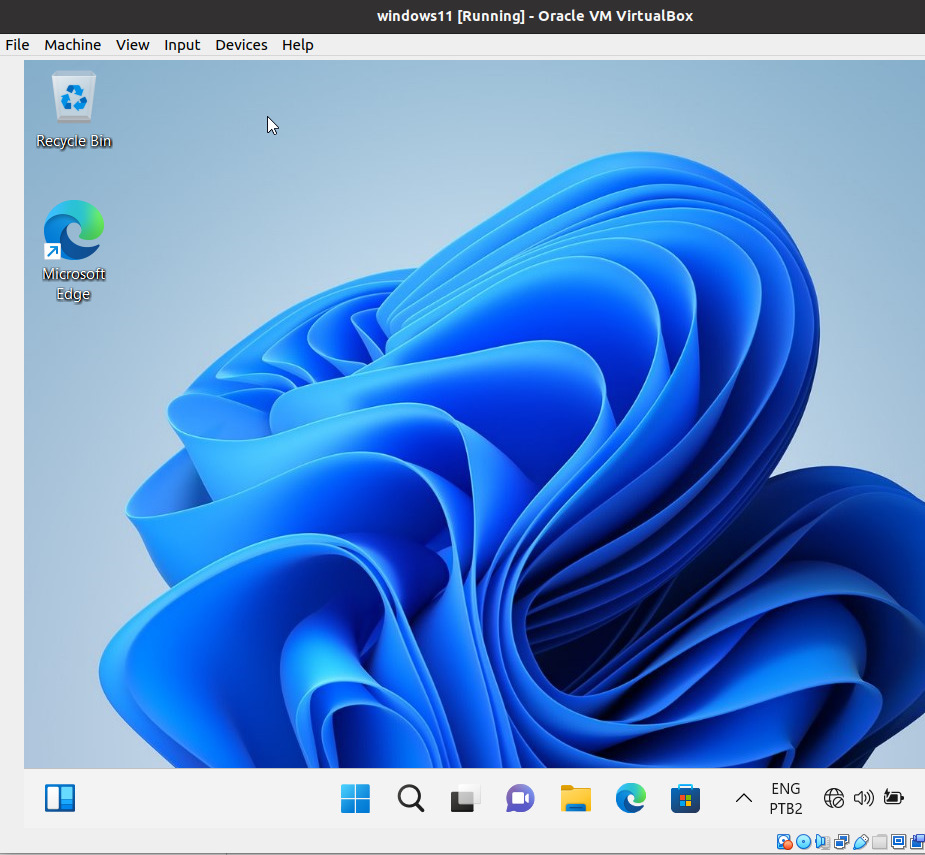
Install Windows 11 in VirtualBox
How to install Ubuntu on VirtualBox
Zabbix Appliance on VirtualBox
Comparing Ubuntu Server on VirtualBox
Below we have a comparison table for using the Ubuntu server in VirtualBox.
It’s worth remembering that these requirements may vary based on the specific tasks you plan to perform with the VM and any additional services or applications you intend to run.
Therefore, I suggest consulting the official documentation to obtain more accurate and current information.
| Operational system | Minimum RAM | Virtual Processor Core | Minimum disk space |
|---|---|---|---|
| Ubuntu Server | 1 GB | 1 | 10 GB |
| Debian Server | 512 GB | 1 | 10 GB |
| CentOS | 1 GB | 1 | 10 GB |
Ubuntu Server: The minimum I have used for simple applications is 1 GB of RAM, but for minimal installations or low memory environments it may be possible to run with less. The disk space requirement is for a standard installation; Minimal installations may require less.
Debian Server: I see this server as interesting due to its efficiency and flexibility, Debian can run with just 512 MB of RAM, especially for minimal installations. As we know, the disk space requirement can vary greatly depending on the packages installed.
CentOS: CentOS has been widely used in companies and is compatible with Red Hat Enterprise Linux, I have had satisfactory performance with at least 1 GB of RAM for minimal installations. In this case, the disk space requirements are for a minimal installation and with a little additional space needed to run a few applications and services.
Virtual processor cores: Although we are suggesting 1 virtual processor core for all of these distributions, assigning more cores can significantly improve performance, especially for resource-intensive applications.
Disk Storage: The disk space requirements I suggested are for minimum or standard installations. Therefore, if you plan to use the VM for applications that require larger storage, you may want to allocate more disk space.
RAM: Remember that allocating more RAM can help improve performance, especially if you are running multiple services or applications on the VM.

Juliana Mascarenhas
Data Scientist and Master in Computer Modeling by LNCC.
Computer Engineer

Email Server & Webmail Setup: Postfix, Dovecot, SnappyMail
Install Ubuntu Server 26 on VirtualBox (Step-by-Step)

How to Configure NAT in Packet Tracer (Step-by-Step)

Zabbix FIM: How to Setup File Integrity Monitoring
Configure DHCP in Packet Tracer: Server & Router Guide