Installing Android on VirtualBox
We quickly teach you how to install ANDROID on the VIRTUALBOX. We often need to install an application for testing.
Similarly, it may be necessary to create a test environment with virtual machines.
In this way, VirtualBox can be used to host ANDROID within one or more virtual machines. As a result, in this tutorial you will be installing Android on VirtualBox.
VirtualBox can be installed on Linux and Windows machines. Check out other OS installed on VirtualBox.
Step 1: Downloading the Android ISO
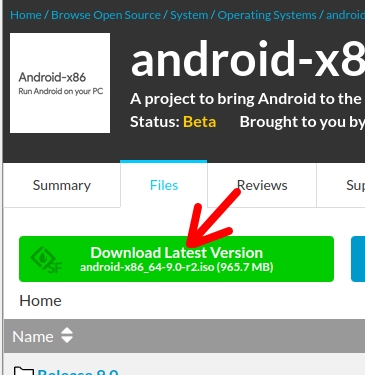
First, let’s download the iso from: “https:/ /www.android-x86.org/download.html“.
Soon after, we look for the newest version.
Step 2: creating the Virtual machine (with VirtualBox 7)
Here, we will introduce the creation of the virtual machine using a newer version of VirtualBox. If your version is older, you can go to (Step 2: creating the Virtual machine (with old VirtualBox)).
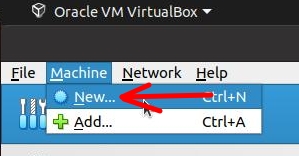
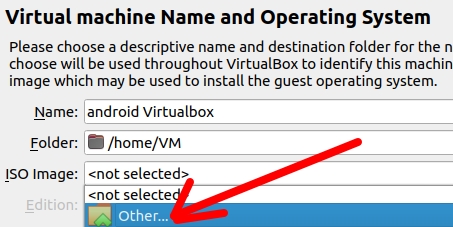
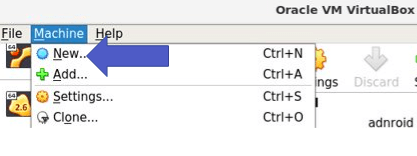
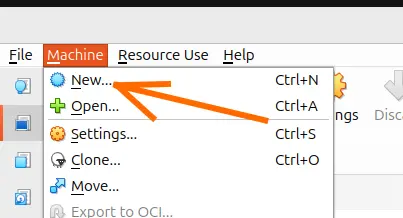
Initially, let’s open VirtualBox and click on machine “Machine” and then click on “New“.
After that, we need to select the “.iso” image that we downloaded. To do this, we will click on “ISO Image” and then we will click on the yellow folder to select the location where our android image is located.
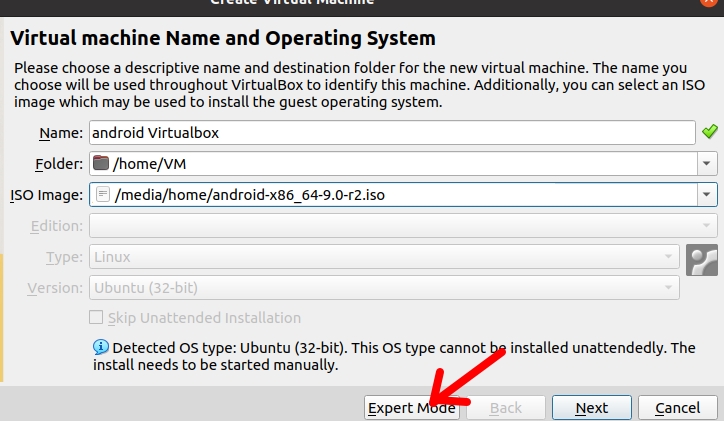
It may happen that VirtualBox detects the type of operating system incorrectly, as in the figure below where “Linux + Ubuntu 32bits” was detected.
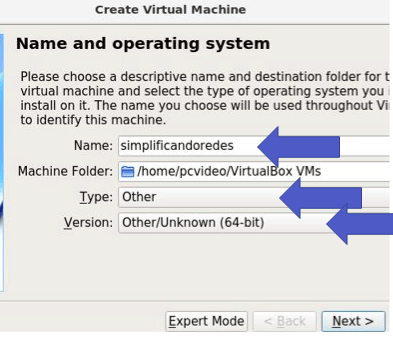
However, we know that our Android image is 64-bit. So let’s change this by clicking on “Expert Mode“.
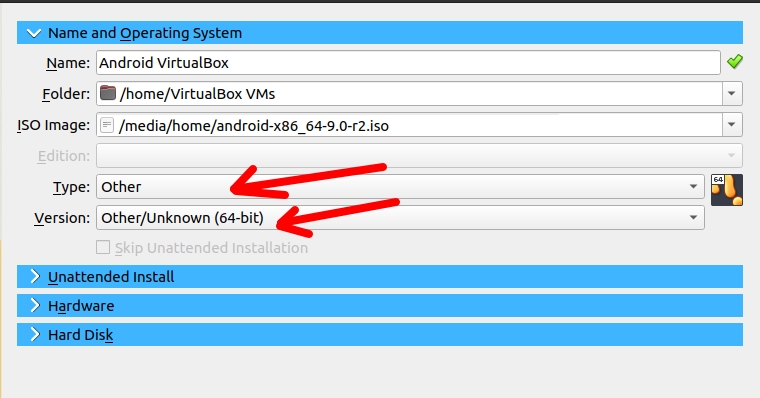
Now, we can enter the type of operating system “Type” which in our case will be Other “Other” and the “Version” will be “Other /Unknown (64bit)”.
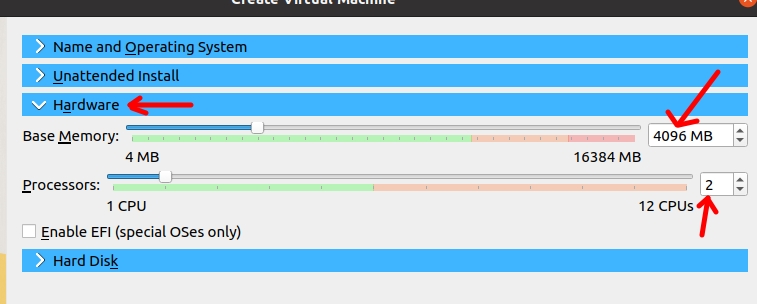
Now, let’s click “Hardware” and then select the size of RAM we will use “Base Memory“. In this case we will use 4096MB. We will also use 2 virtual processors.
If you need to increase or decrease the amount of RAM and CPU you can do this later.
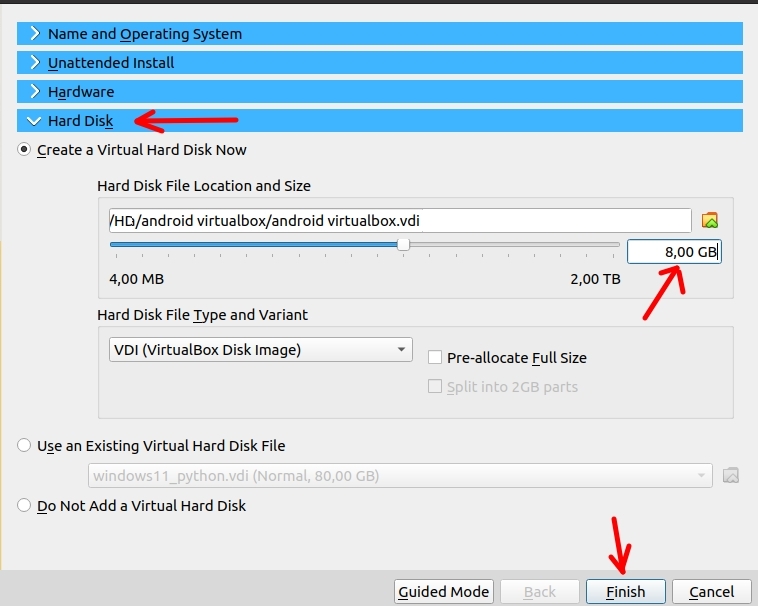
In Seuida, we will click on “Hard Disk” and we will choose the disk size. For this case we will use an 8GB disk. However, if you need more space, you can enter a size larger than the one shown here.
After that, we will click on “Finish“.
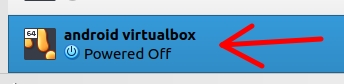
Next, let’s start the virtual machine. To do this, we can double-click on the newly created Android virtual machine.
Step 2: Installing Android on VirtualBox
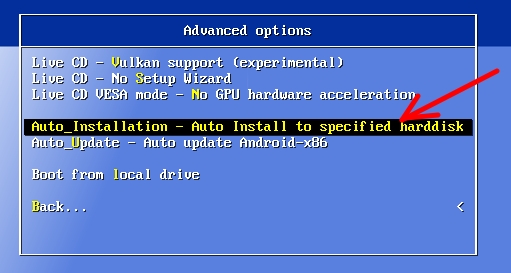
We will select the “Advanced Options” option.

And then, we will select the “Auto_installation” option. This way, most of the installation will be automated.
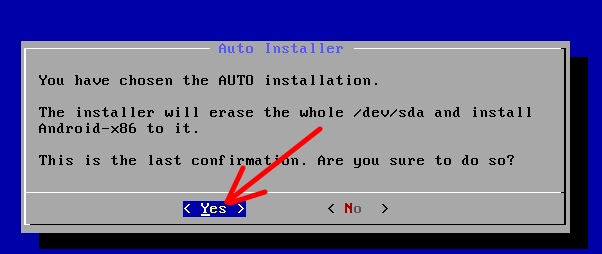
You will then be asked for confirmation to erase the virtual disk and begin the installation. In this case, we will mark that you can erase the disk and continue.
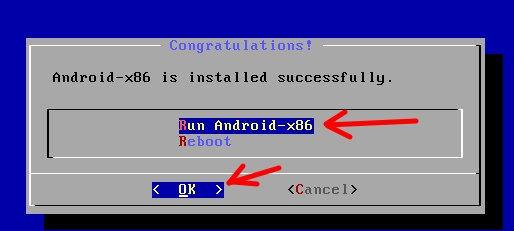
Step 3: Launching Android in the VM
We will select the option “Run Android-x86” and then “OK” to start.
Later, the Android startup screen will appear and then the language selection screen.
Below we can see the loading screen.

And then we will see the language selection screen.

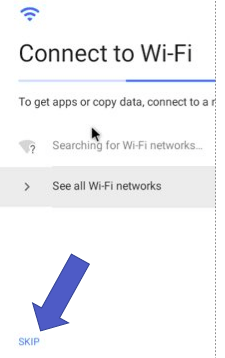
Subsequently, the “wi-fi” configuration screen will appear. We will skip this step as the network will come from the VirtualBox interface in NAT mode. So let’s click “SKIP“.
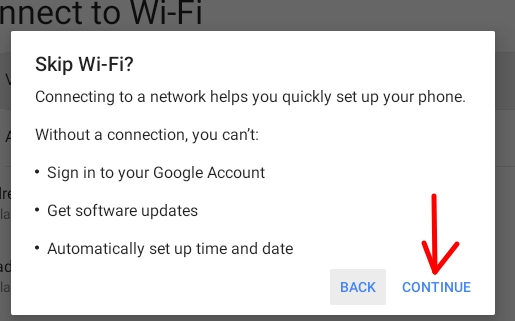
After that, we will have to confirm that we do not want to configure Wi-Fi. To do this, we will click on “Continue“.
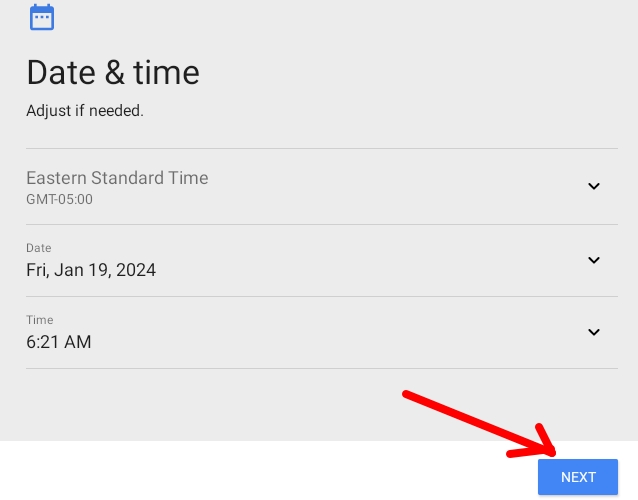
Next, we will see a screen with time and date and we will click on “NEXT“.
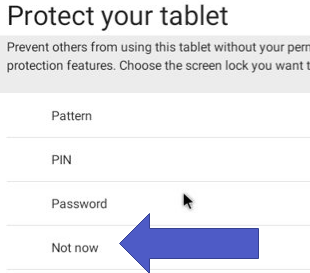
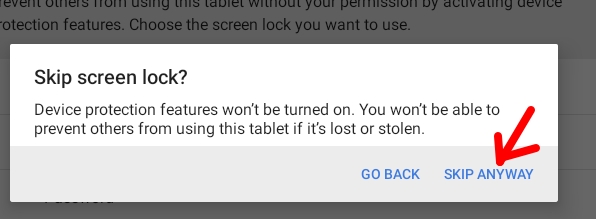
At this stage, a password can be entered. However, we chose not to use it. So let’s click “Not now“.
Then we will confirm by clicking on “SKIP ANYWAY“.
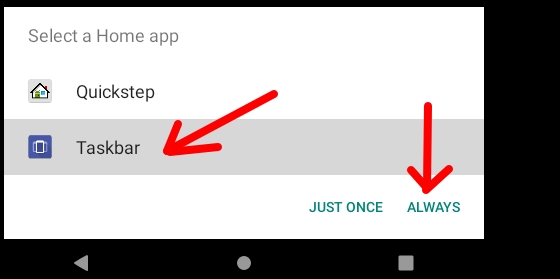
Now, we will select “Taskbar” and then click on “ALWAYS“.
And congratulations, you just installed Android on VirtualBox.
Final step: configuring Android in VirtualBox
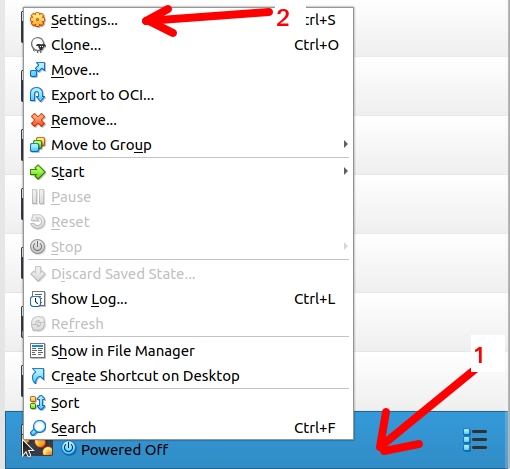
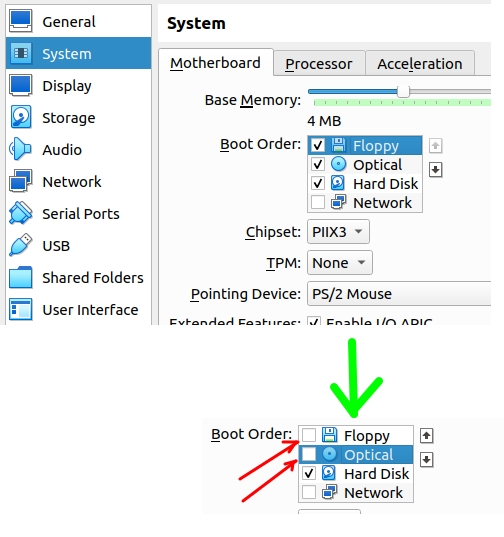
Later, when you turn off the machine, go to virtual machine settings.
Next, let’s click on “System” and then disable booting via “Optical Disk“. In this case, we are disabling CD booting.
Alternative Step : creating the Virtual machine (with old VirtualBox)
Next, we will create the virtual machine using the android image.
Afterwards, choose the machine name, type and version.
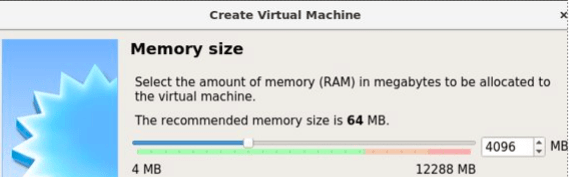
Then, we will choose the memory size. I usually use from “4000 MB“.
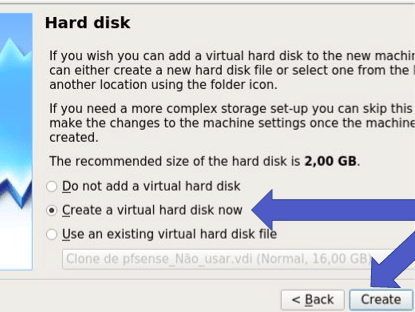
Now let’s select the option to create a virtual disk. And select “create virtual disk now“.
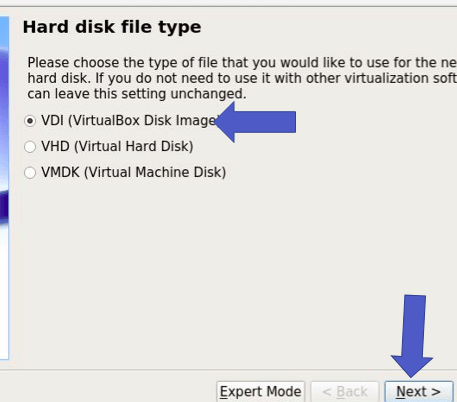
The type of hard disk chosen will be VDI. So let’s select VDI.
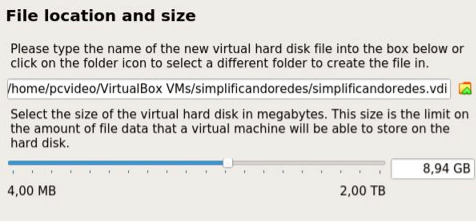
The disk type will be dynamically allocated (Dynammically allocated).

Soon after, we will choose the size allocated to the disk. In this sense, a size of “8GB” is already sufficient for initial tests.
Next, we will start the virtual machine with a double click.

So, we select the location of our image. So let’s click on the yellow folder
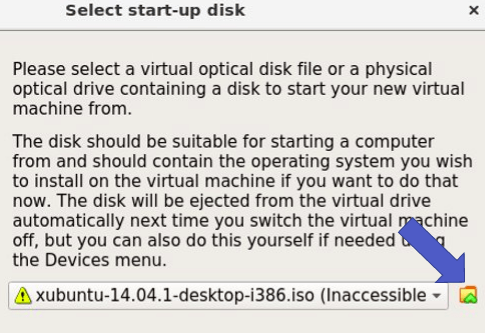
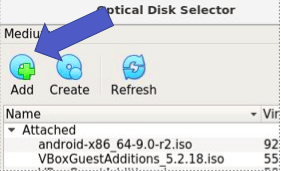
We select the “Add” option. Then we point to the location of the image. And let’s click Add.
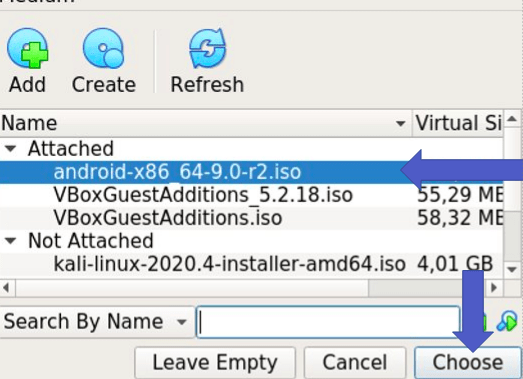
Then, let’s choose the image we downloaded.
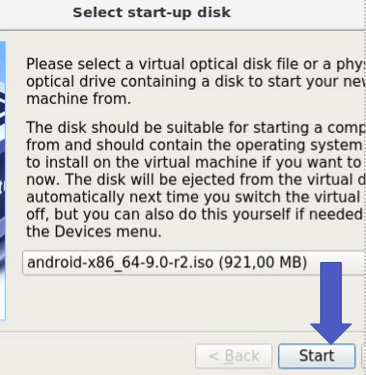
Then, let’s select the image and click choose.
Once the image has been selected, click “Start“.
See more:
Install Windows 11 in VirtualBox
Virtualizing the Raspberry Pi – Raspbian

Juliana Mascarenhas
Data Scientist and Master in Computer Modeling by LNCC.
Computer Engineer
Tutorial: Using Port Forwarding in Packet Tracer
Tutorial: Web Server in Packet Tracer (Client-Server)

Email Server & Webmail Setup: Postfix, Dovecot, SnappyMail
Install Ubuntu Server 26 on VirtualBox (Step-by-Step)

How to Configure NAT in Packet Tracer (Step-by-Step)