We’ll introduce two ways to create block lists. pfBlockerNG using customize blocklist can be interesting when we want to block a specific group of domains. For example, imagine that you only want to block a specific social network.
Therefore, you can specify the domain of this network in your block list. So, instead of blocking all social networks you will be blocking only the one specified.
PfBlockerNG Setup Tutorial:
Part 01: pfBlockerNG Customize Blocklist
Part 02: PfBlockerNG: Exception List for Clients
pfBlockerNG : Creating your Blocklist
We’ll introduce two ways to create blacklists. The first way using the Blacklist/Whitelist TLD. And the second way using static blocking list.
Using the Blacklist/Whitelist TLD
After installing pfBlockerNG go to “Firewall -> pfBlockerNG”. Then select DNSBL. In this step enable the DNSBL option. Then use “DNSBL Mode” for the direction you plan to block. In our case we use Unbound_mode.
Then enable the option of “Wildcard Blocking (TLD). This option will allow blocking of TLD domains.
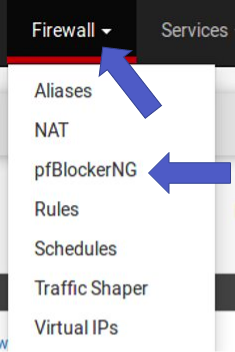
“Firewall -> pfBlockerNG“
DNSBL= Enable , DNSBL Mode = Unbound , TLD = Enable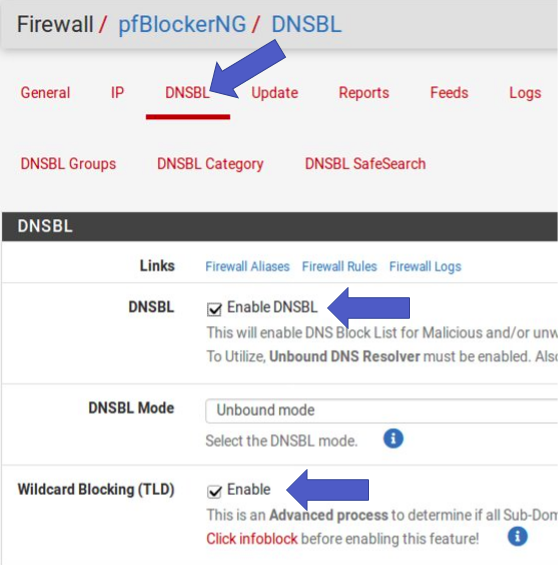
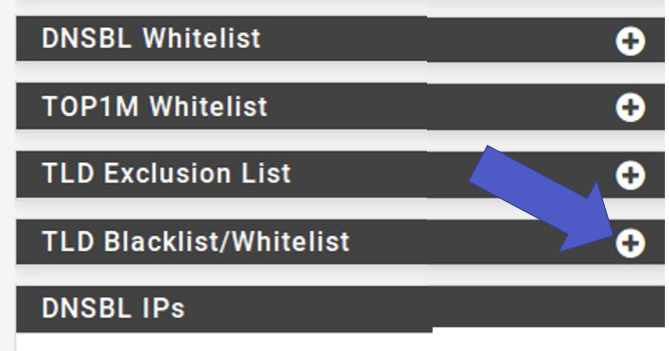
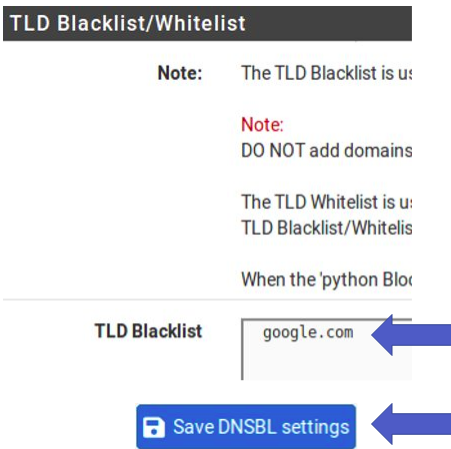
Then scroll down further to the “TLD Blacklist/Whitelist” option. Click on this option. After that, enter the domain you want to block. In our example it’s “google.com”. Then go to “Save DNSBL Settings”.
Click TLD Blacklist/Whitelist.
Enter the domain and save.
Now, let’s do a “Reload”. For that, let’s go to “Update”. Then we select “Reload” and “All”. Then click on “Run”.
Force option = Reload, Reload option = ALL 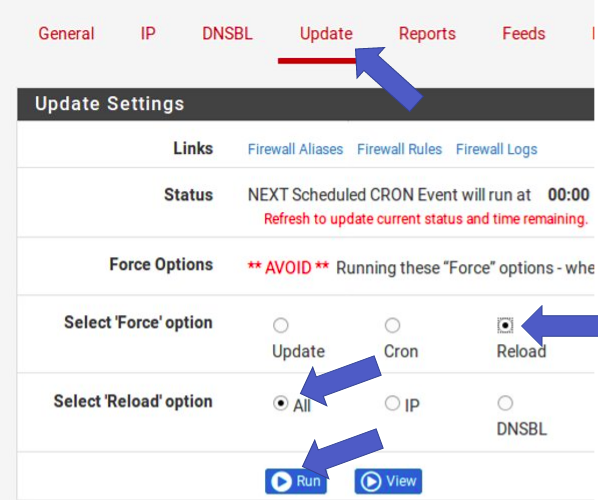
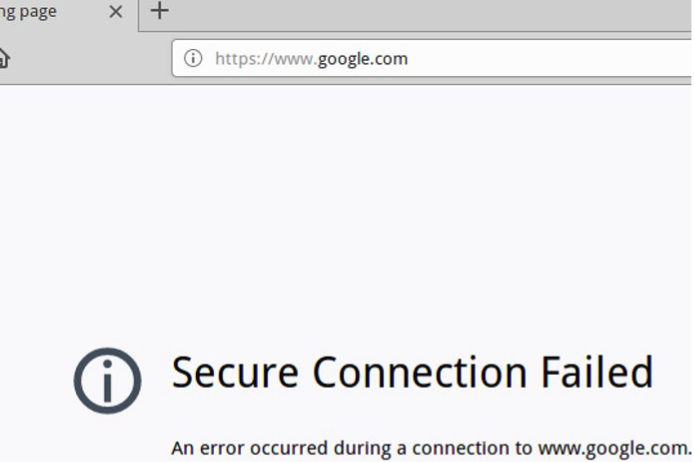
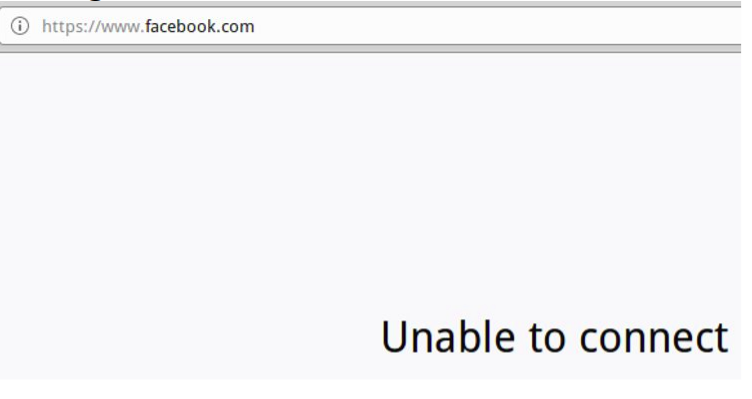
Wait a moment for the “Reload” to finish. Now let’s test blocking. Before that, remember to clear your browser cache. In some cases it is necessary to restart the browser.
Accessing the blocked domain in the browser.
Next let’s check the blocking logs. For that, we go to “Logs” and select “Log/File location = dnsbl.log”. Soon after we can look at the end for the specified domain’s blocking logs.
Select log = dnsbl.log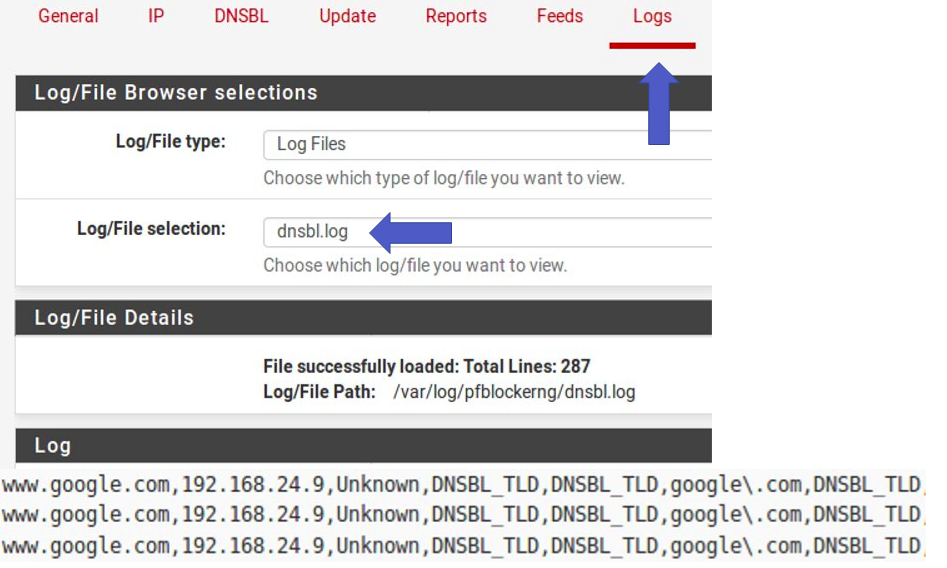
Second way: Creating your static block list
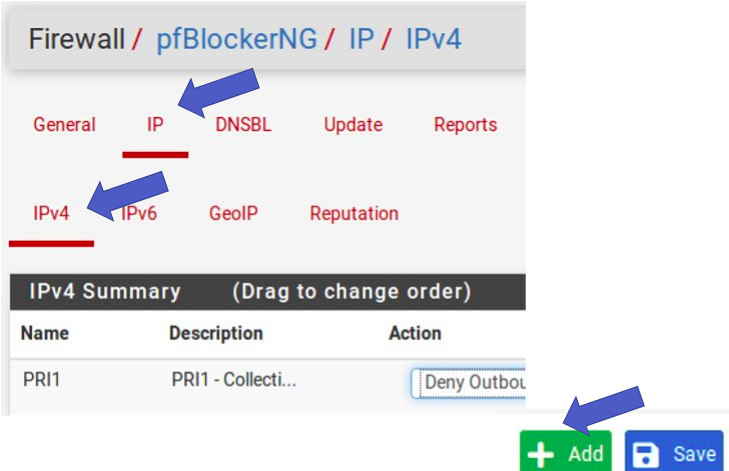
After installing pfBlockerNG, go to “Firewall -> pfBlockerNG”. After that, select “IP” and then “IPv4”. Then click on “Add”.
Click Firewall -> pfBlockerNG
Select IP -> IPv4 and then click Add.
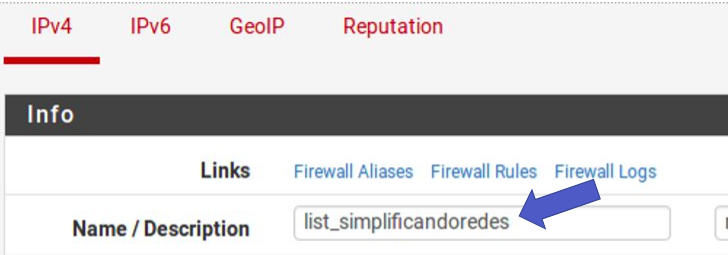
Afterwards, we give our list a name and a description.
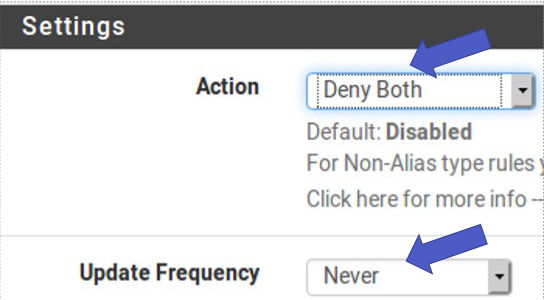
Next, let’s deny in both directions “inbound & outbound”. After that, the update frequency will be selected “Never”. This frequency is like “Never” as we are creating a static list.
Select Action = Deny Both, Update Frequency = Never.
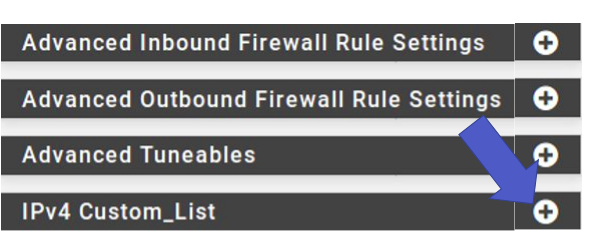
Next, let’s select “IPv4 Custom_List”.
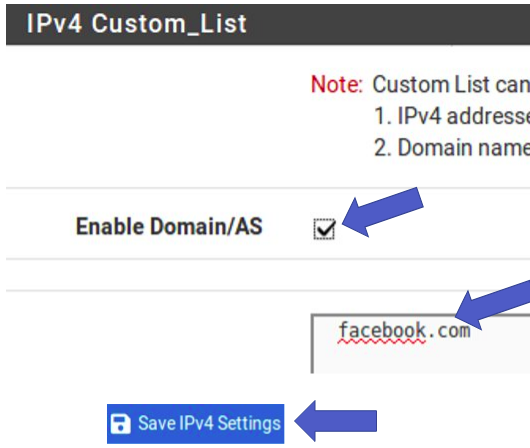
So let’s enable “Enable Domain/AS”. Next we’ll add the domain to be blocked. After that, click on “Save”.
Now, let’s do a “Reload”. For that, let’s go to “Update”. Then we select “Reload” and “All”. Then click on “Run”.
Select Force option = Reload, Reload option = ALL .
Wait a moment for the “Reload” to finish. Now let’s test blocking. Before that, remember to clear your browser cache. In some cases it is necessary to restart the browser.
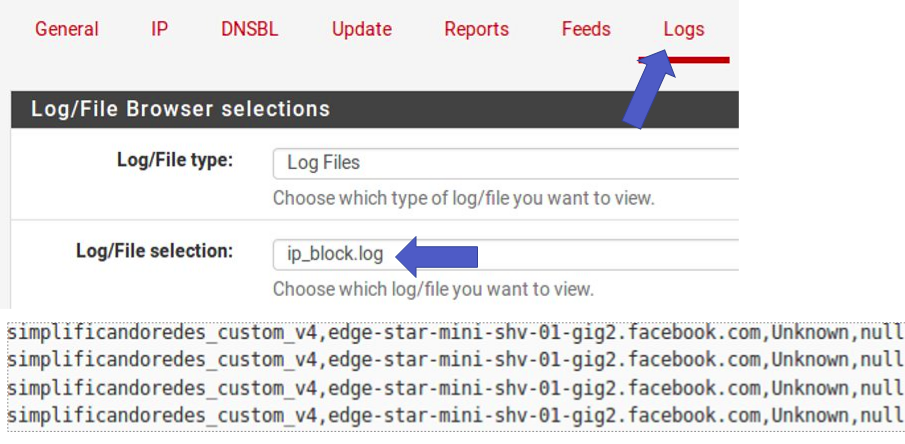
Now, let’s look at the logs. For that, let’s select “Logs” and then choose “ip_block.log”.
pfBlockerNG Customize Blocklist : End of configuration
Congratulations, you’ve created your own block list.
Note. The two forms of blocking lists can coexist.
PfBlockerNG Setup Tutorial:
Part 01: pfBlockerNG Customize Blocklist
Part 02: PfBlockerNG: Exception List for Clients
See more:
Install OpenVPN Client on Windows
Update OpenVPN Client on Linux

Juliana Mascarenhas
Data Scientist and Master in Computer Modeling by LNCC.
Computer Engineer
Video showing the configuration:
Install Ubuntu Server 26 on VirtualBox (Step-by-Step)

How to Configure NAT in Packet Tracer (Step-by-Step)

Zabbix FIM: How to Setup File Integrity Monitoring
Configure DHCP in Packet Tracer: Server & Router Guide

Cheap SSDs: The Hidden Dangers of TLC, QLC & DRAM-less

Zabbix Tags Guide: Organizing and Filtering Monitoring Alerts
If you manage a Zabbix environment, you’ve probably been there: a crowded “Problems” screen, where…