
This tutorial will teach you how to update the OpenVPN client version on Linux.
When using a client version that is incompatible with the OpenVPN server version, we may have connection problems. So let’s introduce how to update your OpenVPN client version.
Updating the OpenVPN repository
In our installation, we are using Ubuntu. So let’s use the commands below:
sudo -sNext, let’s type the command below to create the keyrings directory.
mkdir -p /etc/apt/keyrings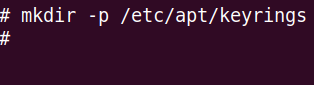
Now, let’s install curl. For this, we will use the command below.
apt install curl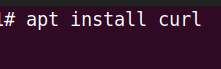
Now let’s add the new OpenVPN repository.
curl -fsSL https://swupdate.openvpn.net/repos/repo-public.gpg | gpg --dearmor > /etc/apt/keyrings/openvpn-repo-public.gpg
Now we can install the OpenVPN version for your operating system version with the command below making the appropriate substitutions in *** and &&& .
echo "deb [arch=amd64 signed-by=/etc/apt/keyrings/openvpn-repo-public.gpg] http://build.openvpn.net/debian/openvpn/*** &&& main" > /etc/apt/sources.list.d/openvpn-aptrepo.listIn this case, let’s replace *** with the version of OpenVPN you want to install.
Below are several OpenVPN version options.
stable: uses the stable version and excludes the possibility of using alphas, betas and RCs
testing: latest version including alphas, betas and RCs types
release/2.3: Uses OpenVPN version 2.3
release/2.4 : Uses OpenVPN 2.4 version including alphas, betas and RCs
release/2.5: Uses OpenVPN 2.5 including alphas, betas and RCs
release/2.6: Uses OpenVPN version 2.6 including alphas, betas and RCs
And let’s replace &&& with the Linux version you have.
Below are several Linux version options.
stretch = Debian 9.x
buster = Debian 10.x
bullseye = Debian 11.x
bookworm = Debian 12.x
bionic = Ubuntu 18.04 LTS
focal = Ubuntu 20.04 LTS
jammy = Ubuntu 22.04 LTS
kinetic = Ubuntu 22.10
lunar = Ubuntu 23.04
As an example we can choose the command below to install the repository for the OpenVPN 2.6 version on a machine with ubuntu 22.04 jammy.< /p>
echo "deb [arch=amd64 signed-by=/etc/apt/keyrings/openvpn-repo-public.gpg] http://build.openvpn.net/debian/openvpn/release/2.6 jammy main" > /etc/apt/sources.list.d/openvpn-aptrepo.list
For more information about other versions, we can access the openvn repository site: https://community.openvpn.net/openvpn/wiki/OpenvpnSoftwareRepos
Installing the OpenVPN Client
To install the newest version of the repository we just added, let’s run the command below.
apt-get update && apt-get install openvpn
Checking for new OpenVPN version
Now let’s check out the new version we just installed. For that, we can use the command below.
openvpn --version
We can see in the picture above that we have already installed the version we wanted.
Configuring the OpenVPN client
To configure the OpenVPN client we have two ways. The first is using the terminal and the second is using the GUI.
Configuring OpenVPN client via GUI
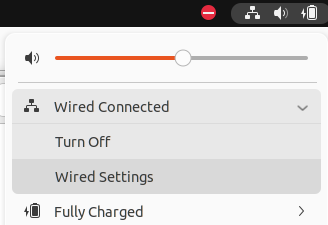
Initially we will access the configuration part of Ubuntu’s network interface.
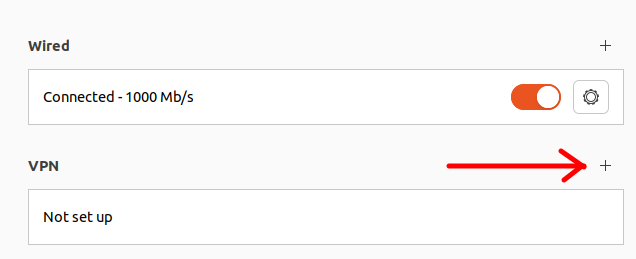
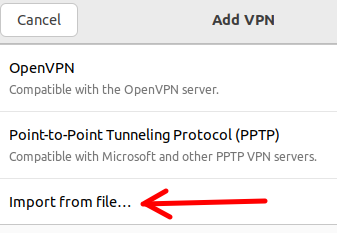
Next, let’s access the + field to add a VPN.
Next, let’s select the Import from file option.
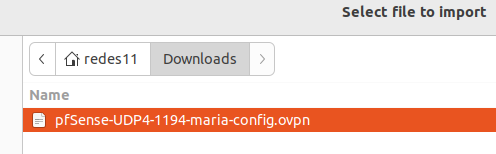
Next let’s select our VPN configuration file.
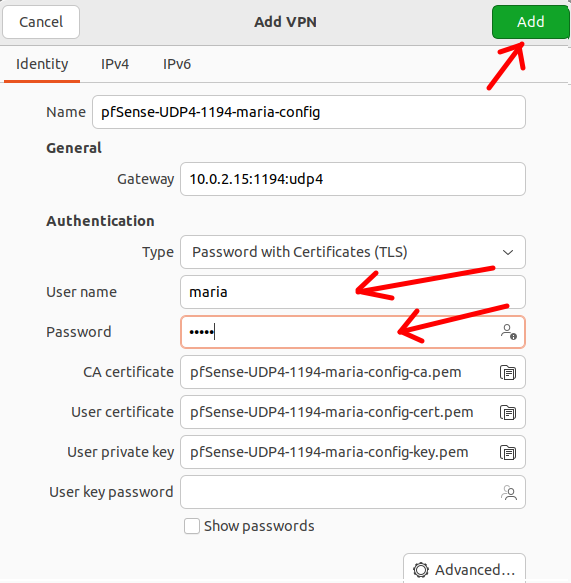
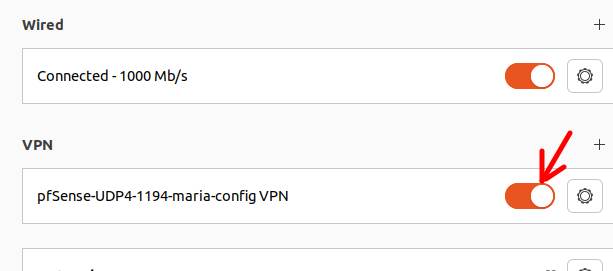
Now let’s fill in our username and password and then click on Add.
Configuring OpenVPN client via terminal
First, let’s open the terminal and go to the folder where you downloaded the openvpn client configuration file.
Next let’s use the command to import the configuration from the ovpn file you downloaded.
In our case, our file has the name “pfSense-UDP4-1194-maria-config.ovpn”. Check your file name and run the command sudo openvpn –config followed by your file ovpn.
sudo openvpn --config pfSense-UDP4-1194-maria-config.ovpn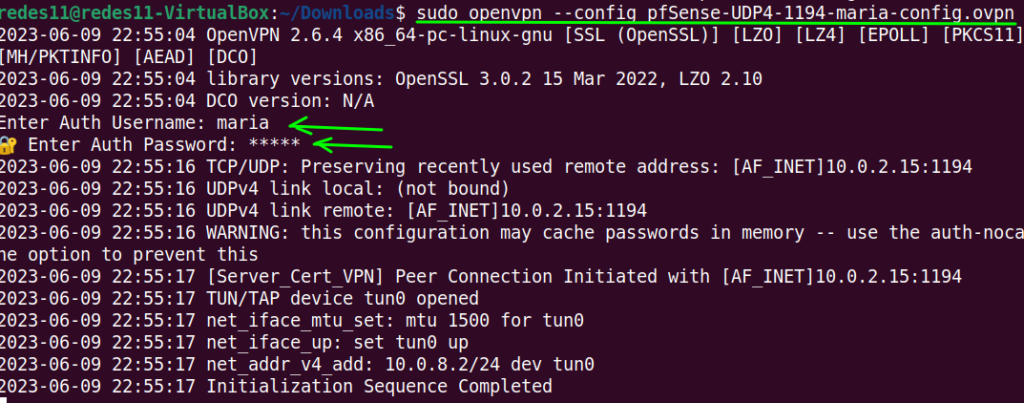
After running the command, you will be asked for the username and password of the user. In our case, the user that had been created on the OpenVPN server was maria and the password maria.
Verifying OpenVPN Client
One of the ways to verify that the OpenVPN client is working is to use the command below to check the machine’s route table.
netstat -rn
We can see in the figure above that the first route goes through the tunnel of VPN 10.0.8.1 using the tun0 interface.
Another way to verify that the VPN is working is using the traceroute command. For that we can verify the route for the google IP 8.8.8.8 with the command below.
traceroute -I 8.8.8.8
We can see in the figure above that the first hop goes to the VPN tunnel ip.

Juliana Mascarenhas
Data Scientist and Master in Computer Modeling by LNCC.
Computer Engineer

How to Configure NAT in Packet Tracer (Step-by-Step)

Zabbix FIM: How to Setup File Integrity Monitoring
Configure DHCP in Packet Tracer: Server & Router Guide

Cheap SSDs: The Hidden Dangers of TLC, QLC & DRAM-less

Zabbix Tags Guide: Organizing and Filtering Monitoring Alerts
If you manage a Zabbix environment, you’ve probably been there: a crowded “Problems” screen, where…

Flooding Routing Algorithm: How It Works & Use Cases
Let’s talk about one of the most primitive and, at the same time, most robust…
More links:
https://community.openvpn.net/openvpn/wiki/OpenvpnSoftwareRepos
https://copr.fedorainfracloud.org/coprs/dsommers/openvpn-release/
https://community.openvpn.net/openvpn/wiki/UnofficialOpenvpnSoftwareRepos


