In this tutorial, we will teach you in a simple way how to install python3 on a Windows 11 machine.
Remember that by the time you are viewing this tutorial, the Python version may have changed. In this case you will use the newest version.
Download Python for Windows
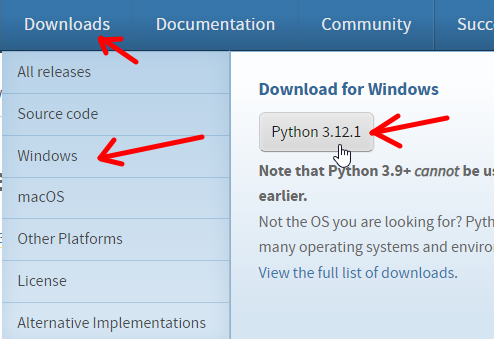
Initially we will download Python for Windows. To do this, let’s access the python website.
Within the website, we will search for Downloads and then select our operating system, which in this case is Windows.
After that we will click on Windows and we will select the version that is offered as the most current for Windows.
Installing python on Windows
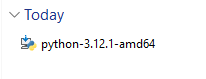
Now let’s select the file we just downloaded and start the installation by double clicking.
Next we will select the Add python.exe to PATH option to allow us to run python in directories different from where python is installed.
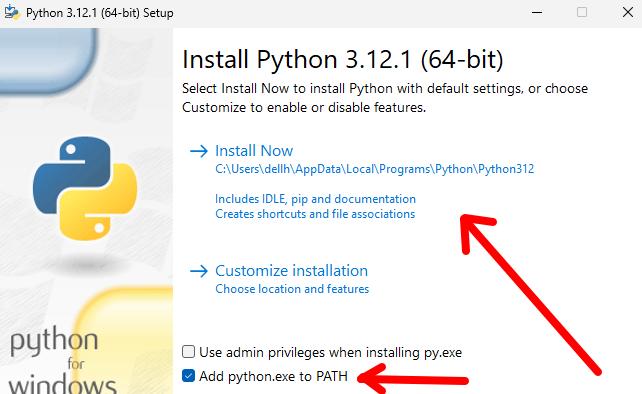
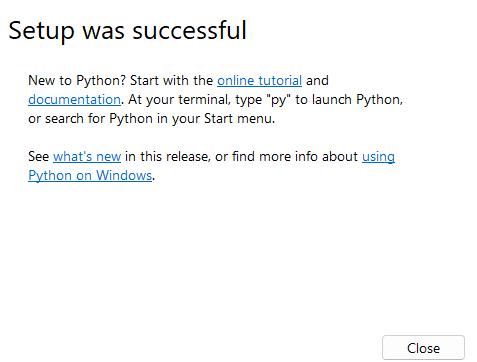
Then we will see a screen informing us that the installation was successful. After that, we can click close.
Testing Python Installation
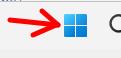
Now let’s open a terminal and test Python. To do this, we will click on run or click on the link that appears in the bottom menu of Windows 11.
After clicking on the icon, type “cmd” and click on the figure that displays a command prompt.
cmd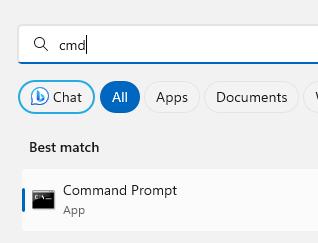
Note. Optionally you can type terminal and use the Windows power shell instead of cmd to run the tests.
After that, we will see a terminal and we can type “python –version” and press ENTER.
python --version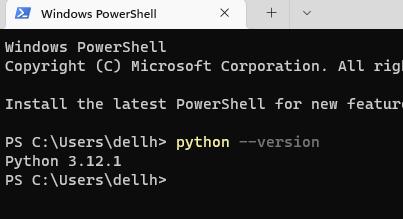
We can see in the figure above that python was correctly installed and that the “python –version” command displayed the current version that we just installed.
Verifying pip package installer
Now let’s check if everything is ok with the python package installer, in this case we are talking about pip. To check pip, we will use the “pip –version” command.
pip --version
We can see in the figure above pip that manages python packages is working correctly and is in the version compatible with our python.
Creating a Python program
Now let’s create a little program in Python that simply prints the words “Hello World” on the screen. The purpose of this task is to start our Python journey by running our first script.
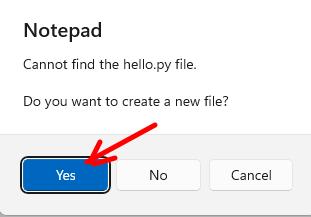
To do this, still in the terminal, let’s type the command below.
notepad hello.pyWe will see a message saying that the hello.py file does not yet exist and asking if we want to create the file. Let’s click Yes.
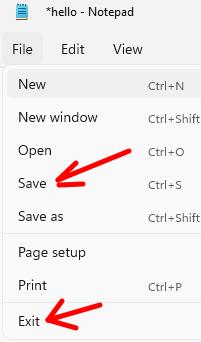
Inside the file we will type the code below.
print("Hello Word")Next we will save and then exit the notepad editor.
Now we can use the command below to run the hello.py script we just created.
python hello.py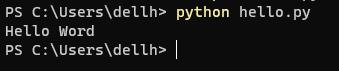
We can verify that Python was installed correctly and now we are even running scripts. From now on I wish you to increase your knowledge with Python.
Updating pip and installing packages
Whenever we install packages or libraries in Python, we can use the pip manager.
This way, before installing a library, we can update pip with the command below.
python -m pip install --upgrade pip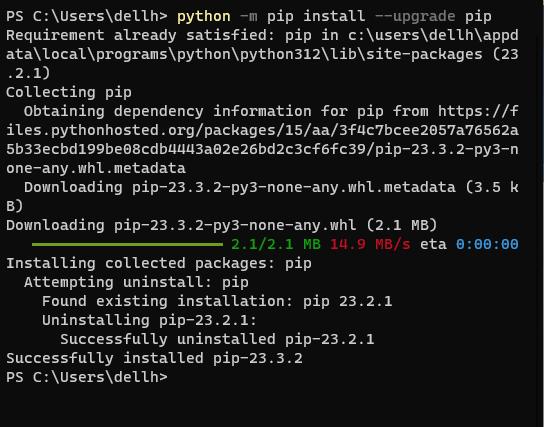
And then install a package or library. In the example below we are installing the psutil library which is widely used to deal with processes that are running locally.
pip install psutil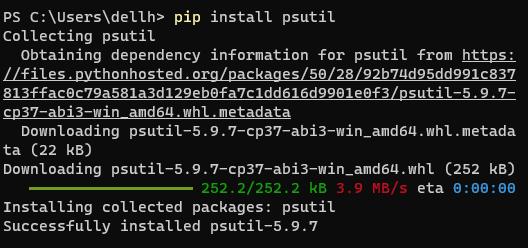
My experience installing python on Windows
I started my journey using Python with Linux, however one day I installed Python on Windows to serve a client who needed a specific script for Windows. To my surprise, the installation of Python on Windows was simple and quick and consequently I was able to carry out the task I needed.
I believe that an important step for anyone starting out in their programming career is to install Python on their operating system. In this case, if the user uses Windows, they can perfectly install Python on Windows and start creating their programs.
See more:
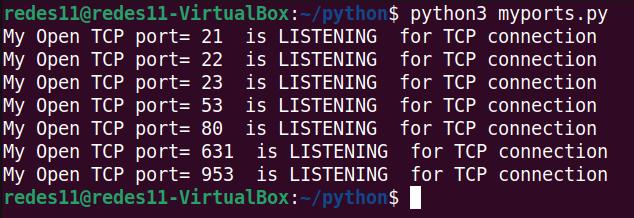
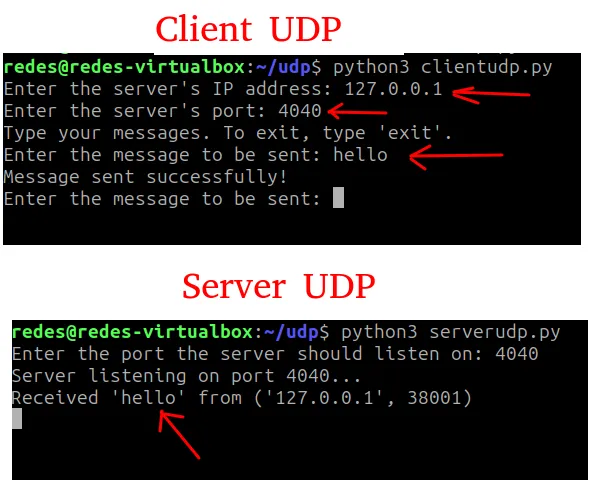
Python: show my TCP and UDP ports
Top Python Libraries for Data Science

Juliana Mascarenhas
Data Scientist and Master in Computer Modeling by LNCC.
Computer Engineer
Tutorial: Using Port Forwarding in Packet Tracer
Tutorial: Web Server in Packet Tracer (Client-Server)

Email Server & Webmail Setup: Postfix, Dovecot, SnappyMail
Install Ubuntu Server 26 on VirtualBox (Step-by-Step)

How to Configure NAT in Packet Tracer (Step-by-Step)