First, we’ll show you how to install OpenWRT on VirtualBox. OpenWRT is a firmware that can be used on routers.
So, installing OpenWrt in VirtualBox allows you to replace the original firmware of some routers. Additionally, we can check compatibility using the database.
Furthermore, OpenWRT is a Linux. Then, we can make various configurations and modifications to the router’s operating system.
Next, we will show you how to install and create a virtual environment in VirtualBox.
There are several applications, from testing within the network to using OpenWRT as a protection or layer of protection when you are browsing on a public network.
However, this additional protection is more interesting when there is no knowledge about network security. But this topic is for another video.
First step: Download OpenWRT:
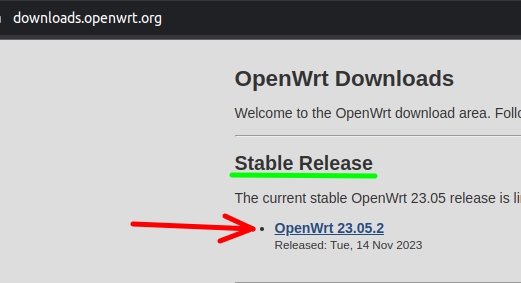
First, we will download OpenWRT from downloads.openwrt.org. Then we select the latest version.
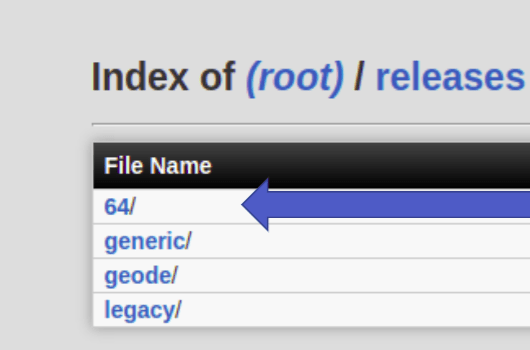
Now let’s select the model = “x86/ “, which is compatible with the VirtualBox machine model.

Later, we will choose = “64/“.
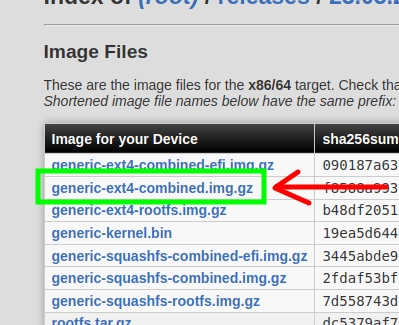
So, here you can choose other images. However, it is advisable to use the image = “ext4“. The image = “ext4” allows later expansion of the storage memory.
This way, using ext4 we can also perform writing and reading. So, the first step is to simply click and download.
So let’s select the image “generic-ext4-combined.img.gz” for Download.
Step 2: transforming the OpenWrt image into VDI
Now, let’s go to the directory where we downloaded the “generic-ext4-combined.img.gz” file. Then, we can unzip this file using the command below.
gzip -d *combined*.img.gz
After that, we will transform the unzipped file, which now has the extension “.img“, to the extension “.vdi“. So, let’s use the command below:
VBoxManage convertfromraw --format VDI *combined.img openwrt.vdi
As a result, we will have a file called openwrt.vdi.

And now we can open Virtualbox and continue the configuration steps.
Step 3: Installing OpenWrt on VirtualBox
We will show the configuration with the newer VirtualBox and at the end we will show the installation with the old VirtualBox. See the version of your VirtualBox by clicking on the menu on “Help” and then “About VirtualBox“. Then choose the section relating to your version of VirtualBox.
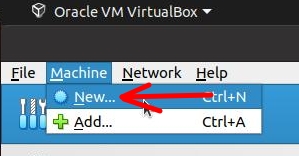
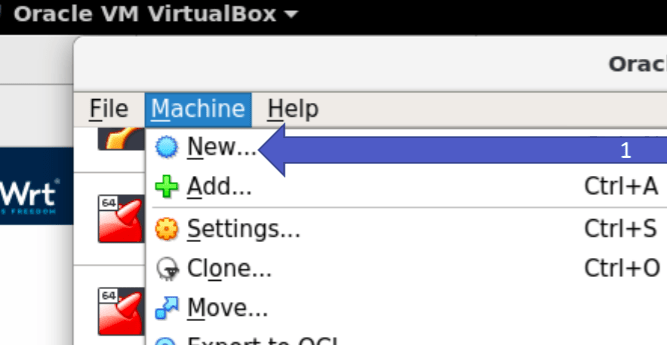
Initially, we will open VirtualBox and click on “Machine” and then on “New”.
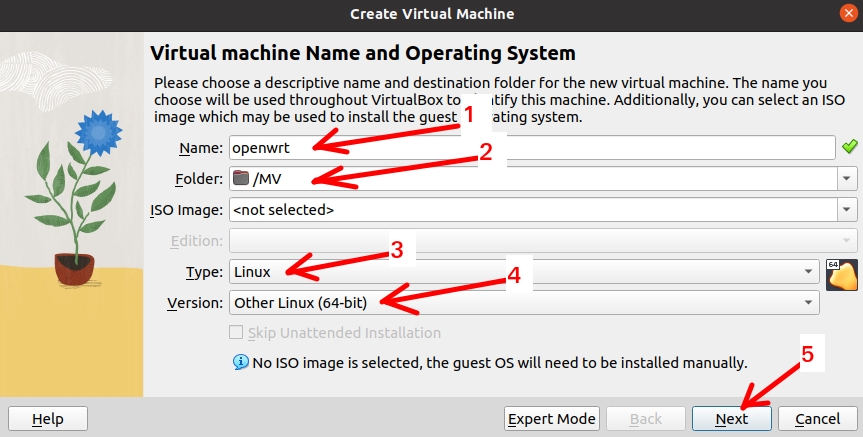
Then we will see a screen like the one shown below and we will enter the options that we will describe below.
- Name: name that will be given to the virtual machine. In this example, we decided to call it “openwrt”.
- Folder: location where the virtual machine will be saved.
- Type: Here we will enter the type of operating system “Linux”.
- Version: Here we will inform you that it will be a Linx with 64 bit “Other Linux (64-bit)”.
Then we will click on “Next”.
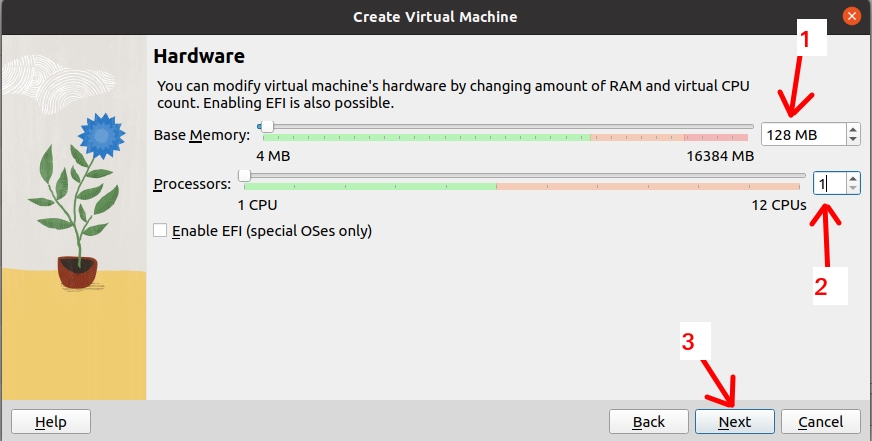
Now, let’s choose the amount of RAM and virtual CPU that we will use in our virtual machine. In this case, OpenWrt can run smoothly with 128 RAM and just 1 virtual CPU.
Then we will click on “Next”.
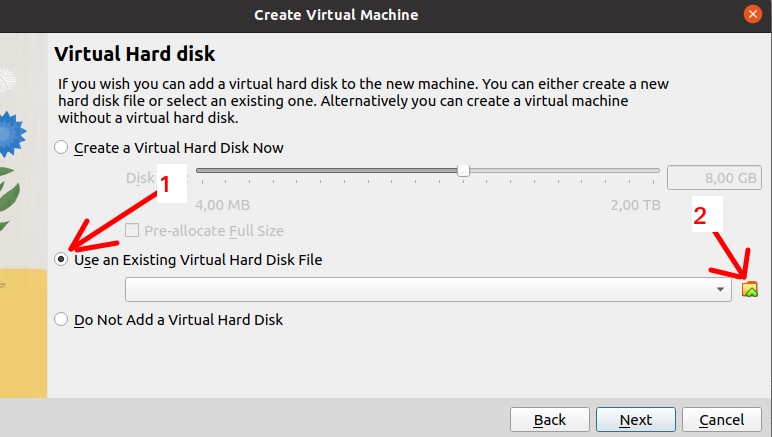
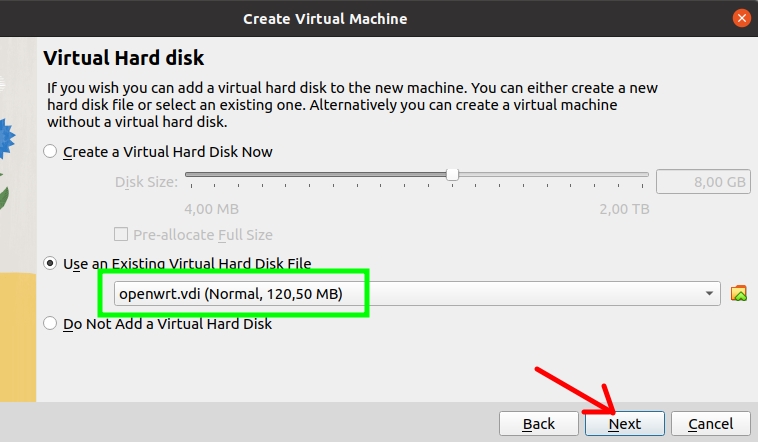
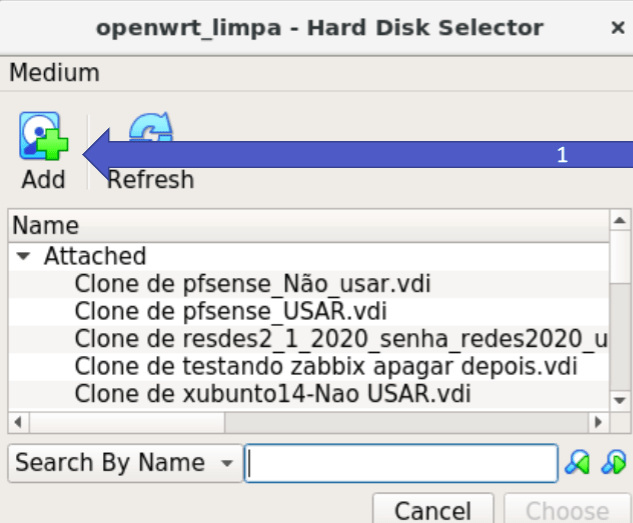
Next, we will select to use an existing virtual disk. To do this, we will choose the option “Use an Existing Virtual Hard Disk File” and then click on the yellow folder symbol as in the figure below.
So let’s click “Add“.
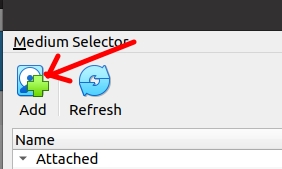
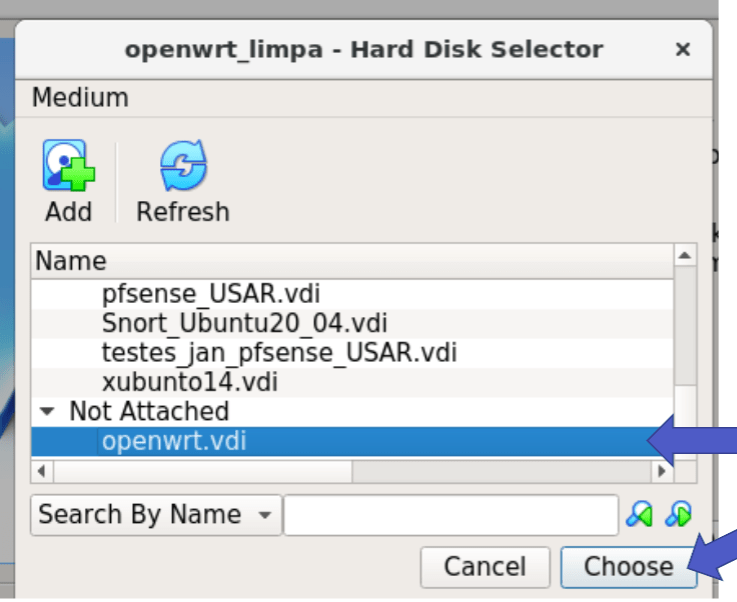
And let’s choose the VDI file that we generated from the image we downloaded.
After that, we will click on “Choose”.

Then, we will be able to see an image similar to the figure below and we will click on “Next”.
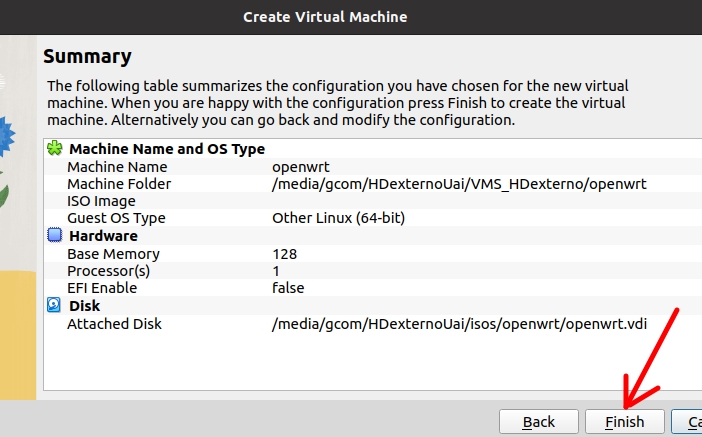
Next, we will see a summary of the entire configuration of our virtual machine. Now, we can click “Finish”.
Step 4: creating OpenWRT networks in VirtualBox
Next, we will create an exclusive network with host. This network will allow the real machine to access the LAN of the OpenWRT virtual machine.
We will show this step with a newer version of VirtualBox 7+ and we will show it next with an older version of VirtualBox.
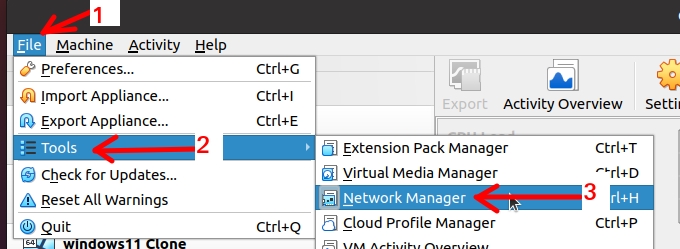
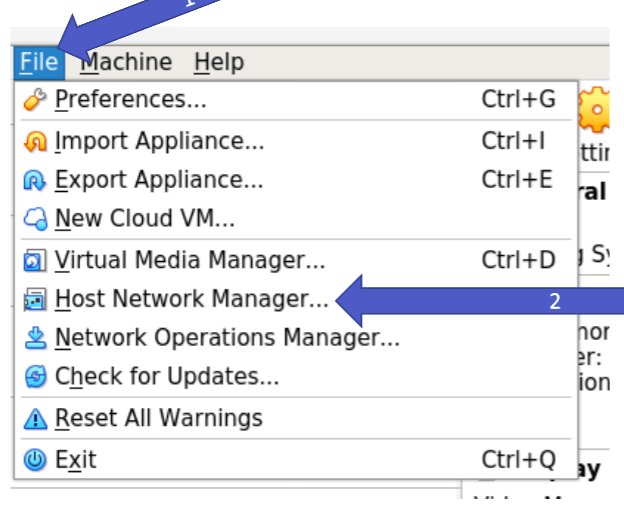
To do this, if you are using VirtualBox 7+, we will click on “File” and then “Tools” and “Network Manager” .
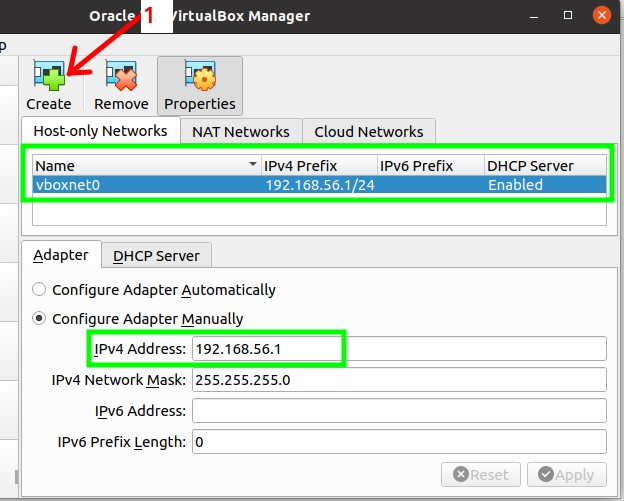
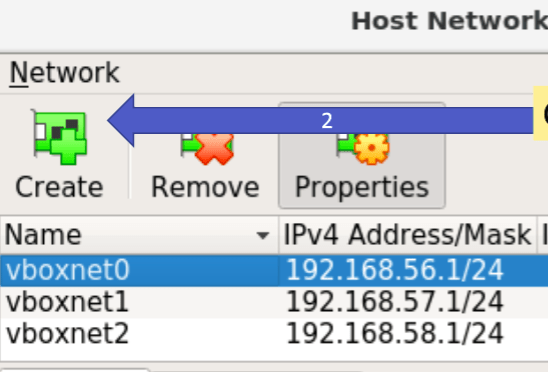
Now, let’s select the first tab with the name = “Host-only Networks” and then click on “Create” to create the network . Additionally, you can create other “host-only” type networks and decide which one will be used for your virtual machine with OpenWrt.
In ours, we will only use the first network created “vboxnet0”. It is worth noting that this network is in a range of “192.168.56.0/24”. Furthermore, our real machine will receive an IP = “192.168.56.1”.
Note. Later we will have to change the OpenWrt LAN IP to work within the “192.168.65.0/24” network.
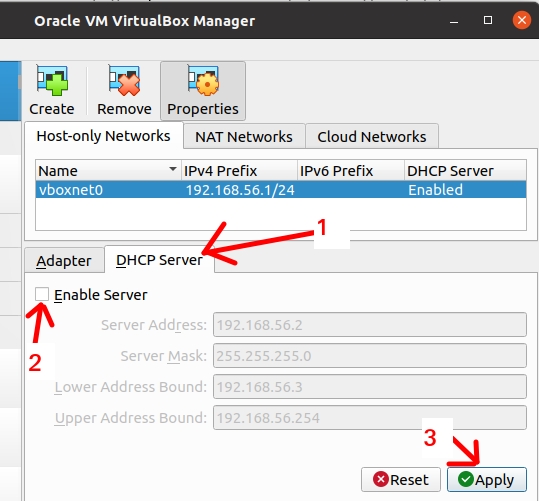
Next, we will disable the DHCP service of this “host-only” network. To do this, we will click on the “DHCP Server” tab and we will disable the “Enable Server“. After that, we will click on “Apply“.
Step 5: selecting OpenWRT networks within VirtualBox
Soon after, we will configure the interfaces in VirtualBox.
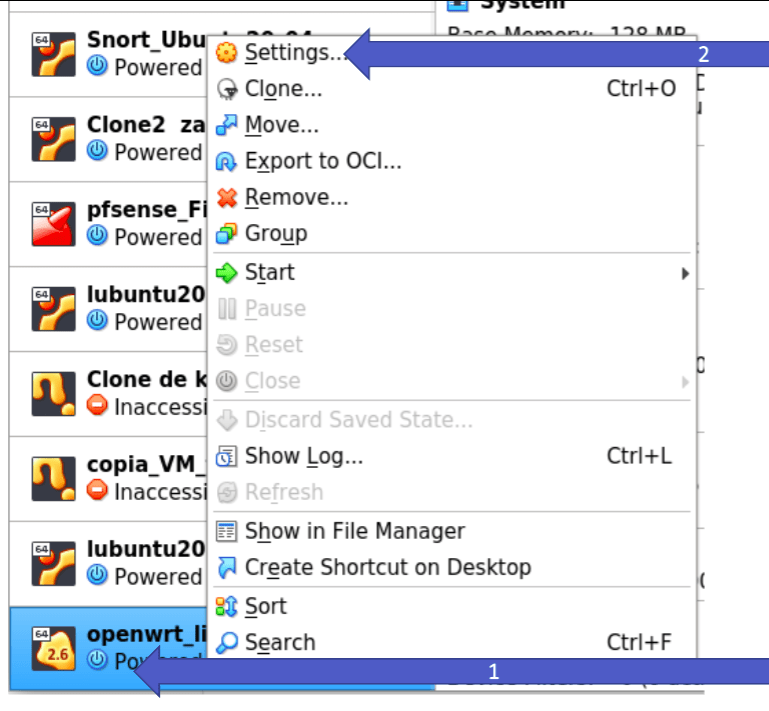
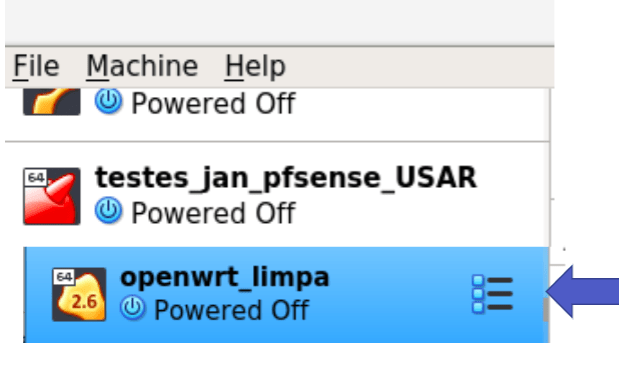
In the figure below, we will select the virtual machine and then click with the right mouse button to access the settings part.
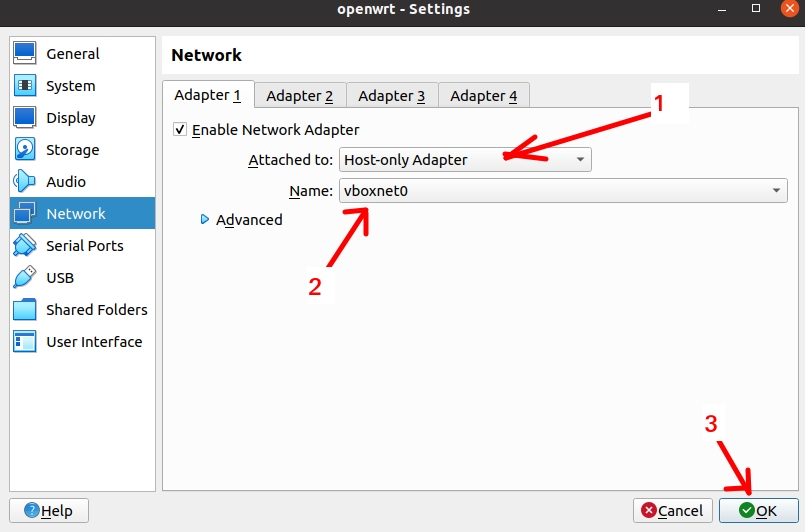
In “Adapter 1” choose “Host-only Adapter” mode. As a result, we will insert in “Adapter 1” the name of the network that you created previously. Our chosen network was “vboxnet0“.
Below, we will choose exclusive mode with host and select the network you created. And then we’ll click “Ok“.
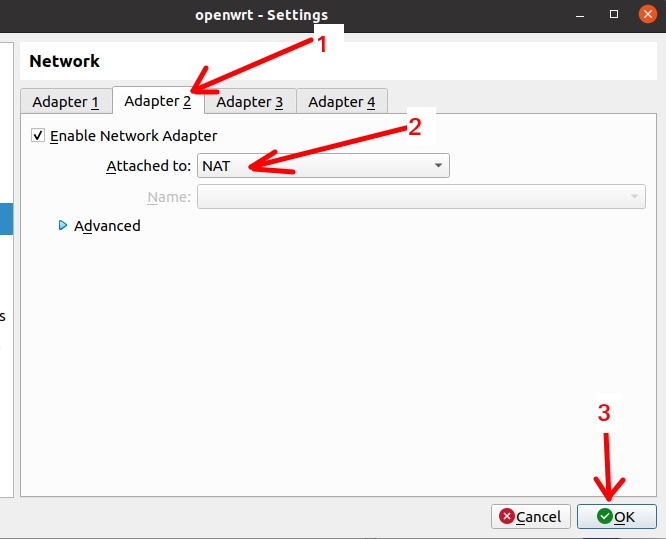
Now let’s enable the second interface “Adapter 2“. In this interface, we will use theNAT mode. This will be the OpenWRT WAN interface.
In the figure below, we will Enable the second interface and mark it as in NAT mode. After that, we will click on “Ok“.
Step 6: Changing the OpenWrt LAN IP
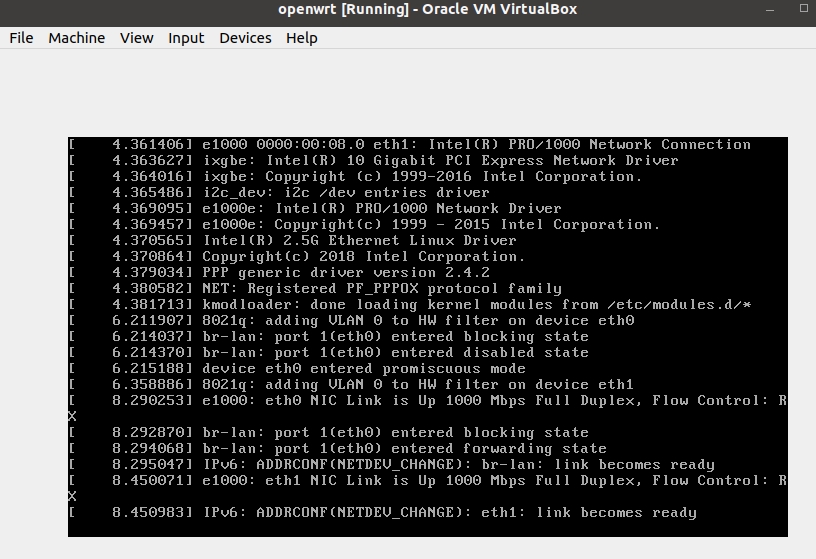
Now, let’s start the OpenWrt virtual machine in VirtualBox. This initialization can be done by double-clicking on the virtual machine or selecting the virtual machine and clicking “Start”.

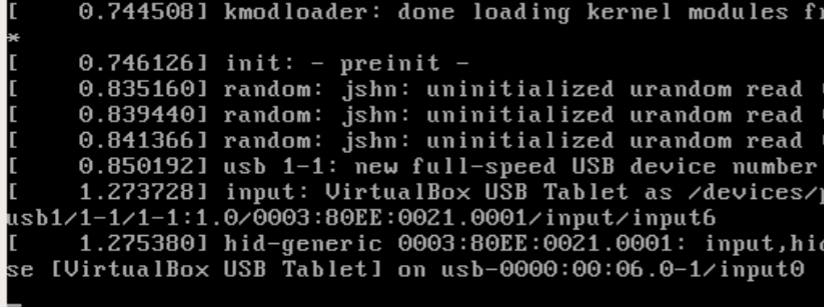
Next, we will see the OpenWrt startup screen.
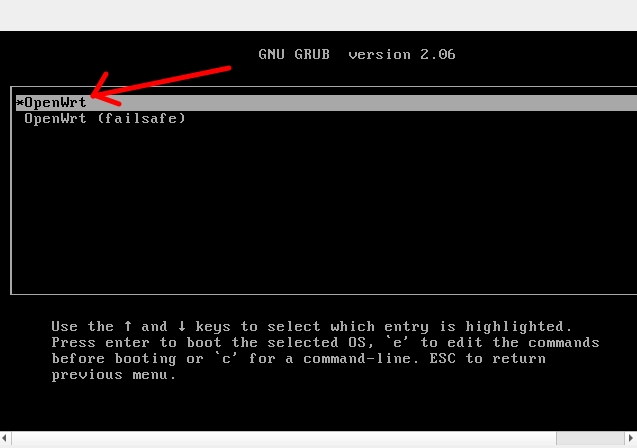
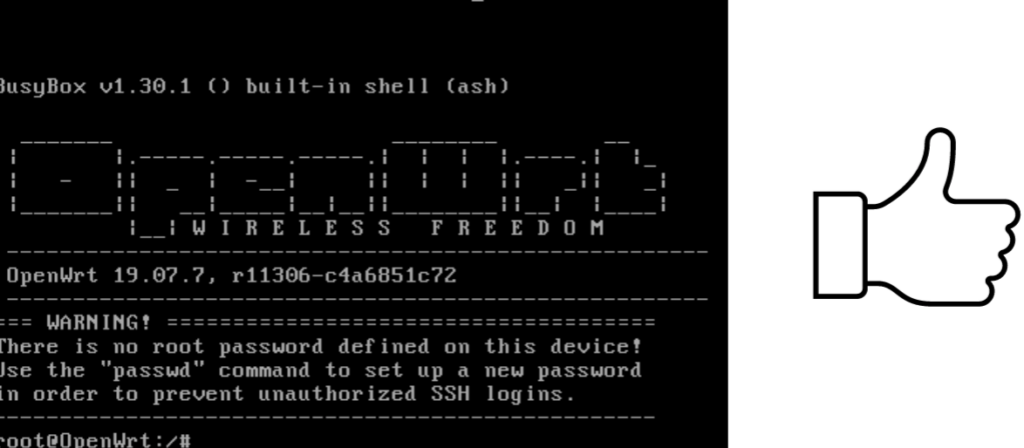
Then we will see the screen below and press the ENTER key.
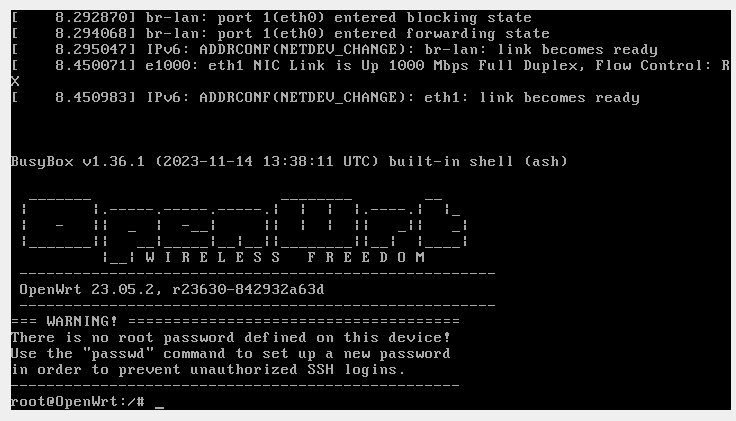
After pressing ENTER, we will see the terminal screen to enter commands.
Next, let’s check the IP addresses of our OpenWrt virtual machine. To do this, we will use the command below.
ip addr
As a result of the command, we can verify that the interface “eth1” has an IP “10.0.3.15/24” this IP was received by the network NAT of our VirtualBox. The “eth1” interface will be the interface used in the OpenWrt WAN.
The “br-lan” interface, which is associated with “eth0”, will be the interface used in the OpenWrt LAN. We can check that this LAN interface has IP “192.168.1.1/24” .
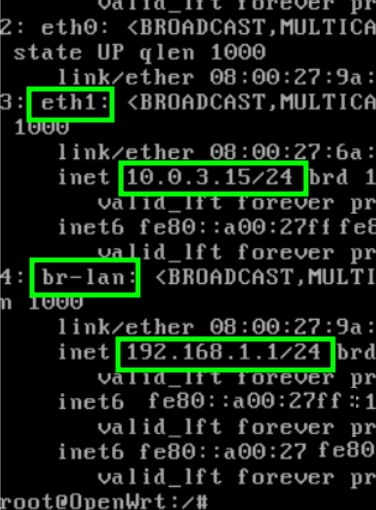
We can see that the OpenWrt LAN interface has an IP “192.168.1.1”. However, our VirtualBox “host-only” network was created on the “192.168.56.0/24” network. Therefore, we need to change the IP of the LAN interface (“br-lan”) of our OpenWrt to an IP that is within the “192.168.56.0/24” network.
To change the IP of the LAN interface of OpenWrt, we will edit the file “/etc/config/network” and we will change the IP.
To edit the file “/etc/config/network” we will use the command below.
vim /etc/config/network 
Inside the file “/etc/config/network”, let’s look for the line “config interface lan “. Along these lines, we will change the IP to an IP that is within the IP range we use in our VirtualBox host-only interface.
To change the IP, press the Insert key on the keyboard and change the IP as shown in the figure below. So we are changing the original IP which was “192.168.1.1” to an IP of “192.168.56.3”.

Note. We are using IP 192.168.56.3 because 192.168.56.1 will be used by VirtualBox on your real machine and 192.168.56.2 will be used as the DHCP server by default in this network configuration.
After changing the IP, we will press the Esc key on the keyboard and then type the characters “:wq” so that the Vim editor can write the changes we did.
:wq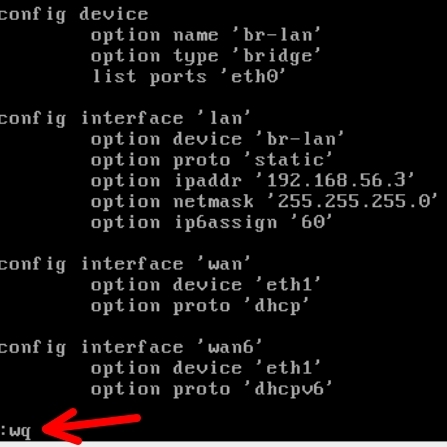
Now let’s run the command below to update the change we made to the OpenWrt LAN IP.
/etc/init.d/network restart
Now let’s check if the OpenWrt LAN address has changed. To do this, we will use the command below.
ip addrThen we will see the LAN IP changed as in the figure below.

Step 7: logging into OpenWRT
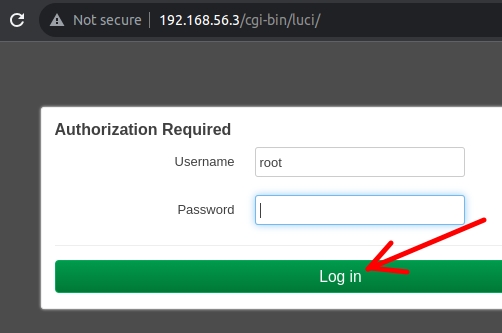
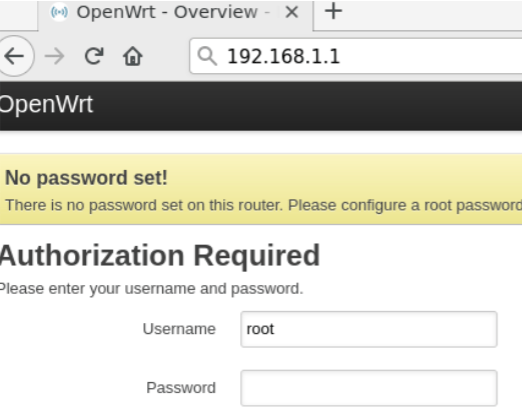
Now, let’s access the OpenWRT WEB interface using our real machine. To do this, let’s open the browser and enter the IP that we gave for the LAN of our OpenWrt virtual machine “192.168.56.3”.
192.168.56.3
Then we type Login = “root” and no password. So we can click on “Log in“
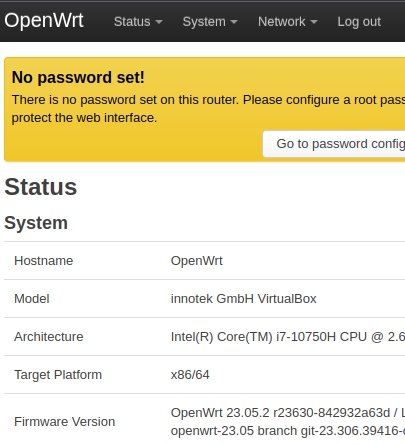
Soon after, we will see a screen similar to the figure below. In this case, we already have access to the OpenWRT WEB interface.
Step 8, testing OpenWRT:
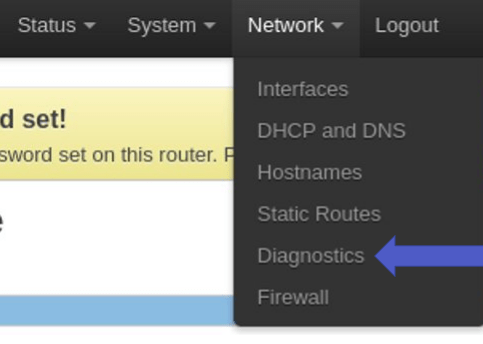
Finally, let’s test the external connection. Therefore, let’s access the “Network” tab and then select “Diagnostics“.
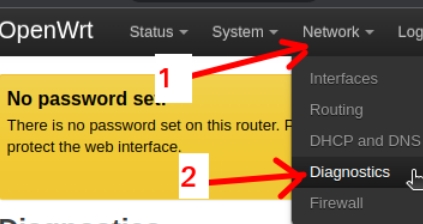
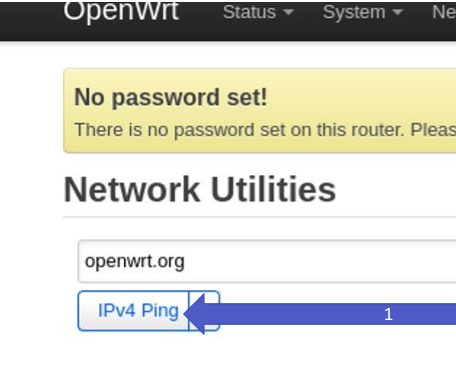
Finally, we will use the Ping tool to test connectivity with the site = “openwrt.org“.
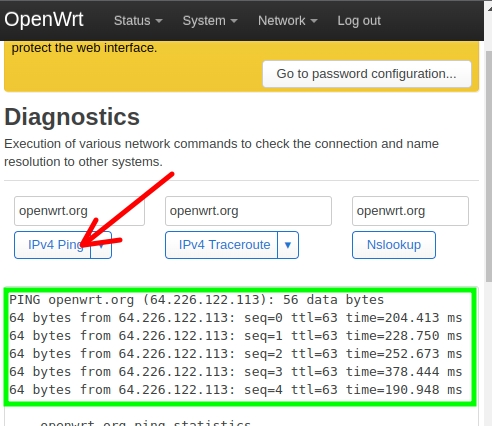
We can verify that our OpenWrt virtual machine in VirtualBox did a Pingit was successful. This way, we complete our installation.
See more:
Turn the raspberry pi into a WIFI router
Install OpenVPN Client on Windows
Update OpenVPN Client on Linux

Juliana Mascarenhas
Data Scientist and Master in Computer Modeling by LNCC.
Computer Engineer
Installing OpenWRT in Old VirtualBox
Now let’s show an installation based on the older VirtualBox. If your VirtualBox is already similar to what we saw in the installation above, you can disregard this installation below.
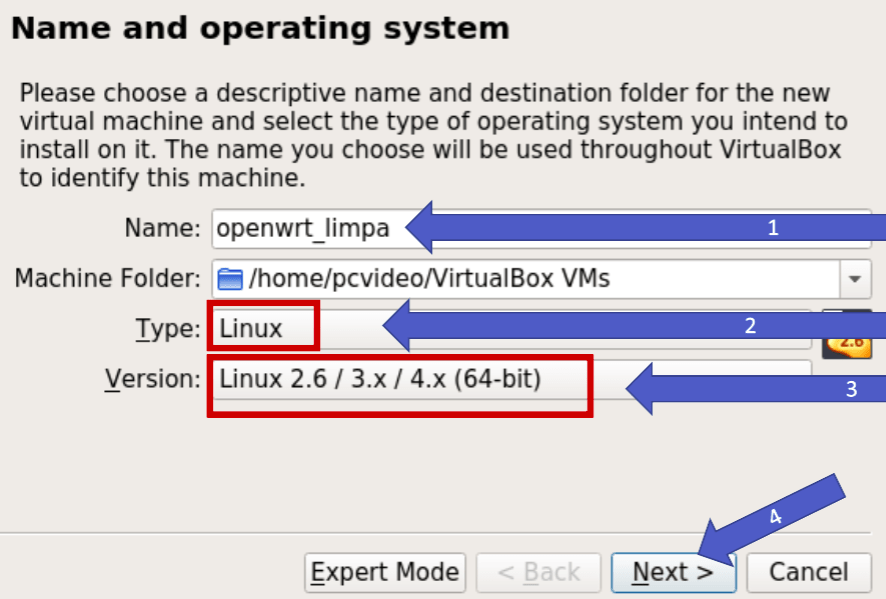
In that sense, let’s add the name of the virtual machine in our case: openwrt_limpa. So, we select the operating system type. For OpenWRT we chose Linux. Afterwards, we select the version as = “2.6/3x/4x(64bit)”.
So now let’s select the amount of memory. For example, in a basic installation, = 128MB is enough. However, if you choose to use additional packages, we can increase the amount of memory.

First, we will choose an existing virtual disk. That is, in our case it is what we downloaded from the openWRT website.

Primarily, let’s choose the option to add the HD.
Afterwards, choose the unzipped file = “.vdi”

Now, just click on = “Choose”. Soon after, the machine will be displayed in VirtualBox.
Creating OpenWRT networks in VirtualBox
Next, let’s create a network of the unique type with host. This network will allow the real machine to access the LAN of the OpenWRT virtual machine.
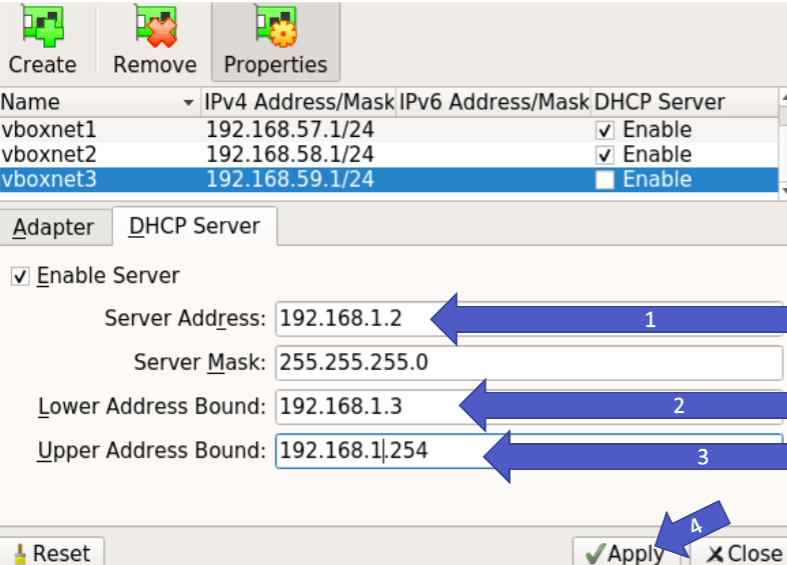
First, let’s create a network of type = “Host-Only”.
Then the network must be in the range = “192.168.1.0/24”. Remembering that other network masks can be used. So, it is necessary to obey this limitation because the LAN IP in OpenWRT will be = “192.168.1.1”.
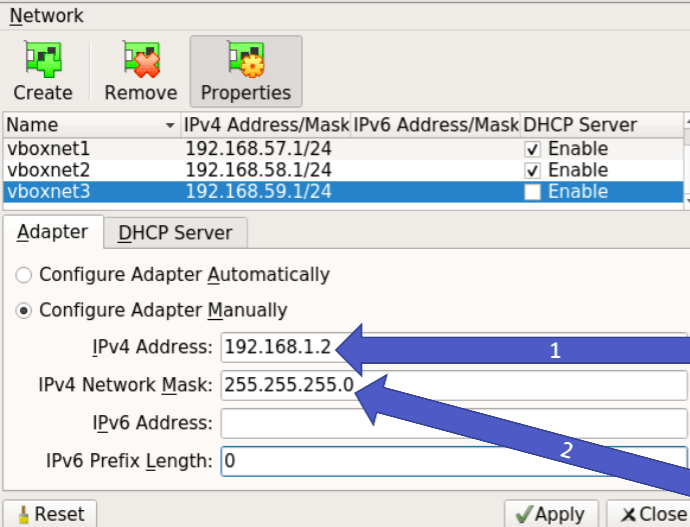
Note that IP = “192.168.1.1” was not used. The reason for this is that the IP = “192.168.1.1” will be used by the OpenWRT LAN interface.
Selecting OpenWRT networks within VirtualBox
Soon after, we’ll configure the interfaces in VirtualBox.
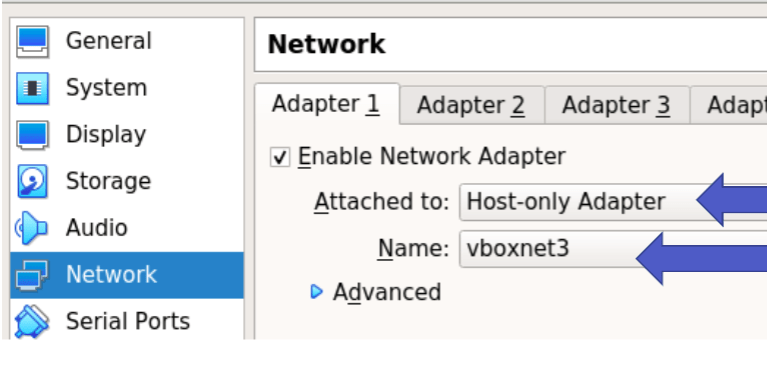
In “Adapter1” choose Host_only Adapter mode. As a result, let’s insert into Adapter1 the name of the network you created earlier. Our chosen network was vboxnet3.
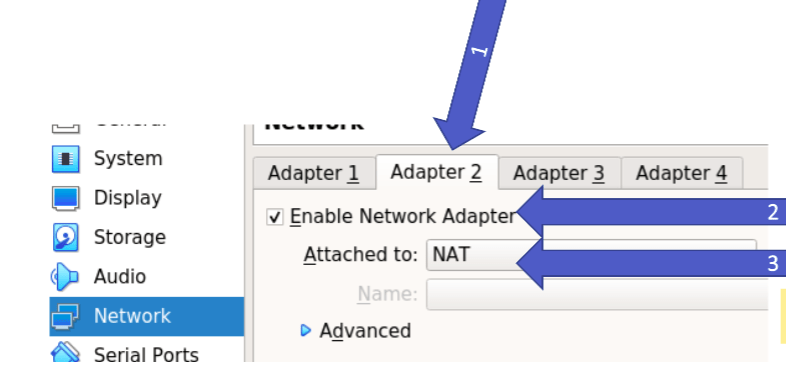
Now let’s enable the second Adapter2 interface. In this interface we will use NAT mode. This will be the OpenWRT WAN interface.
Now let’s start the virtual machine.
The OpenWRT virtual machine has started up. Then press ENTER.
Final screen showing successful initialization.
Logging into OpenWRT:
Next, let’s access OpenWRT. So, let’s open the browser and enter the LAN IP = “192.168.1.1”. Then we type the Login = “root” and no password.
Testing OpenWRT:
Finally, let’s test the external connection. So, let’s go to the Network tab and then select Diagnostics.
Finally, let’s use the Ping tool to test connectivity to the site = openwrt.org.
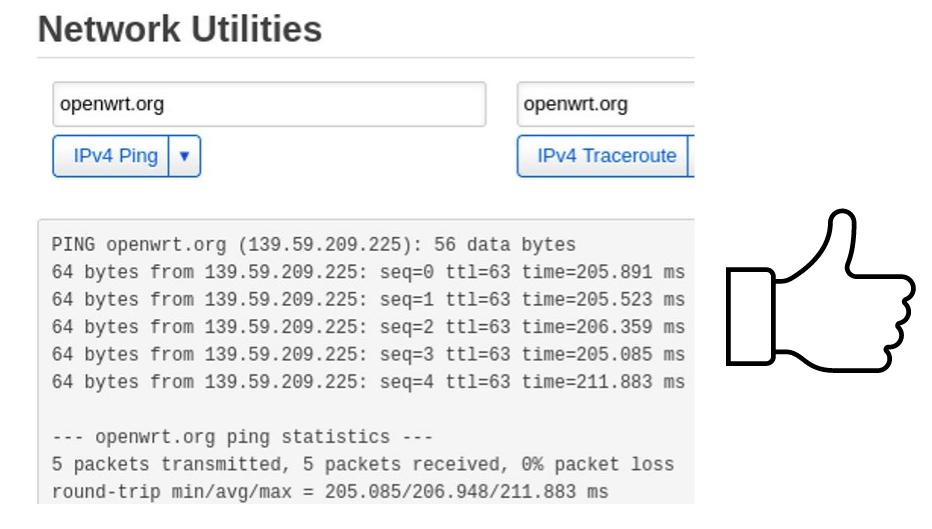
Therefore, we verified that Ping was successful. That way, we complete our installation.
see more:
Turn the raspberry pi into a WIFI router
Install OpenVPN Client on Windows
Update OpenVPN Client on Linux
Juliana Mascarenhas
Data Scientist and Master in Computer Modeling by LNCC.
Computer Engineer
We also have video installing OpenWRT on VirtualBox.
References to OpenWRT in VritualBox:
https://downloads.openwrt.org/
https://downloads.openwrt.org/releases/19.07.7/targets/x86/64/
https://openwrt.org/docs/guide-user/virtualization/virtualbox-vm

Zabbix FIM: How to Setup File Integrity Monitoring
Configure DHCP in Packet Tracer: Server & Router Guide

Cheap SSDs: The Hidden Dangers of TLC, QLC & DRAM-less

Zabbix Tags Guide: Organizing and Filtering Monitoring Alerts
If you manage a Zabbix environment, you’ve probably been there: a crowded “Problems” screen, where…

Flooding Routing Algorithm: How It Works & Use Cases
Let’s talk about one of the most primitive and, at the same time, most robust…

Routing & Dijkstra’s Algorithm: Finding the Internet’s Shortest Path
If you have ever used a GPS to avoid traffic, you already intuitively understand the…