In this tutorial, we will demonstrate how to install the Zabbix server on a Linux machine with Ubuntu.
Downloading Zabbix
Initially, we will access the Zabbix website’s download page using a browser.
https://www.zabbix.com/download

Next, we will select the installation via Zabbix Packages.

Now, let’s choose the Zabbix version and the operating system where Zabbix will be installed. In our case, we are using Ubuntu.
Therefore, we will choose the latest version of Zabbix and select your Ubuntu version.
Next, we will select your Ubuntu version, for example, Ubuntu = 26.
Note. If we were using another Linux distribution, we could choose the installation type at this moment.

Additionally, we will choose the Zabbix component = Server, Frontend, Agent. This way, we can install the Zabbix server and also a local Zabbix agent.
After that, we will select the database we will use. In this case, we will use MySQL.
Now, we will select the WEB server that will host the Zabbix frontend. In this tutorial, we will choose Apache.

Installing the Zabbix Server
Now, let’s scroll down the page and start the Zabbix installation part. For this, we will explain and use the commands described on the Zabbix website.

First of all, let’s run the command below to become a superuser in the terminal. The reason for this is that we will need superuser permission several times during the installation.
To become a superuser in the terminal, use the command below.
sudo -s
Now, let’s choose the location where we will download the Zabbix repository on our computer.
In this case, we will choose the Downloads folder. However, the user can choose another folder.
cd Downloads
Next, we will download the Zabbix repository with the command below:
Below we are using a command to download the repository for Zabbix 7.4 for Ubuntu 24 (check your operating system version and the current Zabbix version.):
wget https://repo.zabbix.com/zabbix/7.4/release/ubuntu/pool/main/z/zabbix-release/zabbix-release_latest_7.4+ubuntu26.04_all.deb
After the command, we will see the result below.

Note. It is worth remembering that by the time you are following this tutorial, the Zabbix version may have changed, and if this occurs, you can replace the command above with the command described on the Zabbix website.
Now let’s install the “.deb” file we downloaded.

To do this, we will use the command below:
dpkg -i zabbix-release*
Next, we will update apt to get the newly added repository.

apt update
Installing the necessary packages for Zabbix
Now, let’s install Zabbix and the necessary components for the Zabbix server to function.
To do this, we will use the command below.
apt install zabbix-server-mysql zabbix-frontend-php zabbix-apache-conf zabbix-sql-scripts zabbix-agent mysql-server -y
The figure below shows the completed installation.

Creating the database for Zabbix
To create the database for Zabbix, we will use the command below.
sudo mysql -uroot -p
Next, we need to enter a password for the database. In this example, we will use the password = 123456

We can observe that we have entered the MySQL terminal.

Now let’s type the command below to create the database.
create database zabbix character set utf8mb4 collate utf8mb4_bin;
Next, we will type the command “create user zabbix@localhost identified by ‘password’“
Instead of ‘password‘, we will use our password, which is 123456. Therefore, in our case, the command will be the one typed below.
create user zabbix@localhost identified by '123456';
Now, let’s grant privileges on the database with the command below.
grant all privileges on zabbix.* to zabbix@localhost;
Next, we will use the command below.
set global log_bin_trust_function_creators = 1;
Finally, we will finish with the command below.
quit;
Importing Zabbix server and the initial schema
To import the “initial schema” and data, we will use the command below.
It is worth remembering that after the command, the password we used will be requested. Therefore, we will use the same password we used before, in this case, it is 123456.
zcat /usr/share/zabbix/sql-scripts/mysql/server.sql.gz | mysql --default-character-set=utf8mb4 -uzabbix -p zabbix 
Note. After entering the password, it is common for it to take a while to process. Therefore, be patient as this may take some time.
Disabling the log_bin_trust_function_creators option
The Zabbix website recommends that we disable the log_bin_trust_function_creators option. Therefore, we will disable it using the commands below.
mysql -uroot -pThen we will use the same password we created earlier, ours is 123456.


Next, we will use the command below.
set global log_bin_trust_function_creators = 0;
Now, let’s finish with the command below.
quit;
Configuring Zabbix server access
To do this, we will edit the file “/etc/zabbix/zabbix_server.conf“.
We will use the command below.
nano /etc/zabbix/zabbix_server.conf
Next, we will look for the line DBPassword= and we will include our password 123456.
DBPassword=123456
After that, we will save the changes and exit the nano editor.
Starting the Zabbix server and agent
First, we eill enable apache modules.
a2enmod proxy ; a2enmod proxy_fcgi 
To start the Zabbix server, the Zabbix agent, and the Apache server, we will use the command below.
systemctl restart zabbix-server zabbix-agent apache2
Let’s restart the PHP.
systemctl list-unit-files 'php*-fpm.service' | grep -oE '^php[0-9.]+-fpm.service' | xargs -r systemctl restart
Now, let’s configure the Zabbix server, the Zabbix agent, and the Apache server to start with the operating system.
sudo systemctl enable zabbix-server zabbix-agent apache2
Let’s enable de PHP.
systemctl list-unit-files 'php*-fpm.service' | grep -oE '^php[0-9.]+-fpm\.service' | xargs -r systemctl enable
Starting Zabbix in the browser
Let’s open a browser and type the link below.
http://localhost/zabbix
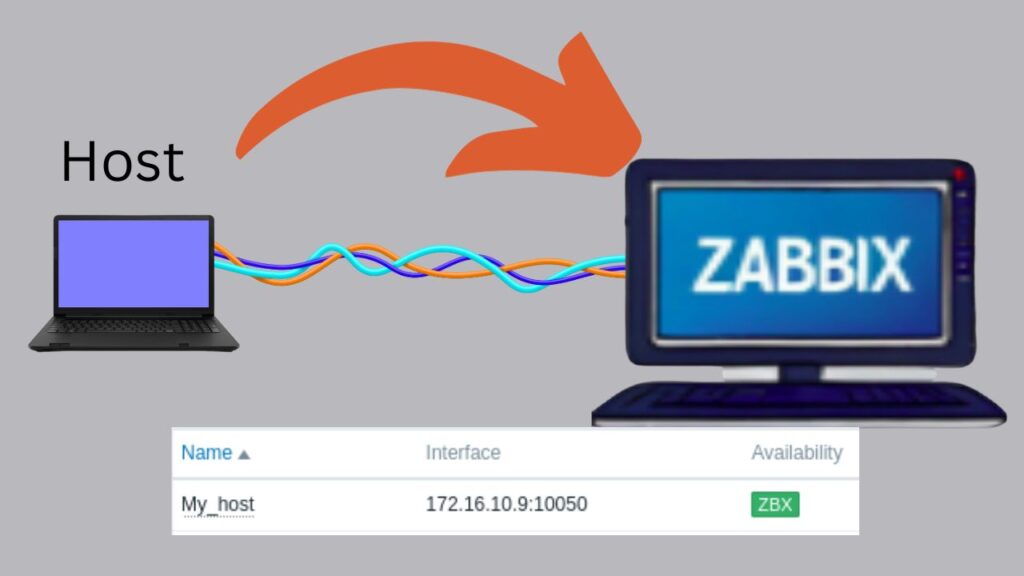
In this case, we are accessing Zabbix using the loopback address = localhost, which can also be replaced by “127.0.0.1”.
To access the Zabbix server from another machine, you will need to enter the Zabbix server’s IP address in the client machine’s browser, as in the example below.
http://zabbix_serverIP/zabbixAfter choosing the language, we will click on “Next step”.
Next, we will have the prerequisite check as in the figure below. Then we will click on “Next step.

After checking the prerequisites, we will now configure access to the database.
To do this, we will include the password we defined earlier.
In this case, our password was 123456. Then we will click on “Next step“.

Now let’s define the Zabbix server name and the time zone.
In our example, we will use the name “my_zabbix” and the Sao Paulo time zone. Then we will click on “Next step.

Then we have a pre-installation summary. In this case, we will just confirm and click on “Next step”.

In the figure below, we can see that we have successfully installed the Zabbix server Frontend.
Therefore, let’s click on “Finish”.

Starting the Zabbix server frontend
Now, let’s start by typing the default user, which in this case is “Admin”, and the password, which is “zabbix”.
Without quotes.

Finally, we have Zabbix installed and will see a page like the one below.

How to solve the “Can’t connect to local MySQL server through socket” error
If an error like the one in the figure below appears.
Can’t connect to local MySQL server through socket ‘/var/run/mysqld/mysqld.sock

This means you do not have the mysql-server installed yet.
Therefore, let’s install mysql-server using the command below
sudo apt-get install mysql-server
Note. We are assuming that the machine we are installing Zabbix on did not have a MySQL database previously installed.
See also:
Zabbix Appliance on VirtualBox
How to install Zabbix on Raspberry Pi

Juliana Mascarenhas
Data Scientist and Master in Computer Modeling by LNCC.
Computer Engineer