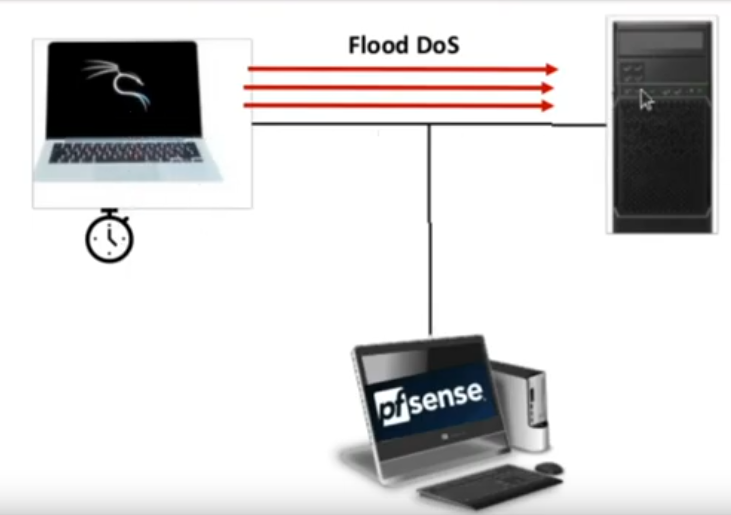
We are going to show you how to protect yourself and detect a Flood-type DoS attack using PfSense Snort. It is noteworthy that there are several tools for this purpose. However, our focus will be on the protection of D.o.S. using Snort + PfSense.
We know that there are several tools for denial of service. However, we will introduce a tool that comes with the Kali distribution. I even have a video investigating the D.o.S tool in more detail HERE.
We will use PfSense with an interface in promiscuous mode and capturing network traffic. In this way, we can capture and identify attacks from a machine that is inside the network to another machine for example an internal server.
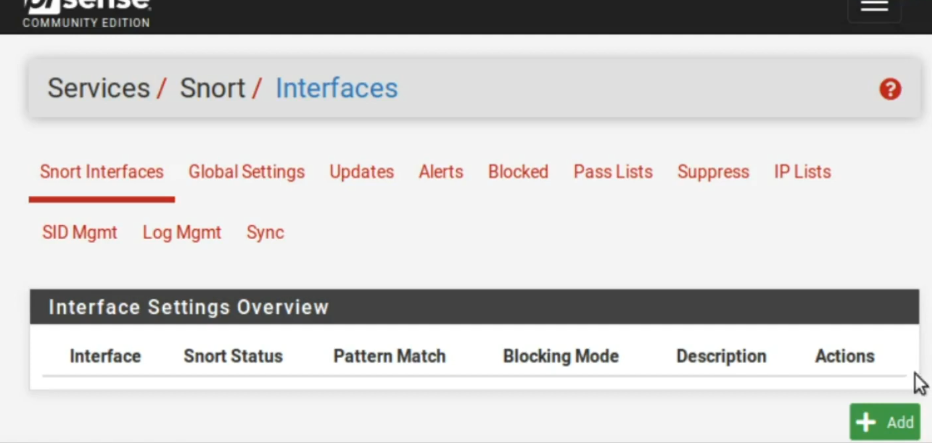
Configuring Snort+ PfSense
Now let’s configure Snort. It is worth mentioning that we have a video teaching how to install and configure Snort in PfSense HERE. So, in this post we are assuming that Snort is already installed in PfSese. Furthermore, we are assuming that the settings exposed in the video HERE have already been made.
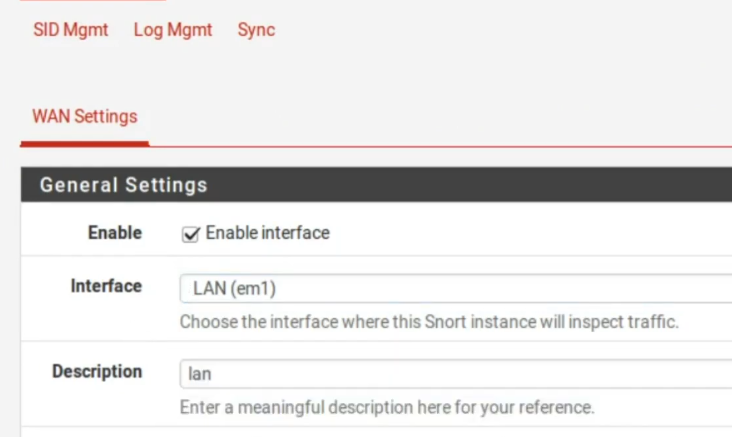
First, let’s create an interface, in this case, our interface will be of type Lan. Because we want to identify this attack inside the Lan ok. So, let’s replace it with LAN.
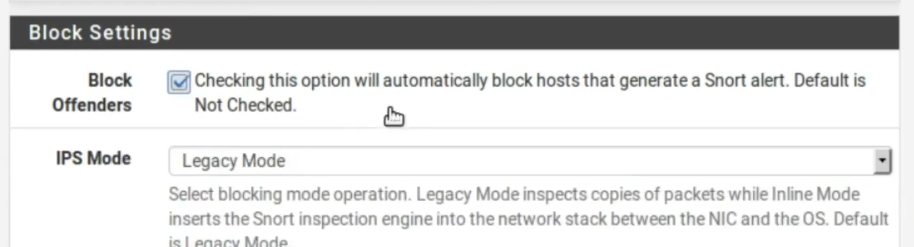
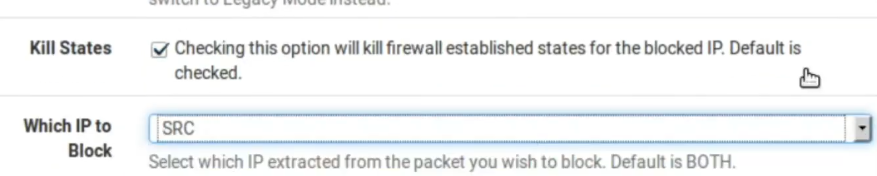
Now, let’s check Block Offenders as we want Snort to act as IPs. Thus, we want the blocking by the source because if any machine is carrying out an attack on this network, we will block precisely the machine that is originating the attack traffic.
Enabling Snort IPS Mode
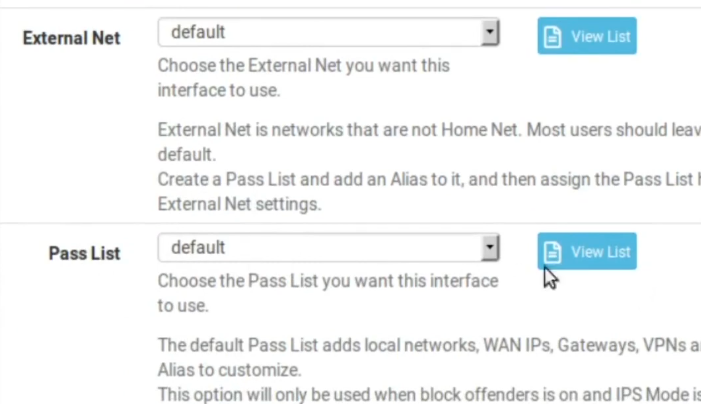
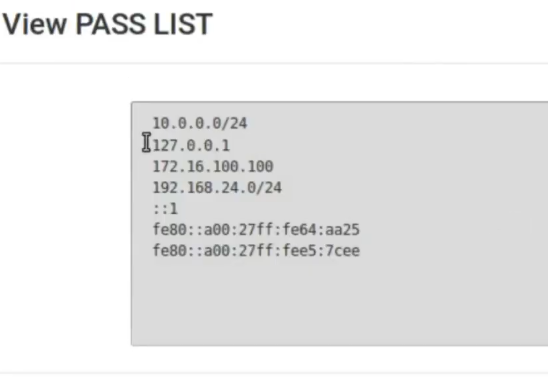
Ok, then we have the variables Home_Net which will be the internal network and External_Net which will be the external network. By default PassLIst includes the local network. But we don’t want that. So, let’s click View List to verify that our internal network is within the Pass List.
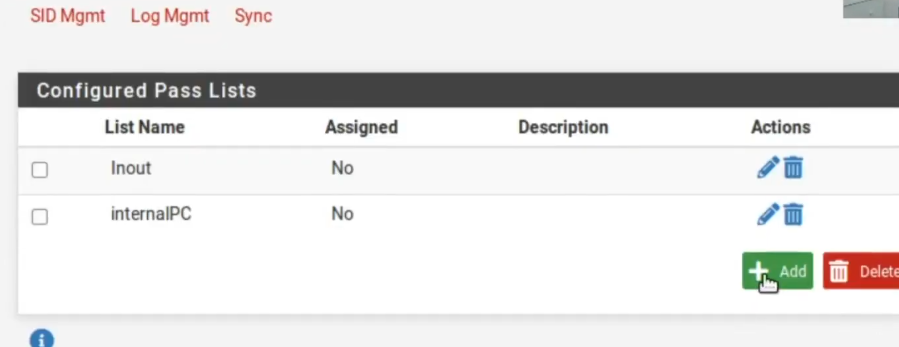
Creating Pass List for Snort
So, we need to create a different PassList here. First lets save here.
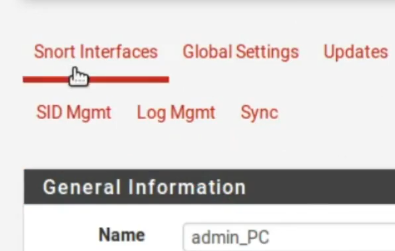
Okay, we saved it and now we go here to PassList and lets create a different PassList . So, let’s name it as admin_PC .
Then, lets click Add so we can add a new PassList.
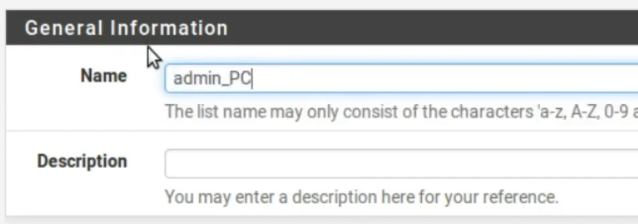
So, lets rename it to admin_PC. Thus, this pass list will be used to guarantee access to the computer that will administer PfSense and will be accessing PfSense using the WEB interface.
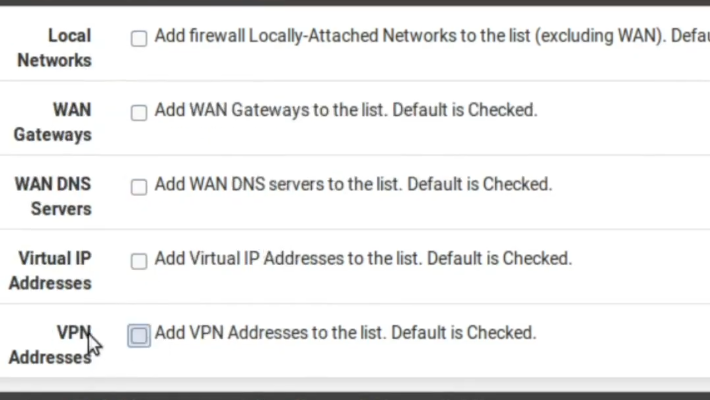
Next, we will disable the inclusion of Local Networks, WAN gateways, WAN DNS Servers, Virtual IP Addresses and VPN Addresses. So, if there is a need to ignore any of these interfaces, we can go back here and enable.
uncheck the options
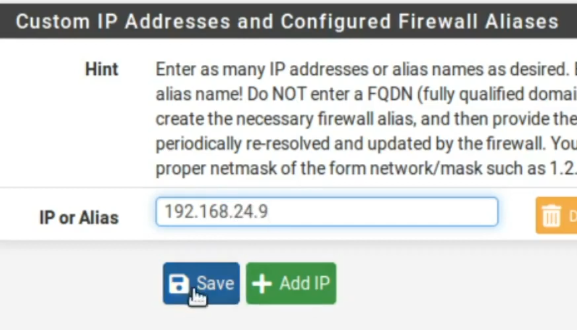
Now lets enter the IP of the computer that will be used to access PfSense. In this case, the IP is 192.168.24.9. After that we can click Save.
Now we go back to Interface and lets click on edit.
Editing the LAN interface
Next, lets enter as PassList the admin_PC.

We need to make this change in the pass list. Otherwise, the moment an attack happens inside your network, it will not be identified. This is because the attack will be interpreted as belonging to your internal network. Consequently, by default the internal network will be ignored. Therefore, we have to carry out this change.
Okay, made that change let’s save.
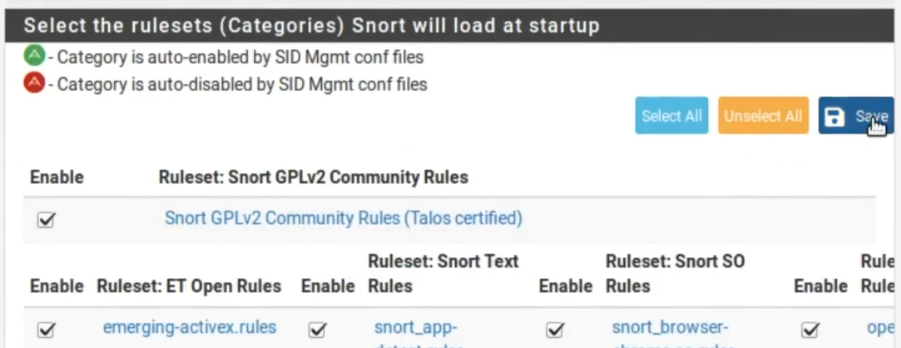
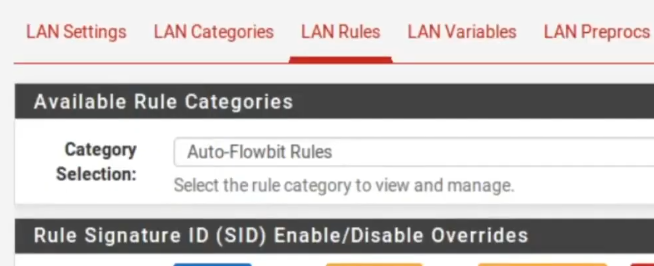
Choosing categories in Snort pfsense
Now letsclick Lan_Categories and letselect all categories.

Generally I like to select all categories Select ALL. After that, well click Save. It is noteworthy that this activation of categories is not necessary, as we are going to create our own rule.
Now let’s click on Lan_Rules and let’s customize our own rule.
Creating a rule in Snort
After that, right below we go to “Custom_Rules”. Next, let’s make our rule.
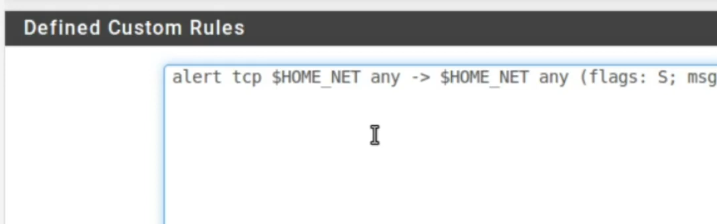
Therefore, this will be a rule to detect a D.o.S. of type Flood. Then, the attacker makes several connections to the services available on the target machine. In this way, the attacker tries to occupy the services so that other clients cannot access the services. So starting the rule will be = ALERT TCP and we enter the source = $HOME_NET .
alert tcp $HOME_NET any -> $HOME_NET any (flags: S; msg:" Manual rule DoS flood"; flow:established; detection_filter: track by_src, count 60, seconds 10; sid:99901; rev:1;)Thus, the source will be from our internal network, the source port will be any “ANY” and the destination is also for the internal network. We could change this rule and put that it originates in the external network and is destined for the internal network or the inverse of that. Therefore, it is worth checking what your objective is in protecting your perimeter.
Regarding the destination port, let’s put “ANY” as well. Also, I’m putting Flag S, which is the connection initiation SYN packet. After that, lets put the message that will be sent when the rule is activated = “MANUAL RULE DOS FLOOD”.
We could have put any other text for the message. Now, lets enter the traffic direction. So, lets go to “FLOW” and lets put “ESTABLISHED” . In this way, I want the rule to fire after it has gone through the three-way TCP connection. That’s because this specific attack occupies the target’s socket after making the three-way connection.
After that, we ll go to “DETECTION_FILTER” “ TRACK” “BY_SRC”. In this way, I’m creating a detection filter and I want it to be tracked by the origin. So my objective is to detect the machine that is carrying out the attack.
Next, weremosll use “COUNT 60” and “SECONDS 20 “. This is because I want you to count 60 entries within the 10-second window. In this way, the rule will count the number of packages SYNs that will effectively establish connections. Also, if you have more than 60 entries in 20 seconds from the same source IP. Consequently, obeying the requirements of this rule, we can identify this specific DoS.
You can change and increase the amount of package for example. Also, you can increase the time window or reduce it. Consequently, this will depend on the behavior of your network and the type of anomaly you want to detect.
In some cases it is worth making changes to verify that it is not giving a false positive.
The “SID” will be the identification of this rule. Thus, the ideal is that you choose a different SID from the others that are already in those other rules that we enable. So I’m going to put a very high SID. After that we’ll set the rule review to 1. The rule review is very interesting to check for updates to the rules in the logs.
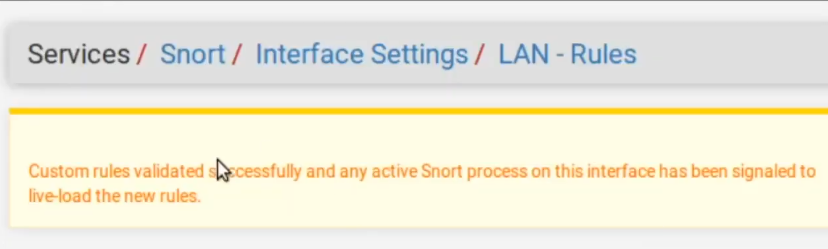
After that we will click Save. Next we will see the message saying that the rule has been successfully applied and is already operational.
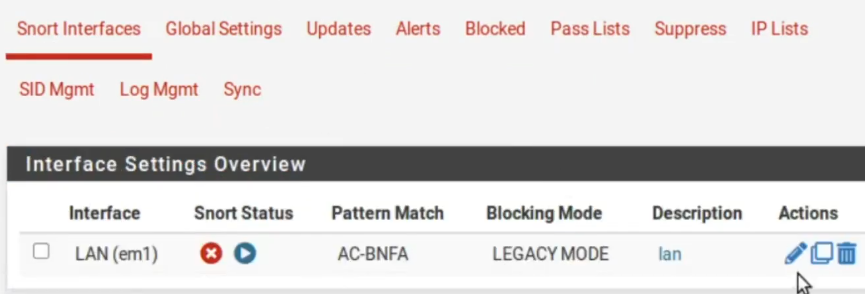
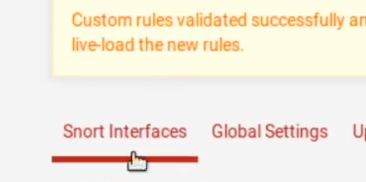
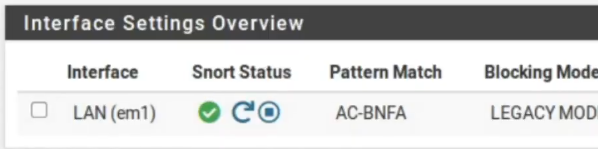
Starting the Snort Interface in pfsense
Now, lets go to Snort interfaces and lets start the interface.

Once initialized the interface will appear like this.
Testing Snort in pfsense
Now we can use a tool called Ettercap in Kali to check if Snort will detect and block the source IP. For this test, we have a WEB server inside the internal network and the ettercap tool is directed to this server. The idea is that the resources of the WEB server are consumed by the tool. This can be seen in the video HERE.
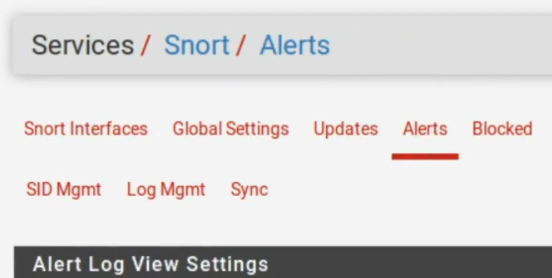
Alert logs
After that, we can see that alerts were generated. Thus, we have alerts from the origin 192.168.24.77. Thus, we can verify that Snort correctly detects the DoS behavior of the Ettercap tool.
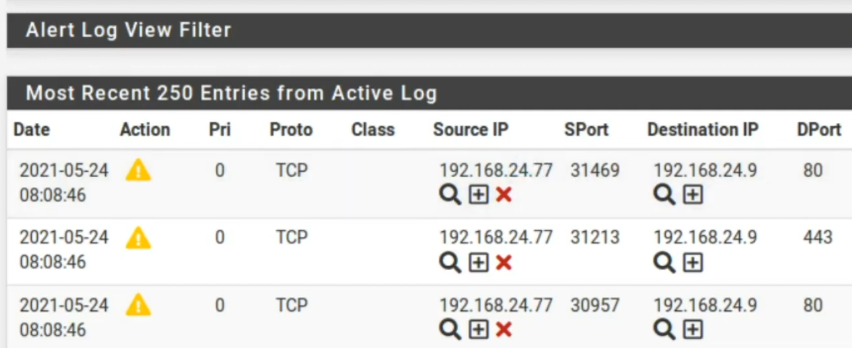
Moving to the left we can check the name of the rule we created. Also, we can see the SID of the rule.
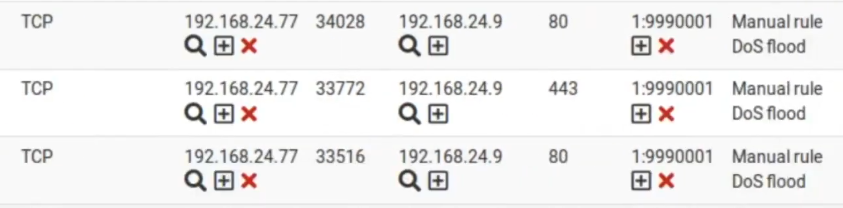
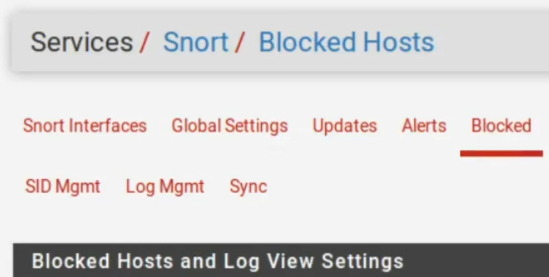
Testing snort blocking
It is noteworthy that Snort is working here as an IPS. Therefore, in addition to generating alerts, Snort also blocks the address that generated the alert. Consequently, we can see that the blocked IP was 192.168.24.77.

Then, using this setting, the machine that ran DoS will be blocked in PfSense and consequently will have its access to the internet blocked. This is because ‘Pfsense’ is being used as a gateway for machines on the internal network (LAN). Thus, we can prevent machines that are performing a DoS like this from having their access to the internet blocked.
It is noteworthy that it is interesting to block Internet access for machines that are performing anomalous behavior within your network. In this way, we can restrict internal data evasion and also a possible remote control of the machine used in DoS.
More details can be seen in the video below:
See more :
SquidGuard : Installation and Configuration
Proxy Squid: User Authentication
Squid Proxy: Filter clients by IP and MAC