
We will show how to import and insert a blocklist into Squidguard. This way, we can use different blocklists available on the Internet for our blocking rules. In addition, blocklists contain categories that divide domains and URLs that can be blocked.
Consequently, using blocklists makes the task of the network administrator easier.
Blocklists make the work of the network administrator easier due to saving search time for domains that must be blocked. This way, a network administrator can download a blocklist containing specific domains and use them on their network.
This post will show how to download the Blocklist for SquidGuard. Next, we will unzip the blocklist and copy it to the Squidguard database directory.
Also, we will show the blocklist of the Shallalist category structure. Afterward, we will add a block using a category from the blocklist.
We will then update the Squidguard database for the changes made. After that, we will run tests and discuss the proposed solution.
Install squid & squidGuard
To install squid and squidguard we can access the previous post HERE.
Alternatively, we have the video HERE.
Download Blocklist
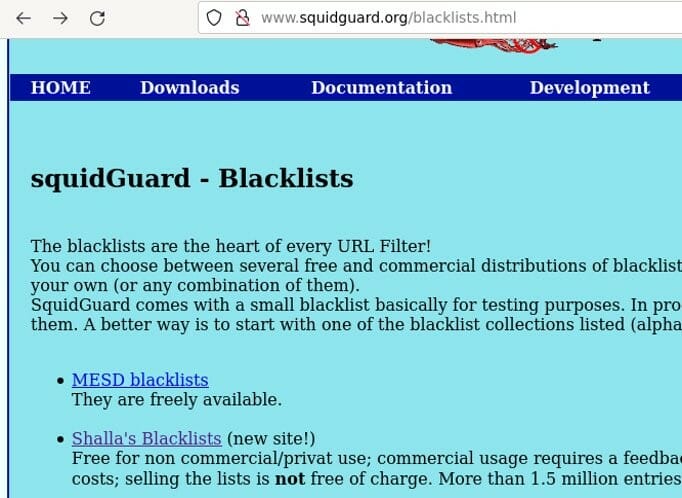
To download the blocklist, we can access the site: http://www.squidguard.org/blacklists.html . Next, let’s choose one of the blocklists. In this example, let’s use Shalla. So let’s click on Shalla.
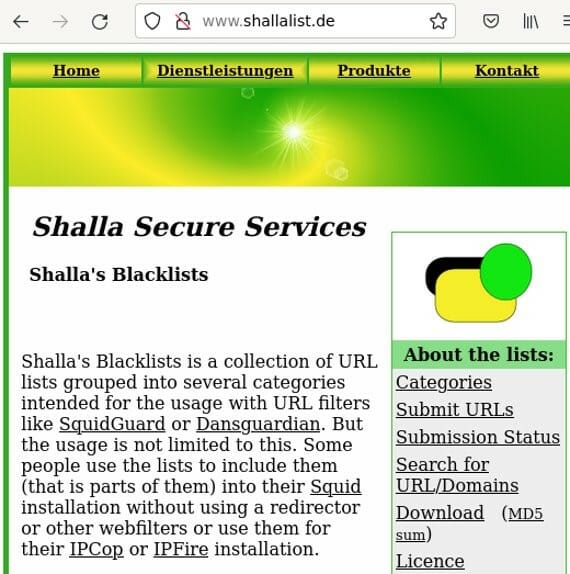
Within the Shalla website, we will access the Download section. After that, we’ll download the blocklist to a location on our computer. Note that the blocklist file is zipped.
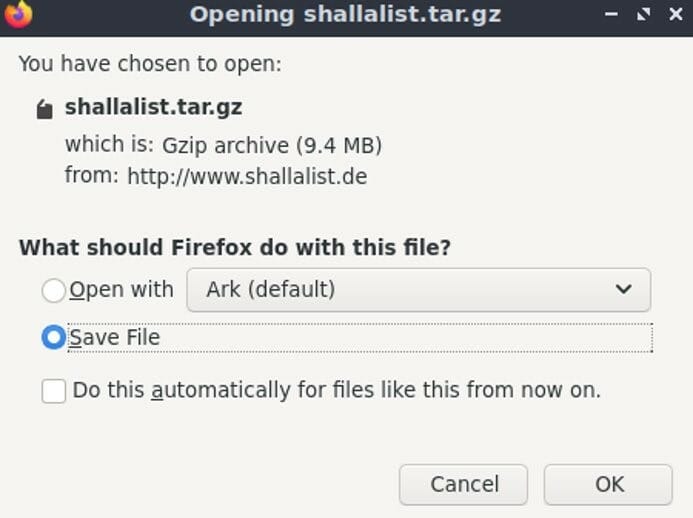
Unzip shallalist.tar.gz
Now let’s unzip the file we downloaded. It is noteworthy that it is important to check where the blocklist file was downloaded. So, to unzip we will use the command presented below:
tar -xvzf shallalist.tar.gz Check the categories
Let us check the categories that make up the blocklist that we unpacked. This way, we can check the different categories and analyze the domains and URLs that make up each category.
It is worth emphasizing the importance of dedicating time to analyzing these categories. In addition, if necessary, we can add or remove domains and URLs from the categories.
As an example, let’s go to a music category and check the domains that are listed. After that we will check a specific domain. Commands used as an example are listed below.
cd BL lscd music lscat domains | grep last Copy blocklist to squidguard
The next step will be to copy the blocklist to the squidguard database directory. So let’s copy the BL directory to /var/lib/squidguard/db/. In this way, we are copying the BL directory, which contains the blocklist, to the squidguard database specific directory.
We are using the command below as super user “sudo” and also with the option “-R”. In this way, weremosll make a recursive copy of the blocklist diretórios directory and its subdirectories.
sudo cp -R BL /var/lib/squidguard/db/ Blocking by category
Now let’s add a block using one of the categories from the imported blocklist. To do this, let’s edit the squidGuard.conf file and add a target-based rule. So, let’s call this rule “dest music ” and inside it well use the domainlist pointing to the blocklist directory, which is “BL/music/domains”.
Remember that this directory is within/var/lib/squidguard/db/. Therefore, as the beginning of the configuration file we already indicated that we will work with the database located in /var/lib/squidguard/db/.
sudo nano /etc/squidguard/squidGuard.conf Let’s add the “dest music ” rule before the ACLs . In this rule we are saying that we will use the domains and urls that make up the music category of the imported blocklist.
dest music{

domainlist BL/music/domains

urllist BL/music/urls

}
Now let’s add a condition to the default ACL. Thus, we add the condition “pass !block !music”. Consequently, this condition makes all traffic pass except what is blocked in the block rule and music rule. The block rule was created in the previous post about squidguard HERE. However, the music rule was created now in this post.
default {

pass !block !music

redirect http://admin.foo.bar.de/cgi-bin/blocked.cgi?clientaddr=%a&clientname=%n&clientuser=%i&clientgroup=%s&targetgroup=%t&url=%u

 }
Example of squidGuard.conf
Update the database
After the new rules are added, we will update the squidguard database. However, we need to give access permission for squid in the/var/lib/squidguard/db/ folder. So, lets use the command below.
sudo chown proxy:proxy -R /var/lib/squidguard/db/ Now, let’s use the command below to update the squidguard database.
sudo squidGuard -b -d -C all Then, we will again give permission for the squid to access the data from the database. This is because after the update, new files with extension “.db” were generated. Consequently, we need to ensure that squid has access to these files. So let’s use the command below.
sudo chown proxy:proxy -R /var/lib/squidguard/db/ Once all the configuration and database update is done, let’s restart squid. In this way, by restarting the squid, we will ensure that the changes are applied.
sudo service squid restart Tests
As a test, we can try to access some of the domains present in the music category of blocklist . In the video below the test was done for the last.fm website.
squidGuard.conf
#
# CONFIG FILE FOR SQUIDGUARD
#

dbhome /var/lib/squidguard/db
logdir /var/log/squidguard

dest music{
	domainlist BL/music/domains
	urllist BL/music/urls
	}

dest block {
	domainlist dalbert/block_domain
	urllist dalbert/block_url
}
# ACL RULES:
#

acl {
	#admin {
	#	pass	 any
	#}

	#foo-clients within workhours {
	#	pass	 good !in-addr !porn any
	#} else {
	#	pass any
	#}

	#bar-clients {
	#	pass	local none
	#}

	default {
		pass !block !music
		redirect http://admin.foo.bar.de/cgi-bin/blocked.cgi?clientaddr=%a&clientname=%n&clientuser=%i&clientgroup=%s&targetgroup=%t&url=%u
	}
}
The video with the entire setup tutorial is below:
See More:
Proxy Squid: User Authentication
SquidGuard : Installation and Configuration
Squid Proxy: Filter clients by IP and MAC
Squid Proxy for linux Installation and Configuration
Snort PfSense : Detect DoS Attack

Juliana Mascarenhas
Data Scientist and Master in Computer Modeling by LNCC.
Computer Engineer


