DHCP (Dynamic Host Configuration Protocol) is one of the most important services in a local network. It allows devices such as computers, notebooks, and smartphones to receive their network configurations (IP, Mask, Gateway, and DNS) automatically, eliminating typing errors and address conflicts.
In this tutorial, we will configure DHCP in two common ways in Cisco Packet Tracer: through a Dedicated Server and directly on a Cisco Router.
Laboratory Scenario
Infrastructure Tip: Before you start, make sure your simulator is working correctly. If you need help, check out our guide on how to install Packet Tracer on Linux.
Option 1: Configuring DHCP via Server (GUI)
To follow this guide, build a simple topology:
- One Generic Server.
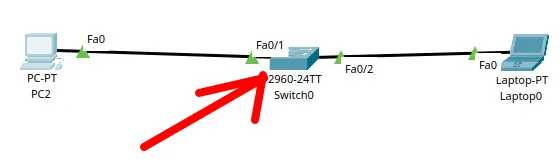
- One 2960 Switch.
- Two PCs.

This option is ideal for representing networks that have a Windows or Linux server managing the addresses.
Step 1: Server IP Configuration
The DHCP server must necessarily have a static IP.
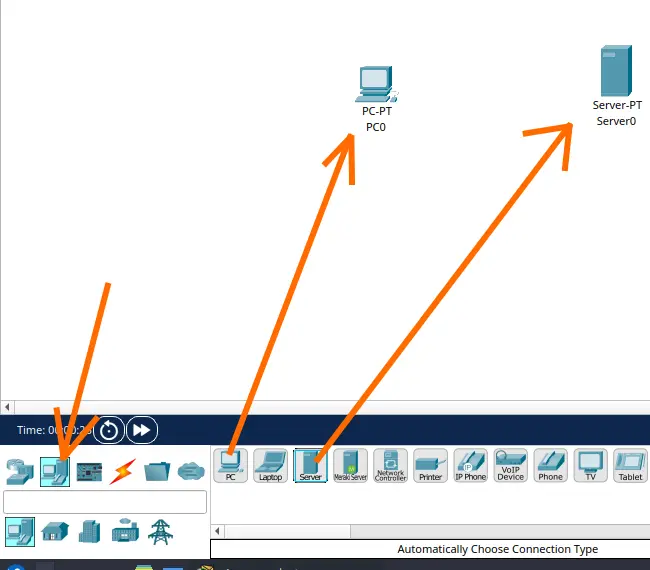
To do this, we will click on End Devices and select Servers.

Next, we will click on the Desktop tab and then select IP Configuration. And we will enter the fields below.
- IPv4 Address = 192.168.1.2 . This will be the DHCP server’s IP.
- Subnet Mask = 255.255.255.0. Here we will put the mask related to the server’s IP.
- Default Gateway = 192.168.1.1 . Here we put the IP of our default gateway.

Step 2: Service Activation
First, go to the Services > DHCP tab.

- Check the On option.
- Fill in the Default Gateway (
192.168.1.1) and the Start IP Address (e.g.,192.168.1.10). And put the mask (255.255.255.0). - Click on Save.

After clicking Save, we can see that at the bottom we already have our DHCP server information. We are configuring DHCP to lease IPs starting from 192.168.1.10.

Step 3: testing with computers
Now let’s insert 2 computers and 1 switch.
Since you have already done the other tutorials, you already know how to insert switches and computers.
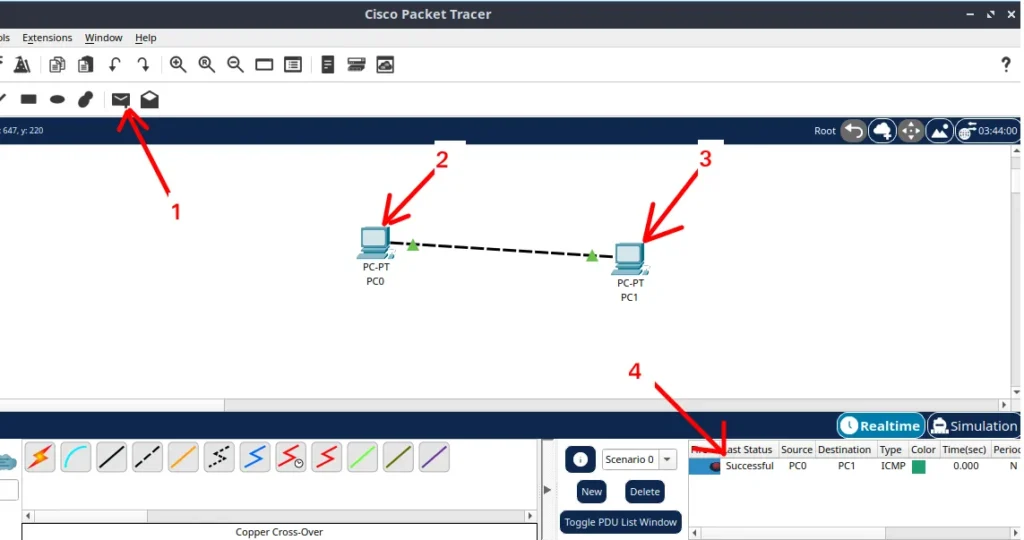
To verify if everything worked:
- Click on a PC > Desktop > IP Configuration.
- Change the option from “Static” to DHCP.
- Packet Tracer will display the message: “DHCP request successful”.

Do this for the other computer as well.

We can see that both computers got IPs automatically and additionally received information about the default gateway IP.
Option 2: Configuring DHCP on the Router (CLI)
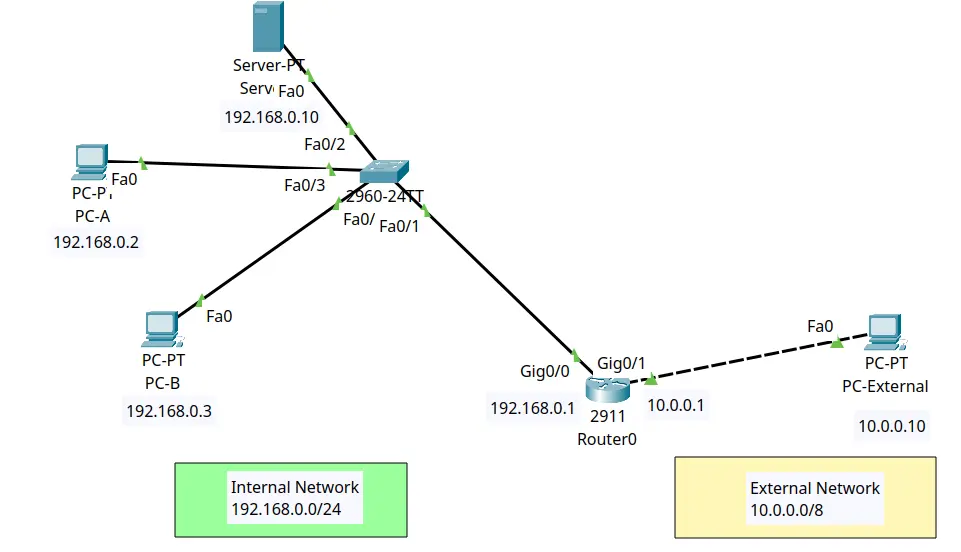
To follow this guide, build a simple topology:

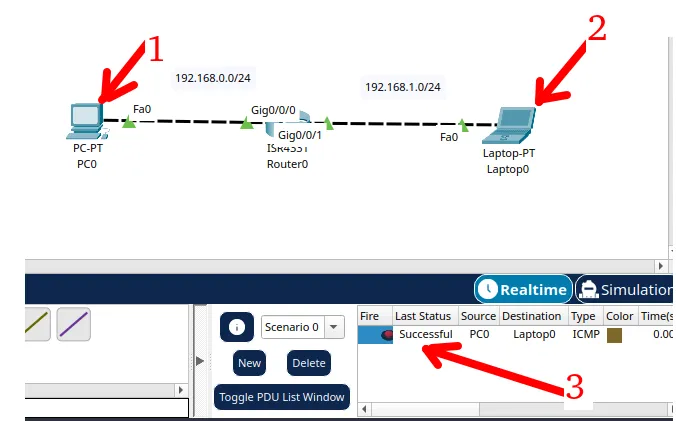
- One 2911 Router.
- One 2960 Switch.
- Two PCs.
In many networks, the edge router itself takes on the role of distributing IPs. We will use the command line interface (CLI).
First, let’s assign an IP to our router’s interface that is connected to the switch.

Now, let’s access the router’s CLI tab and type the commands below.
In this case, I issued two exit commands because we were already in “configure terminal” mode.
Router> enable
Router# configure terminal
Router(config)# ip dhcp pool MY_NETWORK
Router(dhcp-config)# network 192.168.1.0 255.255.255.0
Router(dhcp-config)# default-router 192.168.1.1
Router(dhcp-config)# exit
Router(config)# exit
Router# exit
An important rule: Exclude IPs that are already in use (such as the router’s own IP). See the command below.
Router> enable
Router# configure terminal
Router(config)# ip dhcp excluded-address 192.168.1.1 192.168.1.9
In this command, we are reserving IPs from 192.168.1.1 to 192.168.1.9 to use for the router, servers, or printers. This way, the DHCP will not lease these IPs to other machines.
Step 3: testing with computers
Since you have already done the other tutorials, you already know how to insert switches and computers.
To verify if everything worked:
- Click on a PC > Desktop > IP Configuration.
- Change the option from “Static” to DHCP.
- Packet Tracer will display the message: “DHCP request successful”.
Do this for the other computer as well.
We can see that both computers got IPs automatically and additionally received information about the default gateway IP.
Why is DHCP important?
DHCP saves time and prevents two computers from trying to use the same address on the network. To better understand how this communication happens under the hood, I recommend reading about how the network layer works.
Next Steps
If you are just starting out, try creating your first network with 2 PCs in Packet Tracer before advancing to routing with 1 router configurations.
Lab 1: Install Packet Tracer on Linux
Lab 2: Packet Tracer for Dummies: Setting Up Your First Network with 2 PCs (Quick Start Guide)
Lab 3: How to Create a Network with a Switch in Packet Tracer – Step-by-Step Guide for Beginners
Lab 4: Packet Tracer network with one router
Lab 5: Configure DHCP in Packet Tracer: Server & Router Guide
Lab 6: How to Configure NAT in Packet Tracer (Step-by-Step)
Lab 7: Tutorial: Web Server in Packet Tracer (Client-Server)
Lab 8: Tutorial: Using Port Forwarding in Packet Tracer
See more:
Packet Tracer for Dummies: Setting Up Your First Network with 2 PCs (Quick Start Guide)
Packet Tracer network with one router
How to Create a Network with a Switch in Packet Tracer – Step-by-Step Guide for Beginners
Install Packet Tracer on Linux

Juliana Mascarenhas
Data Scientist and Master in Computer Modeling by LNCC.
Computer Engineer