
Have you ever imagined being able to use two or more Internet links at the same time? Yes, it is possible to do this with Load Balance and PfSense. Additionally, setting up a load balance with PfSense allows you to optimize the utilization of each link at different speeds.
This tutorial teaches you how to configure load balance on a PfSense. In addition to the default load balance configuration, we’ll cover additional configurations that might be interesting for your scenario.
Tutorial Load Balance + Failover
Part 01: Configure Failover in PfSense
Part 02: Configure Load Balance with PfSense
Among the additional configurations that we will present we have: Flush all states when a gateway goes down, Skip rules when gateway is down, different weights for each gateway.
The figure below demonstrates a scenario where we have two outgoing links to the Internet and each link has its own Internet connection. In this way, pfsense allows LAN machines to access the internet using the two outgoing links using load balance.

Creating the Load Balance group in PfSense
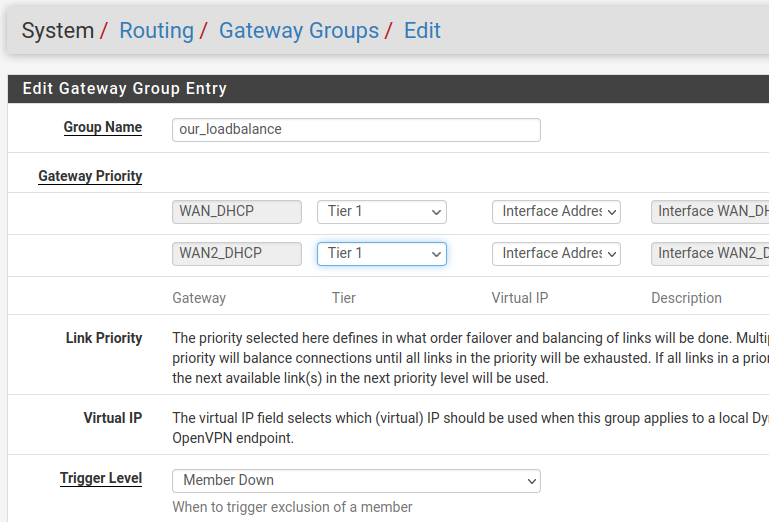
Let’s click on (System/Routing/Gateway/Groups/Edit) and then we’ll create a group for our loadbalance. In this case, we will use a name for the group “our_loadbalance”.
Note that we are using Tier 1 for both WANs. This is because, unlike failover, we are now looking to do load balancing. That is, the two links will operate normally and carrying traffic.
For (Trigger Level) we will leave the option to activate as (Member Down).
Configuring the rule for Load Balance
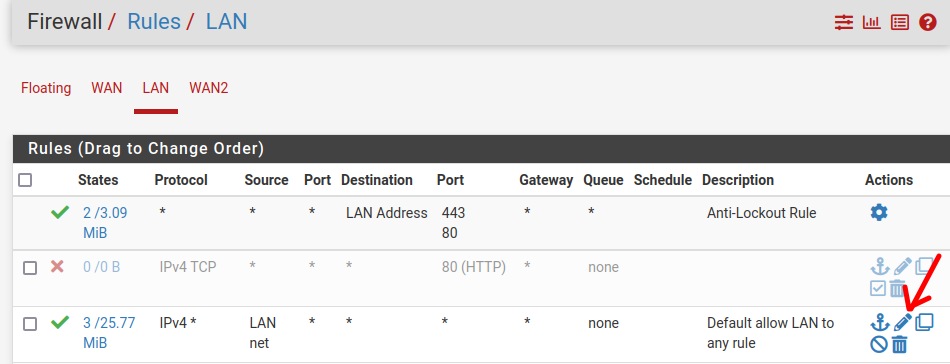
Let’s configure the LAN traffic permit rules to pass through our Loadbalance. To do this, we will access “Firewall/Rules/LAN” then we will edit the rule that allows the passage of standard traffic (Default allow LAN to any rule).
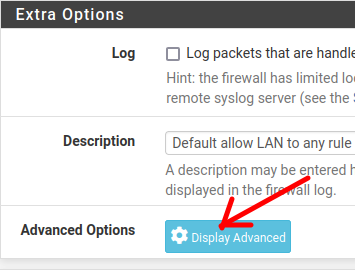
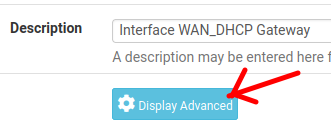
Now, let’s select the option (Display Advanced).
Now let’s look for the “Gateway” option and then select our group of gateways for Load Balance. In our case, the group used was “our_loadbalance”.
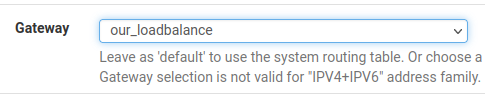
After that, let’s save. And apply the changes.

Testing PfSense Load Balance
Now we can access a machine from our LAN and use the traceroute command to check where our traffic is going.
(Note) If you don’t want to use the traceroute command, you can check this in various ways, such as making connections to web pages and checking pfsense logs or using the diagnostic tool (Packet Capture).
In the figure below, we made a traceroute for google DNS (8.8.8.8). We can see that part of the traceroute responses on the first hop are coming from 10.0.2.2 (WAN Gateway 1) and 172.16.16.1 (WAN Gateway 2).

Additional settings for Load Balance in Pfsense
We will present below some additional configurations that may be interesting for different scenarios. Therefore, we should check what the basic requirements of our network will be before deciding on what additional configurations we are going to use in the pfsnese load balance.
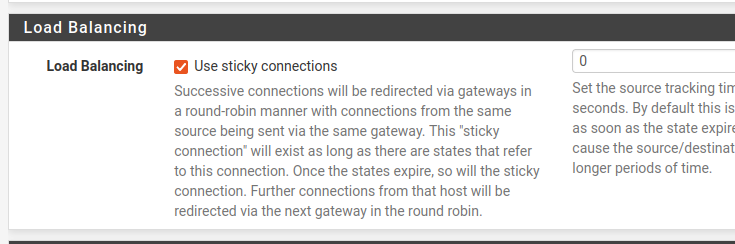
Configuration to maintain connection
We can use a configuration to maintain connections through one of the chosen gateways. In this way, connections from the same source host will follow the same gateway until there are no more connection states or the time expires due to a manual configuration.
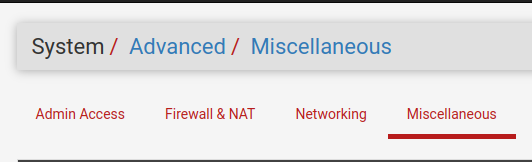
To do this, let’s access (System/Advanced/Miscellaneous) and then look for the “Load Balancing” field
Configuration for monitoring Gateways
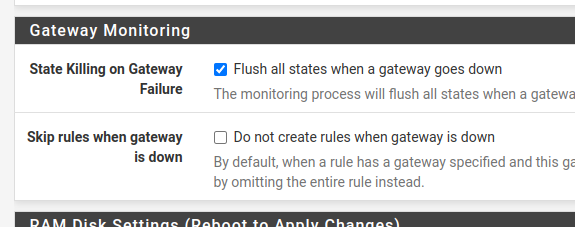
Next, we will search for “gateway Monitoring” and we will select the option “Flush all states when a gateway goes down” within “State Killing on Gateway Failure”. Then go to the bottom of the page and click on “Save”.
The option “Flush all states when the gateway goes down” allows you to reset the states of connections that were using the failed gateway. This way, it allows new connections to be made using the new gateway you took over.
There is another option inside Skip rules when gateway is down is “Do not create rules when gateway is down”. By enabling this option, rules specific to a gateway will be disregarded when the gateway is disabled. This may make sense in some cases and will depend on your business scenario. In this tutorial we will not enable this option.
Configuring different weights for each Gateway
In most cases the different provider links we have have differences. In this way, we may have slower links or quality of service restrictions. However, we can use weights for each gateway in order to optimize the use of each gateway.
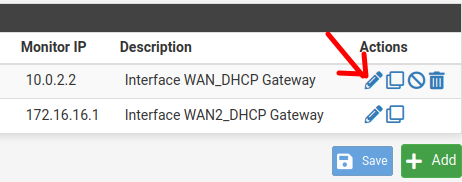
Let’s see now, how to configure weights for each gateway. For that, we go to (System/Routing/Gateways).
Next, let’s edit one of the gateways. In this case we will edit the first gateway.
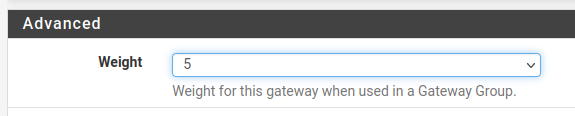
Then go to the bottom of the page and click on “Display Advanced”.
Then we will have more options available. However, we are going to use the “Weight” option which will be the gateway usage priority weight. Thus, if we want a gateway to have more priority of use over another gateway, we must increase its weight.
Here in the example we will increase the weight to 5. This way, we will use WAN 1 5 times more than WAN 2.
After that save and apply the changes.
Testing Load Balance with different weights
Now, if we want to test with the traceroute command on the client machine, we will verify that most of the route chosen is using WAN 1. This is because we assign a greater weight to the WAN 1 gateway.

Creating the Test Scenario
We are assuming that we already have a pfsense installation in virtualbox. If you still don’t have it, I suggest you do the steps described in the video below:
After that, let’s add a NAT Network interface in virtualbox. Thus, in our test scenario we will have two outputs to the internet, one through virtualbox’s default NAT network and another through a NAT network that we are going to create.
(Note) – We have a video showing the entire setup at the bottom of this page.
Creating the second WAN
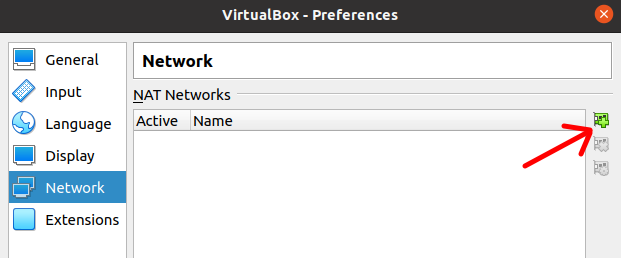
Initially let’s select the File menu of virtualbox and then Preferences.

After that, we are going to select Network and we are going to click on the add icon.
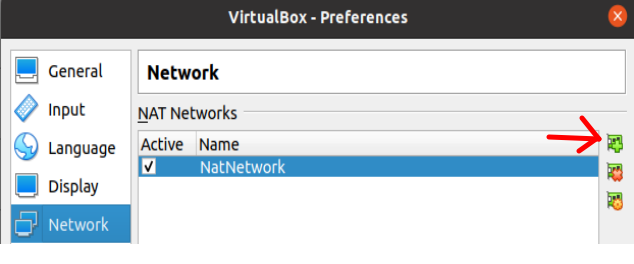
If you haven’t added a NATNetwork before, your first such network will be created.
Now let’s click on the add new NATNetwork network icon again. That’s because we want to create a second NATNetwork.
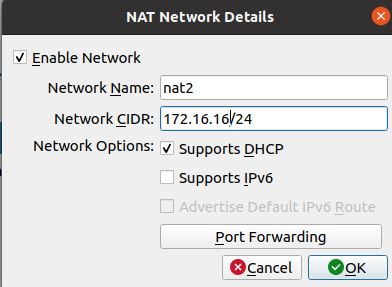
For the second NATNetwork we will name it “nat2”. Also, we are going to use the 172.16.16.0/24 subnet. It could be another network range of your choice.
(Note) It is important to leave DHCP support enabled. That way, we won’t have to manually enter IPs on machines that use this NATNetwork.
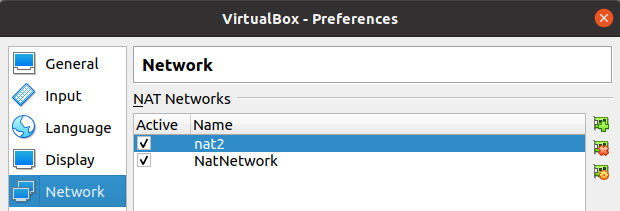
We can see in the figure below that there are two NAT Networks.
Configuring the Pfsense Machine
Now let’s select the virtual machine that we are going to use for pfsense and click on Settings.

After that, we’ll go to Network and we’ll choose the types of networks we’re going to use for the network adapters.
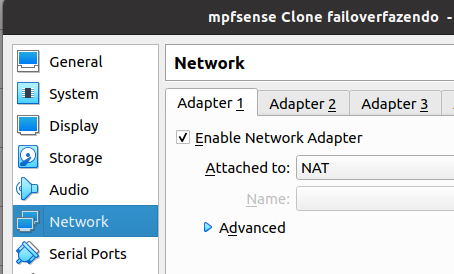
On the first network adapter (Adapter1) we are going to use VirtualBox’s default NAT network.
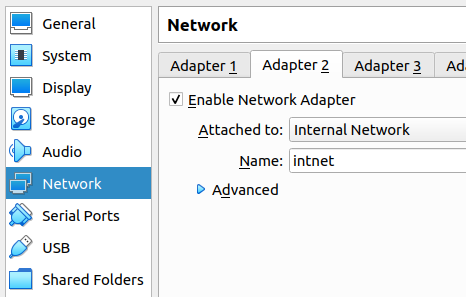
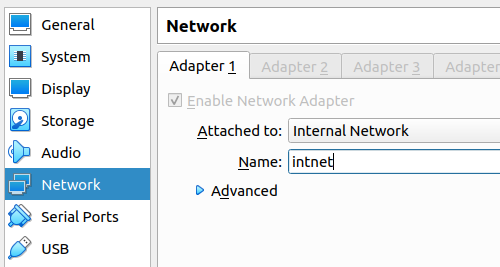
The second network adapter (Adpter2) we will use the interface in “Internal Network” mode and with the name “intnet”. That way, we can access the Pfsense WEB configuration interface using another virtual machine.
(Note) – We must remember that the virtual machine that will access pfsense must have an “Internal Network” interface and with the same interface name “intnet” that we use for the PfSense LAN.
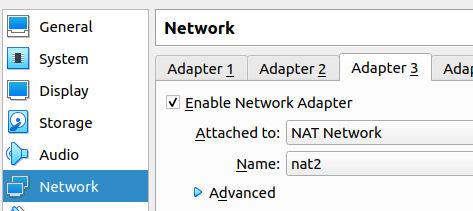
Next we will enable the third network adapter (Adpter3) and we will add it to the Nat Network we recently created “nat2”.
Configuring the PfSense LAN Interface
To configure the LAN interface of the virtual machine where you are installing pfsense, let’s use the Pfsense terminal configuration interface. That’s because, in this case, we still don’t have a way to access the pfsense WEB interface. Therefore, we cannot perform the configuration using a browser from another Pfsense LAN-connected machine.
Now let’s boot the virtual machine and open the configuration console. Next, we will type “2” to allow (Set Interface(s) IP address). We are wanting to enter an IP for our LAN. So let’s choose the “2 LAN” option.
Note- In your scenario the LAN may be in another order. So watch out for any changes to this order of interfaces.
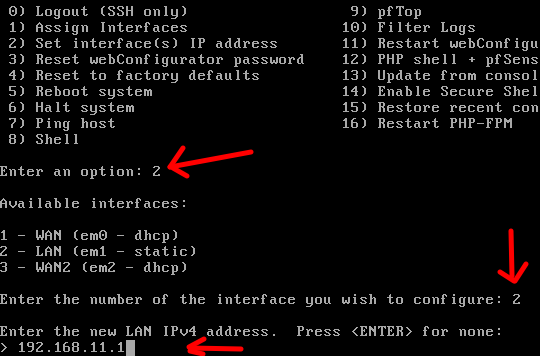
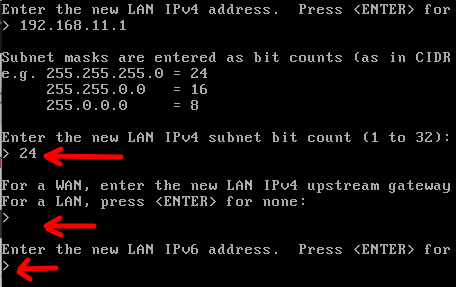
Now, let’s enter the netmask. In this case, we are going to use a 24 mask. Next comes the question whether we are configuring a WAN or a LAN. In our case it’s a LAN , so let’s hit ENTER.
Later, the question arises if we are going to use IPv6. In this case, we are not going to use IPv6. However, if you want to use it, this would be the time to configure it.
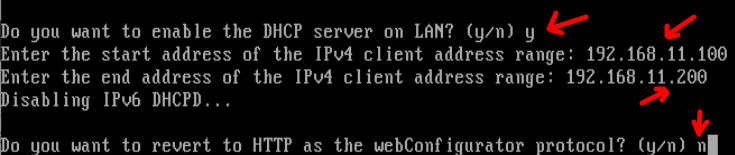
Now, let’s enable DHCP. In this way, we will be able to donate IPs to the machines that are connected to our LAN. To enable DHCP, let’s answer “y”. Then we will enter the range of IPs that will be donated via DHCP. In this case, we will use 192.168.11.100 as the first IP to be donated and 192.168.11.200 as the highest IP to be donated via DHCP.
Lastly, we will have a question related to reverting the webconfigurator protocol to HTTP. In this case, we will answer with “n” because we are not interested.
Now, let’s use another virtual machine to be used as pfsense’s LAN client. For this, it is important that the network interface of the client machine is in the same PfSense configuration. That is, in our case the interface must be configured as “Internal Network” and named “intnet”.
After that we will boot the client machine.
Starting 2nd WAN Setup
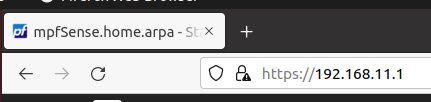
Now let’s boot our client virtual machine and access the pfsense web interface. For this, we will use launch the browser and enter the IP that we configured for the pfsense LAN. In this case the IP was 192.168.11.1.
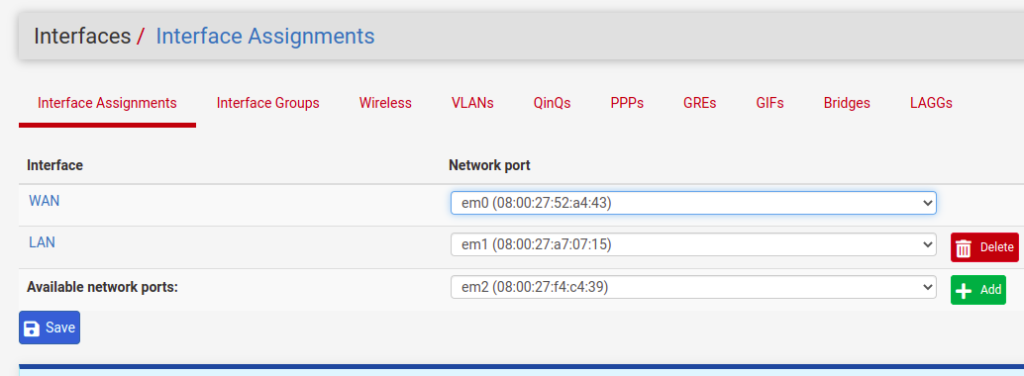
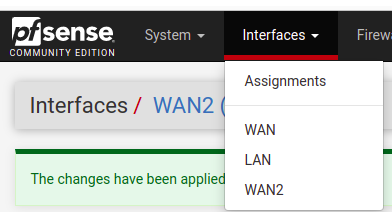
Then, in the main menu, click on Interfaces and then on Assignments

Note that we now have a new interface possibility. So, click on “+Add”
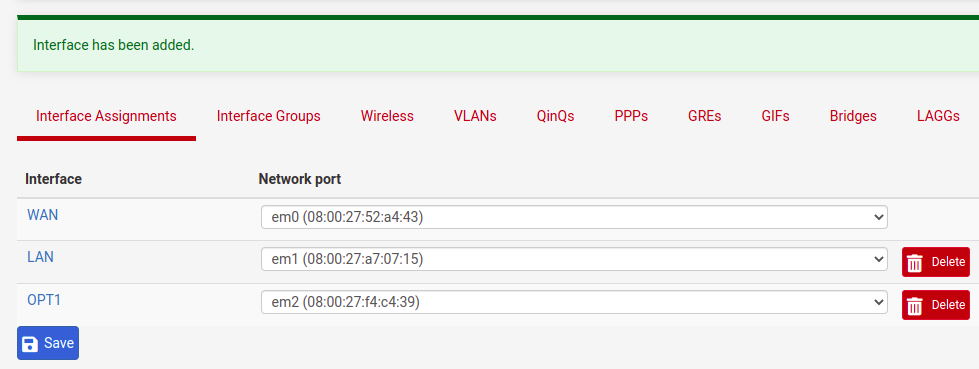
After clicking on “+Add” we will see a new interface with the name “OPT1”. So let’s click on “OPT1” and let’s edit.
Now, let’s change the name of the interface to “WAN 2” and let’s use the option to receive IP by DHCP.

Now let’s go to the bottom of the page and click on “Save”.

Okay, now let’s click on “Apply Changes”. That way, we’ll ensure that the changes we’ve made are applied.

Now we can see that we have a total of 3 interfaces.
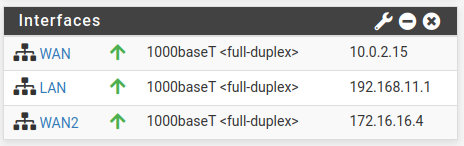
Also, if we go to the pfsense splash screen, we will see the IPs of each interface. In this way, we can see in the figure below that we have the LAN using an IP 192.168.11.1 that is being used with the interface in “Internal Network” mode in VirtualBox. Then we have the IP 10.0.2.15 for the interface that is in NAT. And then we have the IP 172.16.16.4 for the interface that is in network NAT nat2.
As a result, we now have two WAN interfaces one for 10.0.2.15 and one for 172.16.16.4. In this way, we are emulating our scenario to have two different ISPs .
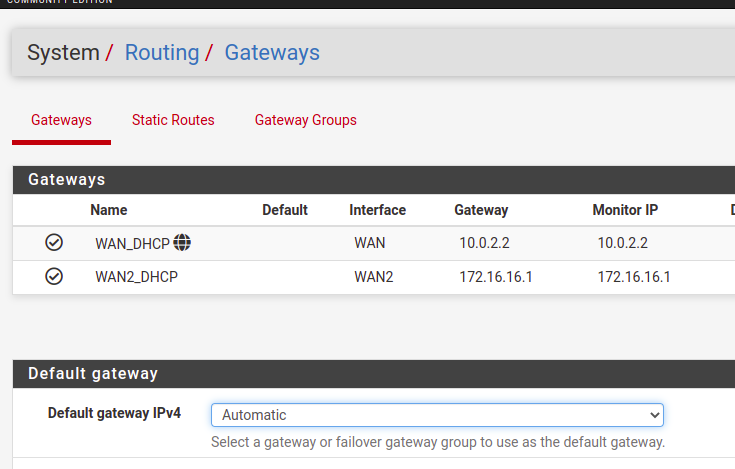
Now let’s click on System/Routing/Gateways. We can see that we now have 2 gateways, as in the figure below.
Alright, we’re done with setting up the test scenario here for configuring Load Balance using PfSense.
See Also:
Arpwatch: Installation and Configuration
PfBlockerNG: Exception List for Clients
pfBlockerNG Customize Blocklist
Additional links:
https://docs.netgate.com/pfsense/en/latest/multiwan/policy-route.html
https://docs.netgate.com/pfsense/en/latest/routing/gateways.html#routing-gateways-manage-default

Juliana Mascarenhas
Data Scientist and Master in Computer Modeling by LNCC.
Computer Engineer


