In corporate environments, it is very common for servers to lack direct internet access. All network traffic must go through a proxy. If you try to pull a Docker image (docker pull) in this scenario without the correct settings, the command will fail or hang indefinitely.
In this tutorial, you will learn how to configure Docker to run behind a proxy permanently using systemd. We will use practical examples of configuring environment variables (HTTP_PROXY, HTTPS_PROXY, and NO_PROXY).
Prerequisites
Before you begin, you will need:
- A Linux server with Docker installed.
- Terminal access with
sudoprivileges. - The IP address and port of your proxy server (in our example, we will use
http://172.24.0.254:3128/).
Step 1: Create the Docker Configuration Directory
By default, Docker does not read global system proxy variables. We need to create a specific directory to override the Docker service configurations.
Open your terminal and run the following command to create the docker.service.d folder:
sudo mkdir -p /etc/systemd/system/docker.service.d
Step 2: Create and Edit the Proxy Configuration File
Now, let’s create the file that will contain the proxy instructions. We will use the nano text editor (you can use vim if you prefer).
sudo nano /etc/systemd/system/docker.service.d/http-proxy.conf
Inside this file, paste the following content (adapt the IPs and ports to your network’s reality):
[Service]
Environment="HTTP_PROXY=http://172.24.0.254:3128/"
Environment="HTTPS_PROXY=http://172.24.0.254:3128/"
Environment="NO_PROXY=localhost,127.0.0.1,mysql-server,zabbix-server,192.168.24.0/24"
Understanding the variables:
[Service]: Indicates that these configurations belong to the systemd service.HTTP_PROXYandHTTPS_PROXY: Define the proxy server address Docker will use to access the internet.NO_PROXY: A comma-separated list of addresses that should not go through the proxy. This is crucial for internal communication. It includeslocalhost,127.0.0.1, internal container/server names (mysql-server,zabbix-server), and local network IP ranges (e.g.,192.168.24.0/24).
Save the file and exit the editor (In nano, press CTRL+X, then Y, and Enter).
Step 3: Apply the Configurations (Crucial Step)
Many tutorials forget this step. Docker will not recognize the new configurations just by creating the file. You need to reload the systemd daemon and restart the Docker service.
Run the following two commands:
sudo systemctl daemon-reload
sudo systemctl restart docker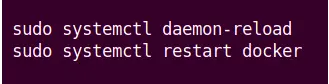
Step 4: Verify if the Proxy was Applied
To ensure Docker has absorbed the environment variables, you can run the following command:
sudo systemctl show --property=Environment dockerThe output should display exactly the variables you configured in Step 2.
Step 5: Testing the Connection (Docker Pull)
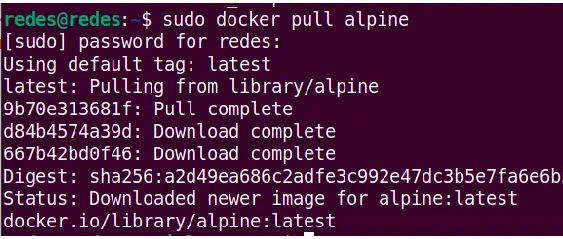
Now comes the final test. Let’s try to download a lightweight image, such as alpine, to validate the configuration.
Run the command:
sudo docker pull alpineIf everything is configured correctly, you will see an output similar to this, showing the download succeeding through the proxy:
Extra Tips and Troubleshooting
- Proxy with Authentication: If your proxy requires a username and password, change the URL to:
http://username:password@172.24.0.254:3128/. - Connection Errors: If
docker pullfails, verify that the proxy IP is correct and that the Docker server has firewall permission to access the proxy port (3128 in our example). - Containers Cannot Access the Internet: Remember that this configuration affects the Docker Daemon (for downloading images). For running containers to use the proxy, you need to pass the environment variables (
-e HTTP_PROXY=...) when you rundocker run, or configure them in yourDockerfile/docker-compose.yml.
Conclusion
Configuring Docker to operate behind a proxy is an essential task for restricted corporate environments. With the systemd configuration shown in this guide, you ensure that the Docker service can download images from the internet seamlessly and securely, respecting your company’s network rules.

Juliana Mascarenhas
Data Scientist and Master in Computer Modeling by LNCC.
Computer Engineer