
We will show how to install OpenWrt on Raspberry Pi. In this way, we can use Raspberry Pi as a WIFI router.
The interesting thing about using OpenWrt with Raspberry Pi is that we can use several applications within OpenWRT.
This article is the first part of a series of videos using OpenWRT.
Therefore, this article presents the steps necessary to install OpenWRT on Raspberry Pi.
The following article will show how to configure OpenWRT into a wireless router.
Image maker download
Now let us download an image maker. In this case, we will use the rpi-imager from the raspberry pi.
So, let us access the website below and click on the image creator for our operating system.
https://www.raspberrypi.com/software/

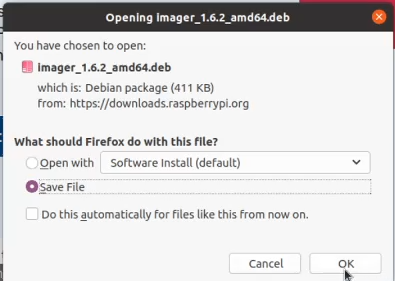
Installing the rpi-imager
After downloading, let’s install rpi-imager.
Thus, the installation can be done using installation managers of “.deb” packages. Alternatively, we can use the command below to install:
sudo dpkg -i imager_1.6.2_amd64.deb Openwrt image download
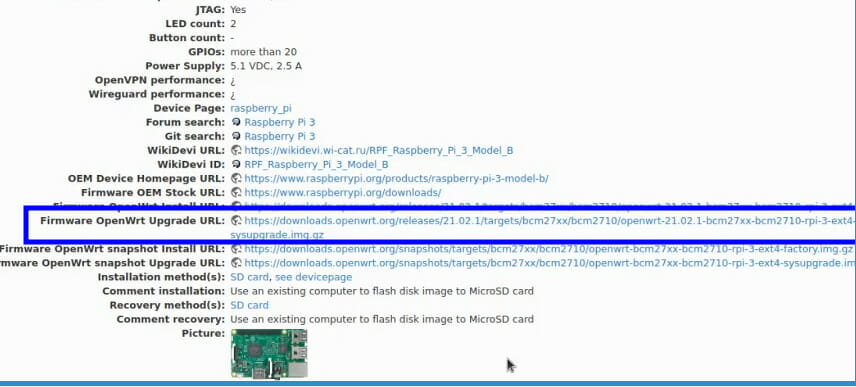
Now let’s download the openwrt image compatible with your raspberry pi device. For this, we will use the website below:
https://openwrt.org/toh/raspberry_pi_foundation/raspberry_pi
Then, select the link referring to your model in the Technical Data column.

Then, we will be redirected to the page with the images referring to our raspberry pi model.
Then, select the option “Firmware OpenWrt Upgrade URL”. Then download the image.
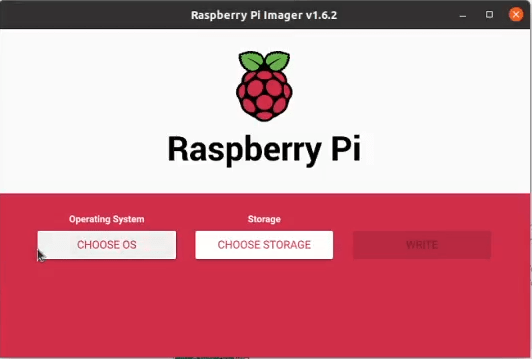
Using the openwrt image in rpi-imager
First of all, insert the SD card into your machine.
Now let us access rpi-imager and select the image from OpenWRT.

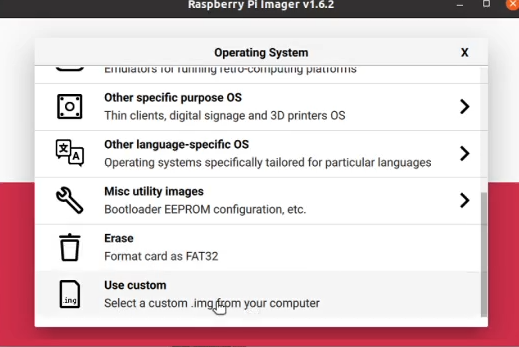
Then click on “Choose OS”. After that, select the option “Use custom” and the image of the OpenWRT. Then, the rpi-imager will ask to confirm and start writing to the SD card.
Inserting the card with the image into the raspberry pi
After transferring the image to the SD card, insert it into the raspberry pi and start the device.
Changing the interface network to the same openwrt network
Then connect an RJ45 cable to the raspberry pi and our computer.
After that, we changed our computer’s wired interface network to the same range as the raspberry pi.
In this case, let us change the computer’s wired interface IP to “192.168.1.2” using the mask “255.255.255.0” or “/24”.
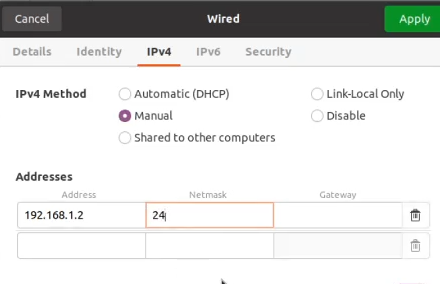
This IP change of your computer’s interface will allow the wired interface to communicate with the raspberry pi IP. Thus, the raspberry pi IP is 192.168.1.1 .
Accessing openwrt using the browser
Now let’s access the openWRT WEB interface, also called luci. For that, let’s open a browser on the machine connected to the raspberry pi and type http://192.168.1.1
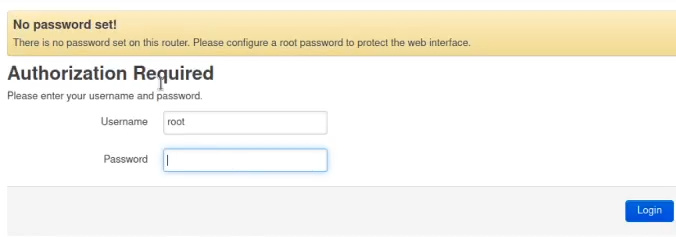
Then you will be asked for a password. In this case, the password is pi . Yes, simply “pi”.
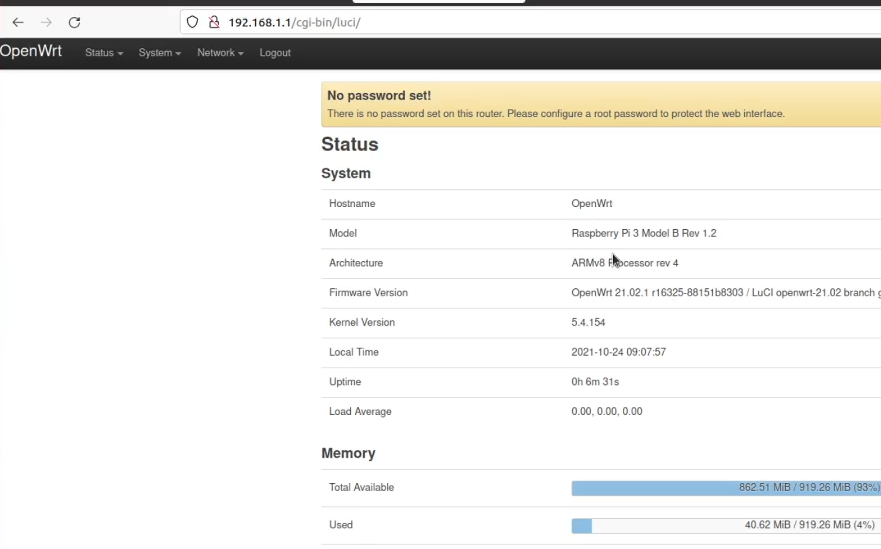
Okay, now you are inside the openWRT configuration interface. That way, you can use the graphical interface to make settings faster.
Comment if you are interested in this type of article.


