
This is an installation tutorial for the Packet Tracer network simulator.
Packet tracer is an excellent tool to improve skills related to computer networking.
In addition, we can test protocol and topology configurations before implementing them in a real environment.
Downloading Packet Tracer
To download the Packet tracer we can use the link below.
https://www.netacad.com/resources/lab-downloads
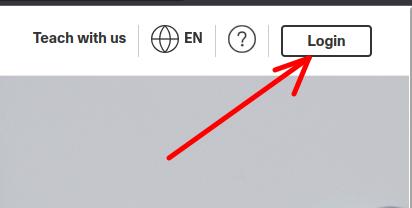
Next, let’s click on the login symbol (top right corner) on the screen as shown in the figure below.
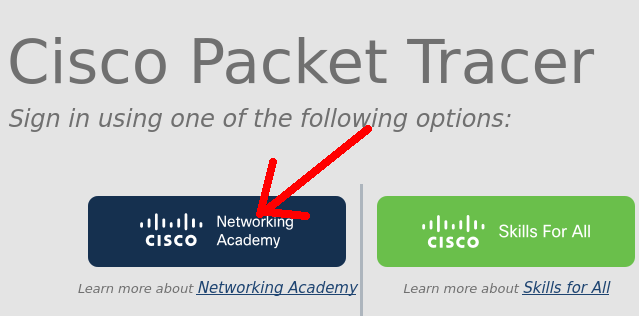
Now, let’s choose the login form we will use. In this case, we’ll use login via Networking Academy.

Once the login has been selected, we will be directed to the page where we must enter the e-mail and password registered with the Networking Academy.
If you don’t have an account, you can click Sign-UP and register.
Choosing Packet tracer version
After logging in, we will be redirected to the Networking Academy page.
Let’s go down the page to the part that has the packet tracer files for download. In that case, choose the packet tracer for your operating system.
In this tutorial we will choose the packet tracer for Linux. However, you can choose the installation package for your preferred operating system such as Windows or MacOs.

Installing Packet Tracer
Now, let’s enter the directory where we downloaded the packet tracer.

Now let’s install the package using the command below.
sudo dpkg -i Packet_Tracer*.deb
During installation, you will be asked if you agree with the software license terms.
The figure below demonstrates that there were problems with some package dependencies. This can occur depending on the Linux distribution and version.
However, it’s not a complex thing to solve, you just need to check which packages are missing and install them.
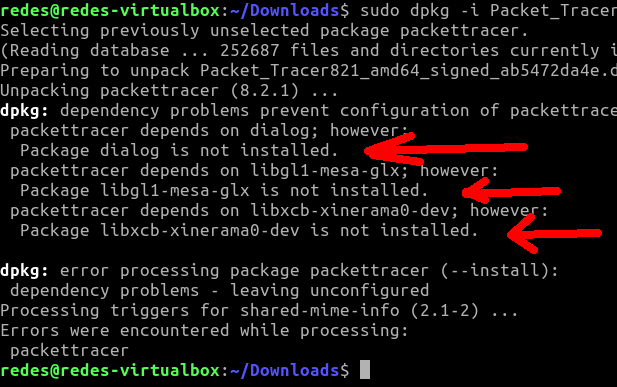
In this case, let’s install the packages required in the picture above. In your installation the required packages may be different.
So, look at what packages are being requested in the dependency error message.
The command below installs the packages requested in the dependencies error.
sudo apt-get install dialog libxcb-xinerama0-dev libgl1-mesa-glx
The figure below shows the result of the above command.
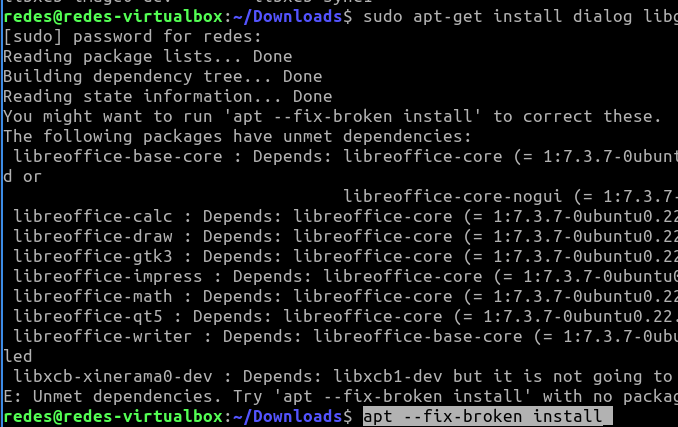
We can see that even installing the additional packages we still need to fix the broken dependencies.
To solve this problem of dependencies, let’s use the command below.
sudo apt --fix-broken install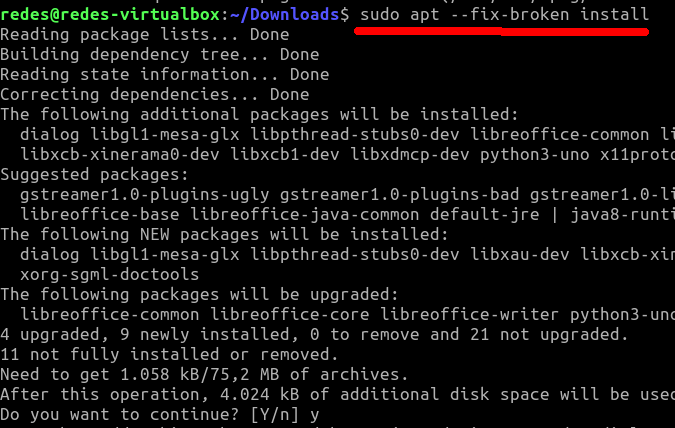
Solving the problem of libgl1-mesa-glx in Packet Tracer
In newer versions of Ubuntu the lib “libgl1-mesa-glx” can no longer be installed using the “apt” command because this lib is no longer in the repositories. In this case, you will see an error like that of the figure below.

To resolve this error of libgl1-mesa-glx, we will go to the page containing libgl1-mesa-glx using the link below.
https://pkgs.org/download/libgl1-mesa-glx

Within the page you will search for the distribution closer than you are using.
In my case, I have Ubuntu 24 but the page only has the “libgl1-mesa-glx” up to Ubuntu 23. So, I’m going to download the “libgl1-mesa-glx” to Ubuntu 23 amd64.
When selecting the “libgl1-mesa-glx” for Ubuntu 23 amd64 we go to the page below. On this page we will go down to the Download section and we will copy the link to download the “libgl1-mesa-glx“.

After that we will start downloading lib libgl1-mesa-glx.

Now, let’s use the command below to install the lib “libgl1-mesa-glx” with dpkg.
sudo dpkg -i libgl1-mesa-glx_23.0.4-0ubuntu1~22.04.1_amd64.deb 
Now, we can install the others libs “dialog libxcb-xinerama0-dev” using the command below.
sudo apt-get install dialog libxcb-xinerama0-dev
Now we can install the Packet Tracer with the command below.
sudo dpkg -i Packet_Tracer*.deb
And finally his Packet Tracer was installed.
Accessing Packet Tracer
Now we can access the packet tracer using the command below.
packettracer
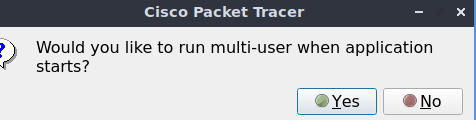
The packet tracer application will ask if the user wants to use the application in multi-user mode. In this example, we will respond with “Yes”.
Next, let’s go to the login screen. On this screen, we’ll select the email and password we use at Networking Academy.
After logging in, we will have access to the Packet tracer and we can start improving our networking skills.
See more:
- Lesson 1: Install Packet Tracer on Linux
- Lesson 2: Packet Tracer for Dummies: Setting Up Your First Network with 2 PCs (Quick Start Guide)
- Lesson 3: Create Network Switch packet tracer
- Lesson 4: Packet Tracer network with one router
Snort PfSense : Detect DoS Attack
How to create a port forwarding

Juliana Mascarenhas
Data Scientist and Master in Computer Modeling by LNCC.
Computer Engineer

Congestion Control in Networks: Optimizing Efficiency and Bandwidth Allocation
This technical post breaks down congestion control mechanisms, focusing on the role of the transport…

AIDE : IDS for Linux Ubuntu Installation and Configuration
We present an IDS Installation and Configuration Tutorial on Linux Ubuntu. AIDE is also known…
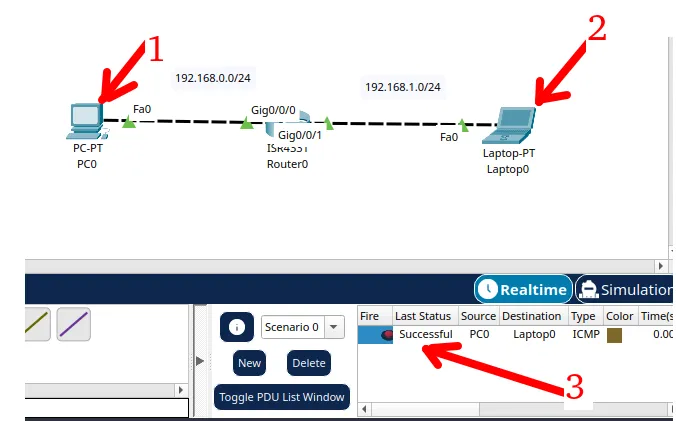
Packet Tracer network with one router
In this tutorial, we will show you how to configure a network with just one…

How to Use Snap Behind a Proxy on Linux (Step-by-Step Guide)
In this guide, you’ll learn how to configure Snap to work behind a proxy, even…
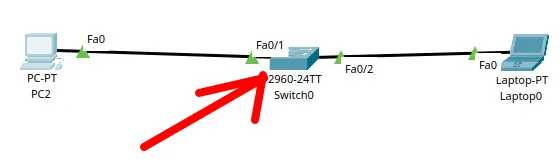
How to Create a Network with a Switch in Packet Tracer – Step-by-Step Guide for Beginners
In this practical tutorial, I will show you how to create a simple switch network…
Why use Kali Linux inside VirtualBox?
In this article, we will see the main reasons for considering the use of Kali…