We will demonstrate how to edit the hosts file on Linux, Windows, and Mac. Also, let us practical experiment with the hosts file.
Do we still have hosts?
Yes, most operating systems have a hosts file.
If we are using Linux, we can find the file in the path “/etc/hosts,” and if we are using Windows, we can find the file in the path “c:\windows\system32\drivers\etc\hosts “
Practice with hosts.
Let’s edit our hosts file to demonstrate how we can map a name to an IP. First, we will map the name “dns” to an IP “127.0.0.24”.
Of course, we could map another IP and another name, but we will use this example due to the simplicity of the configuration.
We’ll show you some ways to do this, depending on your operating system.
Editing hosts on Linux or Mac
Let’s edit the /etc/hosts file with some text editor. We will edit inside a Linux machine using the nano edit in this example.
For this, we will use the command below with administrator privileges.
sudo nano /etc/hosts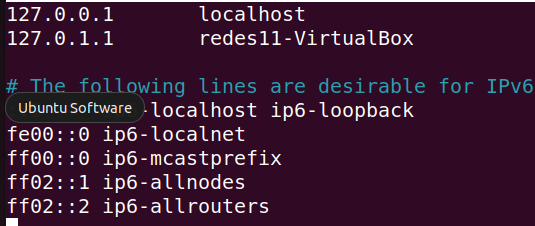
Next let’s edit the file by inserting a loopback IP = “127.0.0.24” and the name “dns”.
Note. We could create a name for any other IP you would like to access for example (8.8.8.8 dnsgoogle).
127.0.0.24 dns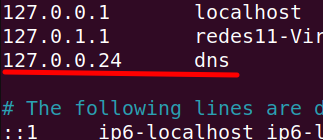
Now let’s save the change. If you are using the nano editor, as we are using, you can press Ctrl + x . Then confirm with Y for Yes and press ENTER.
Now let us test using the ping command and the name we gave to our IP. In this example, we will use the command below.
ping dns
Editing hosts on Windows
Let’s look for Notepad and right-click on “Run as Administrator”.

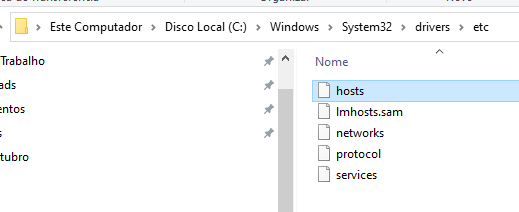
Now let’s click on File and open. Then let’s select the path below.
C:\Windows\System32\drivers\etcIt’s worth checking that the option to display all files is selected. Otherwise, notepad only shows files of type text.

Then let’s select the hosts file.
Next let’s edit the file by inserting a loopback IP = “127.0.0.24” and the name “dns”.
127.0.0.24 dnsNote. We could create a name for any other IP we would like to access, for example (8.8.8.8 dnsgoogle).
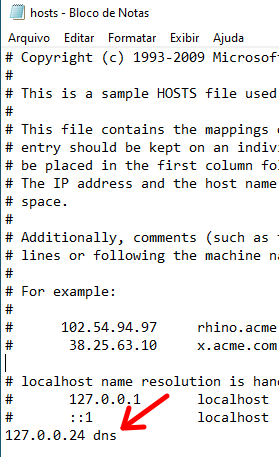
After that we will save the changes.
Next, let’s test it by opening the terminal with cmd in the run menu.

Now let’s type in the terminal the ping command and the name we gave to our IP. In this example, we will use the command below.
ping dns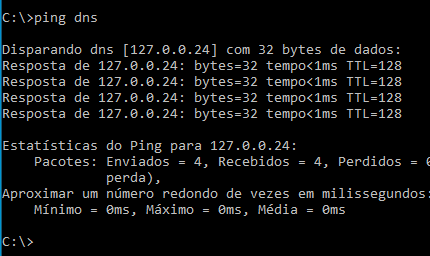
We can see in the figure above that the name “dns” is linked to the IP that we previously configured “127.0.0.24”.
See more at :
Install OpenVPN Client on Windows
How to install Zabbix on Raspberry Pi
Comment on our channel if you liked it: Click here

Juliana Mascarenhas
Data Scientist and Master in Computer Modeling by LNCC.
Computer Engineer

