This is a tutorial that will present a basic configuration of an email server using Postfix and Dovecot. The idea here is to configure an email server to enable sending and receiving emails among internal clients.
Because it is an asynchronous communication, email is ideal for communications in which a user does not need to wait for the recipient user to be online.
Thus, when we send an email, the recipient will only have access to it at the moment they connect to their email inbox.
Installing and configuring Postfix
We will use Postfix because it is one of the main email sending servers, with widespread global distribution.
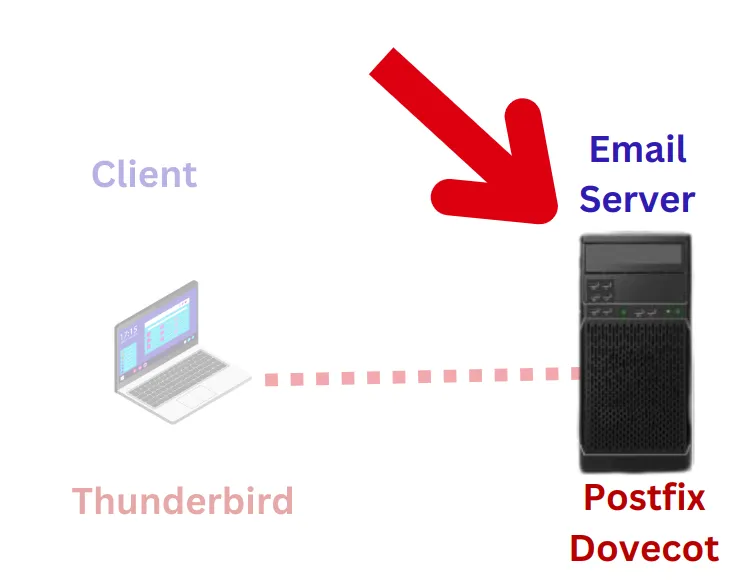
The figure below shows that we will start our tutorial by configuring the email server.
To install Postfix, we will use the command below.
sudo apt install postfix
Then confirm the installation.
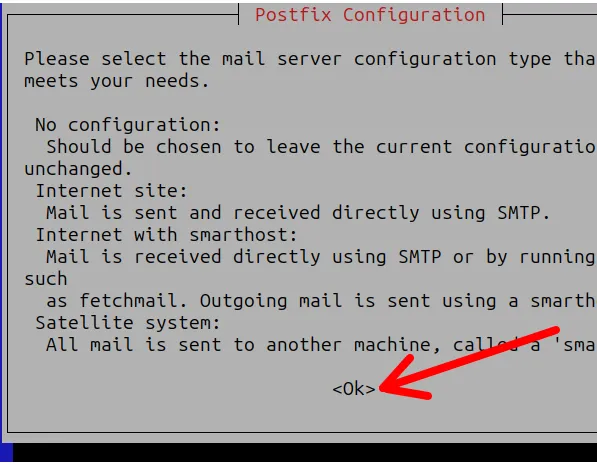
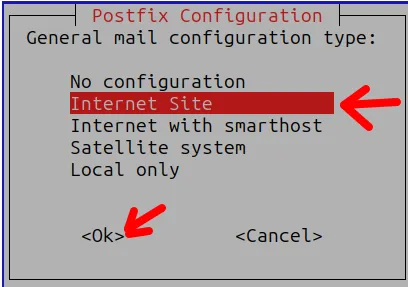
Next, we will choose the type of configuration used in our Postfix. For this tutorial, we will use the “Internet Site” mode. This model is interesting because it allows future integration with external domains.
Now, we will give a name to the email server. In this case, we can use a local domain or a domain that we have on the Internet.
In this case, we are doing a local configuration and will use a fictitious domain “labredes.teste“. You can use the domain that is most suitable for your case.
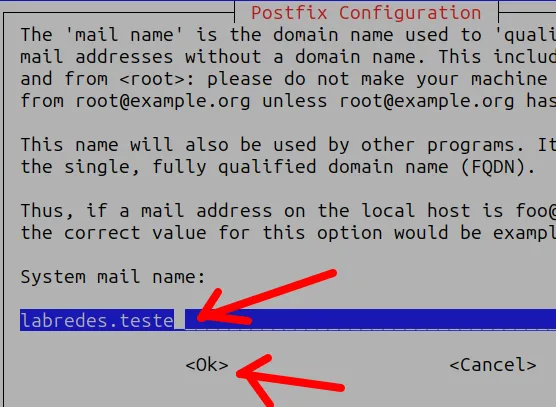
After clicking “Ok“, we will see the server finishing the configuration.
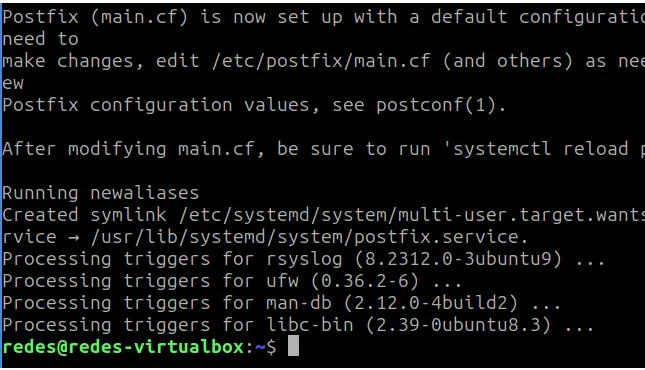
Once Postfix is installed, let’s check if the server is listening on TCP port 25, which is the SMTP port.
To check if the Postfix server is listening on port 25, we will use the command below.
ss -nlt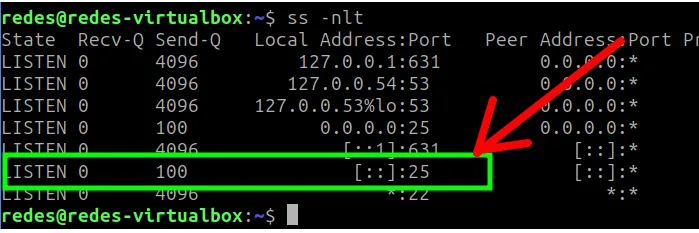
Basic Postfix configuration
To configure Postfix, we will access the “main.cf” file and make changes. To edit the “main.cf” file, we will use the nano editor and can use the command below.
sudo nano /etc/postfix/main.cf
Next, we will comment on some parts of the “main.cf” file configuration.
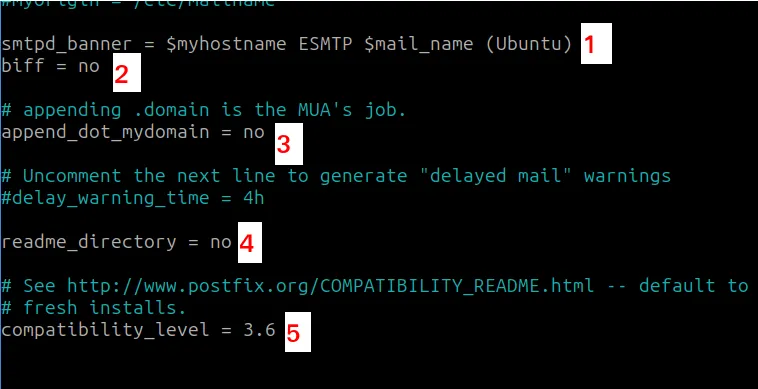
- # = Comments.
- 1 = Displays “$myhostname” provided in the file itself as well as “$mail_name“. This presentation banner can be useful when you want to provide some information to the user, for example: “This is server 1“.
- 2 = Allows new email notification for users and is usually disabled because it can affect server performance.
- 3 = If sent locally, it adds the string “.$Mydomain” to addresses that do not have “.domain” information. If sent remotely, it adds the sequence “.$Remote_header_rewrite_domain”.
- 4 = Location where Postfix README files describe the building, configuration, or operation of a specific Postfix feature.
- 5 = Allows compatibility with previous versions. Ideal after upgrading to a newer version of Postfix.

The figure above shows the configurations used in message encryption/security.

- 1 = Access restrictions for email relay control. Postfix SMTP applies it in the context of the “RCPT TO” command.
- 2 = The hostname of this email system. The default is to use the fully qualified domain name (FQDN) of “gethostname()” or use the non-FQDN result of “gethostname()” and append “. $ Mydomain”.
FQDN = Fully Qualified Domain Name. - 3 = Information for alias databases for local server delivery.
- 4 = Defines the domain that will be used as origin (or “my origin“) for emails sent by the mail server. This configuration is important because Postfix uses this value to determine which domain will be used in the “From” field of emails sent locally or to define the origin domain of emails that are delivered to other servers.
- 5 = The list of domains delivered via the “$local_transport” message delivery transport.
In the Postfix local delivery agent, it looks for recipients in /etc/passwd and /etc/aliases.
Only using the default “mydestination” specifies names for the local machine only.
On a mail domain gateway, you must also include “$mydomain”. Note: Here I added my domain “labredes.teste”. - 6 = The next-hop destination for non-local mail. It replaces non-local domains in recipient addresses.
- 7 = A list of network addresses or network/mask patterns separated by commas and/or whitespace
“trusted” SMTP clients are allowed to relay messages through Postfix. - 8 = The maximum size of individual mailboxes or local “maildir” file, zero means unlimited.
- 9 = The set of characters that can separate a username from its extension (example: usuario + xyz).
- 10 = The interface on which the Postfix server will listen. “all” means all the machine’s interfaces.
- 11 = When set to all, Postfix will use both IPv4 and IPv6 to communicate.
Important: Add these two lines at the end of the configuration file.
home_mailbox = Maildir/
resolve_numeric_domain = yes
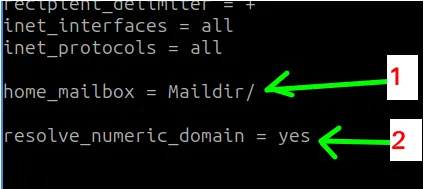
- 1 = Routing to the mail directory of the users registered on the Postfix server machine.
- 2 = Allows address resolution using IP.
To save the change in the nano editor, we can use “CTRL + x” and then type “y”.

Then, restart the Postfix server with the command below.
sudo service postfix restart
You can also check the status of the postfix server with the command below.
sudo service postfix statusInstalling and configuring Dovecot
We will use Dovecot to be able to receive emails using the IMAP protocol. However, it is worth remembering that Dovecot can also use POP3.
First, let’s install Dovecot with the command below.
sudo apt install dovecot-core dovecot-imapd
After that, we will edit the file “dovecot.conf” using nano.
sudo nano /etc/dovecot/dovecot.conf
As in the figure below, we will uncomment the line “listen = *, ::“.

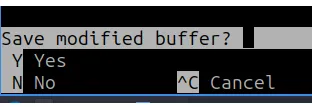
To save the change in the nano editor, we can use “CTRL + x” and then type “y”.
Now, we will restart the Dovecot server with the command below.
sudo service dovecot restart
Next, we will check the status of Dovecot with the command below.
sudo service postfix status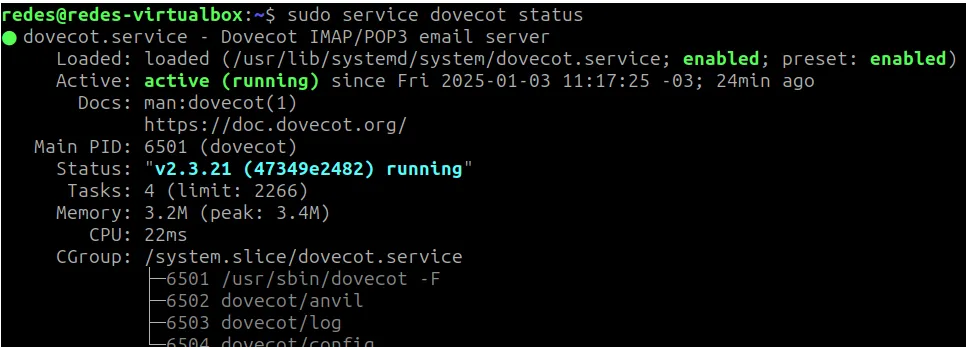
Now, let’s configure the “10-mail.conf” file, and for that, we will edit the file with the command below.
sudo nano /etc/dovecot/conf.d/10-mail.conf
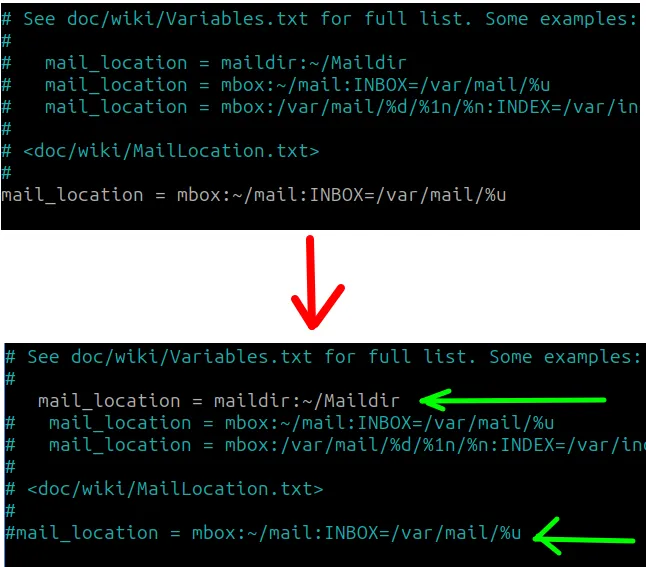
Inside the file, we will comment out the line “mail_location = mbox:~/mail:INBOX=/var/mail/%u” and uncomment the line “mail_location = maildir:~/Maildir“.
To save the change in the nano editor, we can use “CTRL + x” and then type “y”.

Now, we will configure the “10-master.conf” file, and for that, we will edit the file with the command below.
sudo nano /etc/dovecot/conf.d/10-master.conf
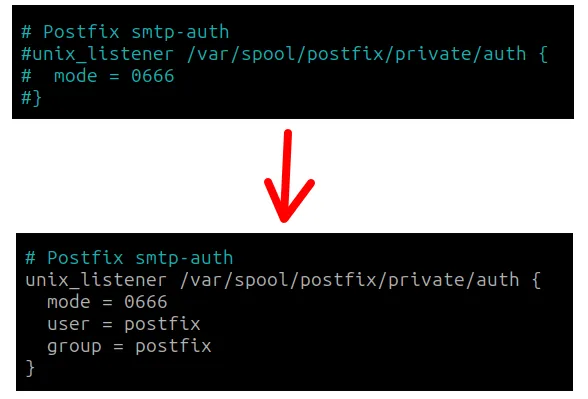
Inside the file, we will uncomment the lines:
“unix_listener /var/spool/postfix/private/auth {”
and
“mode = 0666“.
And we will add the lines:
“user = postfix“
“group = postfix“
And uncomment “}“.
To save the change in the nano editor, we can use “CTRL + x” and then type “y“.

Now, we will restart Dovecot so that the changes take effect. To restart the server, we will use the command below.
sudo service dovecot restart
Creating users on the Postfix server
Remember that in the Postfix configuration line we used: “home_mailbox = Maildir/”. Therefore, Postfix will look for users created within the machine running the Postfix service.
Thus, we need to create users within the Postfix machine.
In this tutorial, we will create 2 users: “alice” and “maria“.
To create the user “alice” we will use the command below.
sudo adduser alice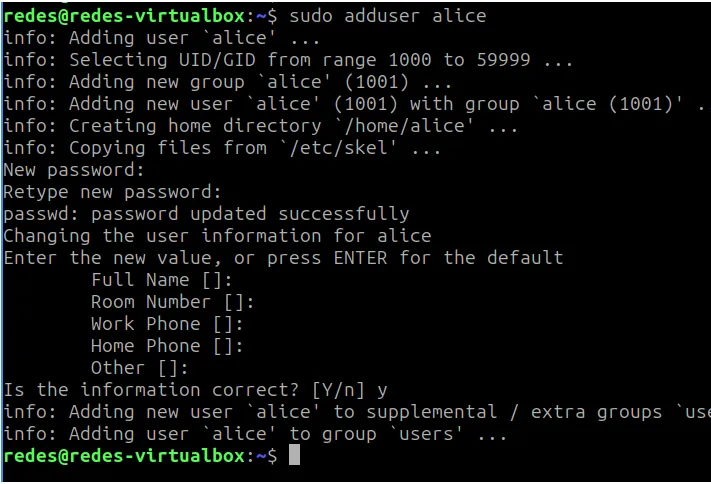
Now let’s create the user “maria” with the command below.
sudo adduser maria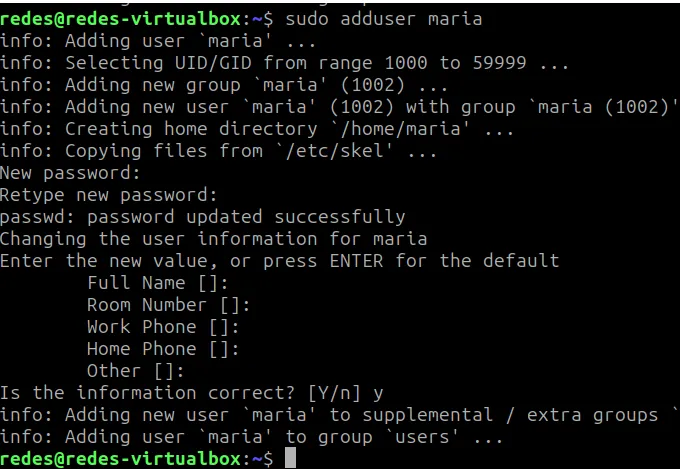
We can use the command below to see the users we created.
ls /home/
Installing and configuring thunderbird
Now we will go to a client machine and install the email reading application “thunderbird“. You can choose another email reading application that you prefer.
The figure below shows that now we will configure the client that will access the email server.
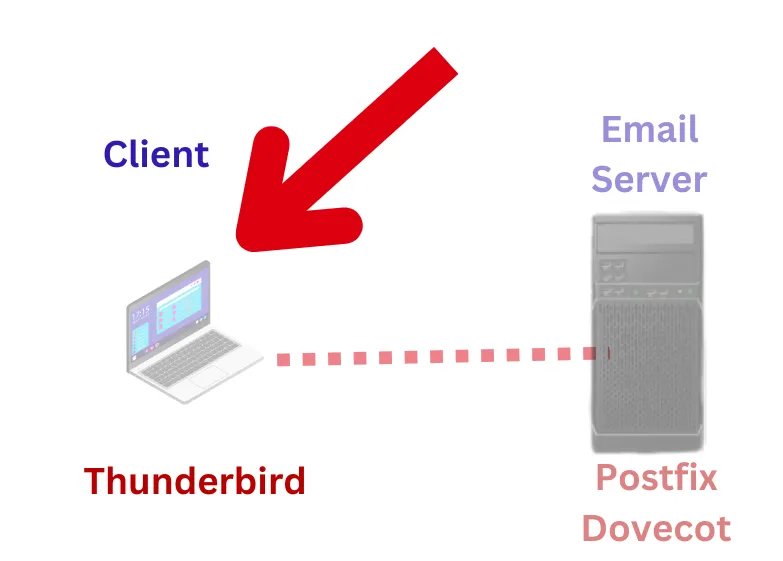
But before anything else, we will make a configuration in the hosts file of the client machine.
Configuring the hosts file on the client machine
You might be wondering why we are configuring the hosts file on the client, right?
It’s good that you asked. The reason we are configuring the hosts file is because “thunderbird” does not accept IP addresses as domain names. Therefore, we will create some local aliases in the client machine’s hosts file.
To configure the client machine’s hosts file, we will use the command below.
sudo nano /etc/hosts
Then, we will add a line at the end of the file containing the IP of the email server and the name we will assign to the email server.
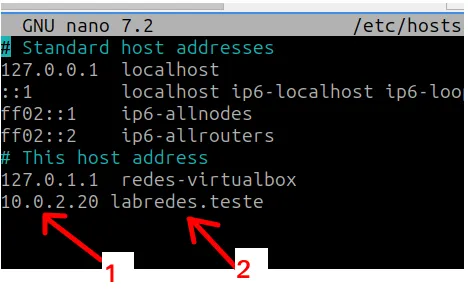
- 1 = The IP of our email server, where Postfix is installed.
- 2 = The name we gave our email server.
Installing thunderbird
To install “thunderbird” we will use the command below.
sudo apt install thunderbird
After that, you can type the command below or run “thunderbird” in the programs area of your graphical interface.
thunderbird
Configuring the user email account in thunderbird
Once “thunderbird” is started, we will configure the account of the user that we have registered on the email server. In this case, we will enter information for the user “alice“.
For that, we will enter the name “alice” and then we will enter the email. For the email, we will use the user’s name and the name we mapped in our client’s “hosts” file.
If you are using a DNS with the email server mapped, you can use your DNS name followed by your domain.
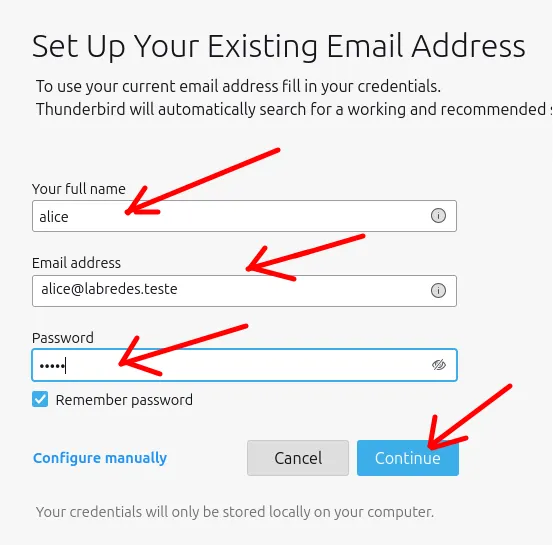
After entering the information, we will click “Continue” and then “Done“.
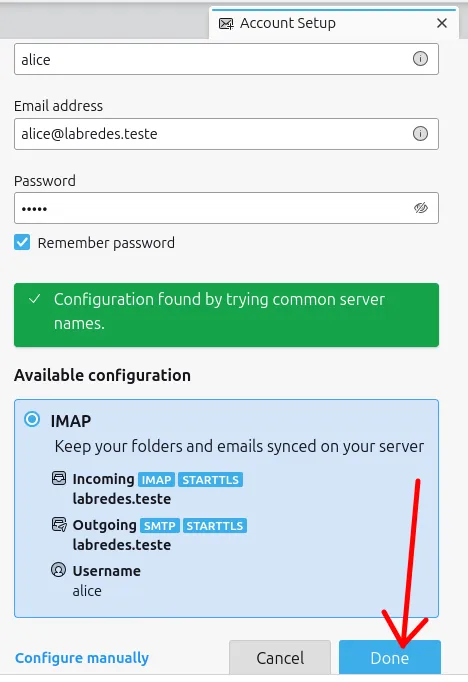
Next, we will see a security alert and will click “Confirm Security Exception” to validate our configuration.
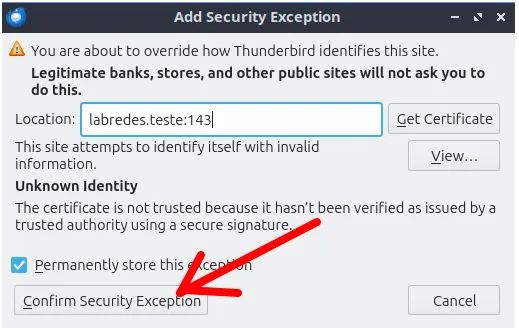
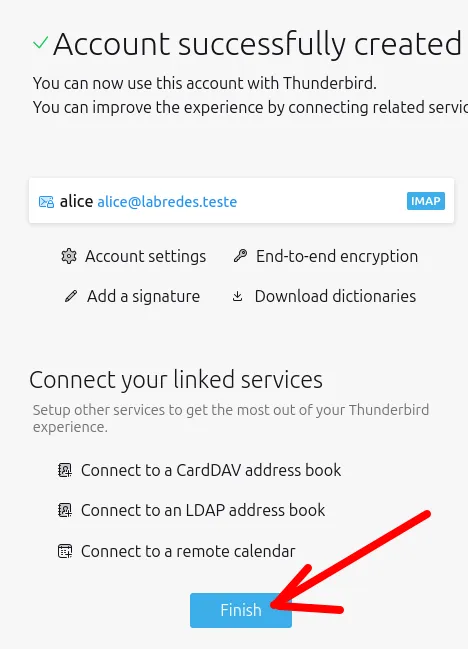
After that, we will see the screen below saying that the email account for the user has been set up. Then, we will click “Finish“.
Now, we will click “New Message” and write a test email.
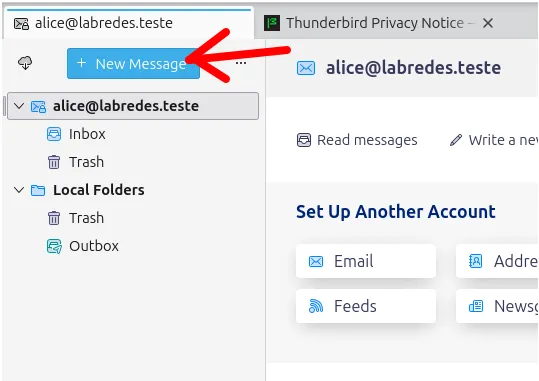
In this case, we will create a test email from user Alice to herself. Below I explain the fields we filled in this configuration.
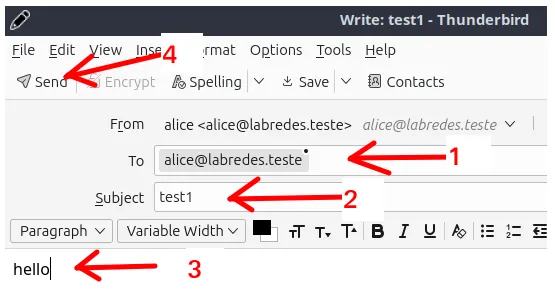
- 1 = Here we will enter the recipient’s email. In this case, since it’s just the first test, it will be for Alice herself.
- 2 = Next, we will enter the subject of the email.
- 3 = Then, we will enter text in the email.
- 4 = We will click “Send” to send the email.
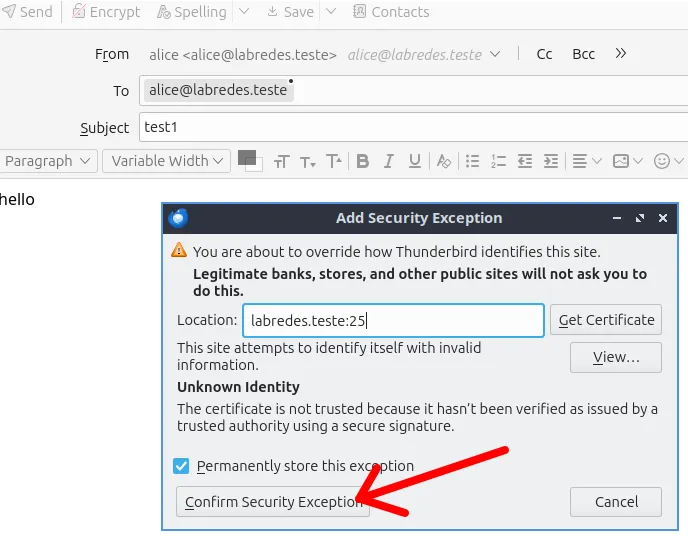
Next, we will see a second security alert and will click “Confirm Security Exception” to validate our configuration.
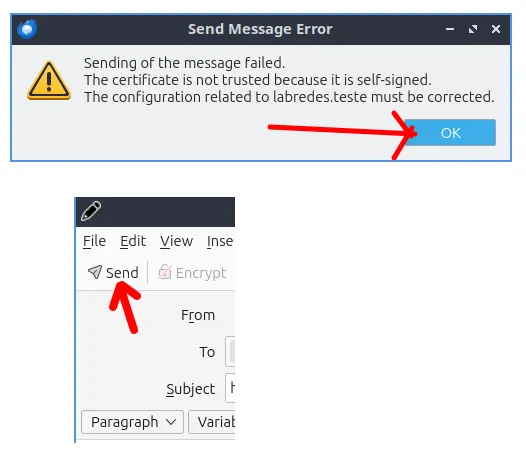
After that, a message will appear saying that sending the email failed, and we will click “OK“. This message appears because the certificate we are using for our email server is self-signed.
For this scenario, we can click “OK” and then we will click “Send“.
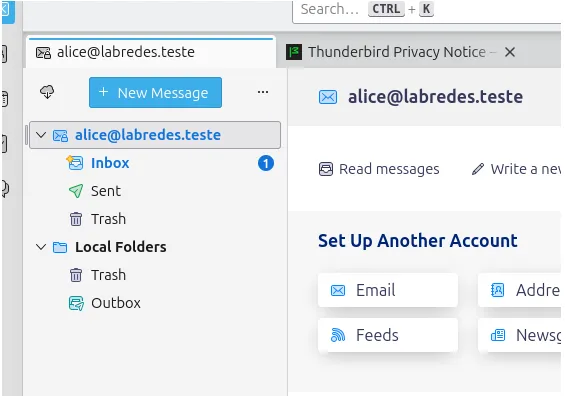
Now, we can see that a message has arrived in the “Inbox” of the user. So, we will click on “Inbox“.
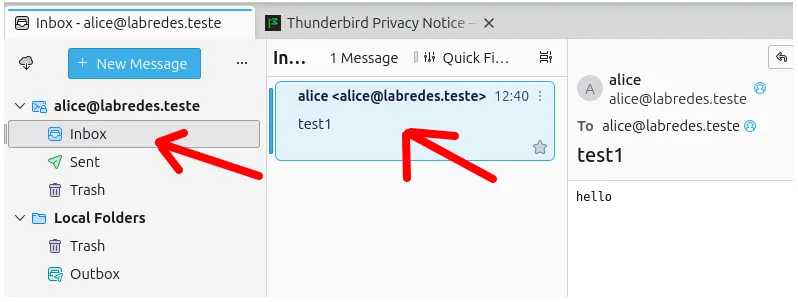
After clicking on “Inbox“, we will see that the message we sent is present.
Setting up a second email account
Now, we will set up a second email account so that we can test sending from one user to another.
Note: There is no need to have two email user accounts registered on the same machine. We are doing this only so that we do not have to turn on a second machine with “thunderbird“.
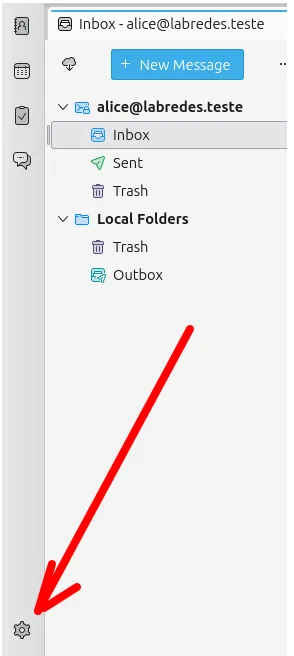
To do this, let’s click on the symbol in the figure below indicated by the red arrow.
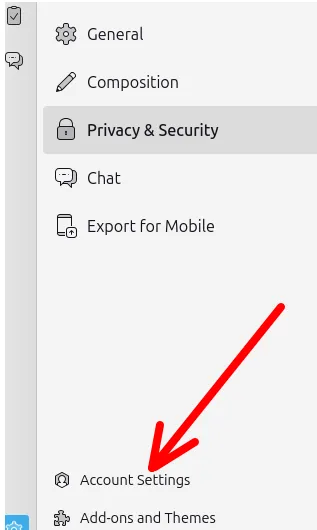
Next, let’s click on “Account Settings” as shown in the figure below.
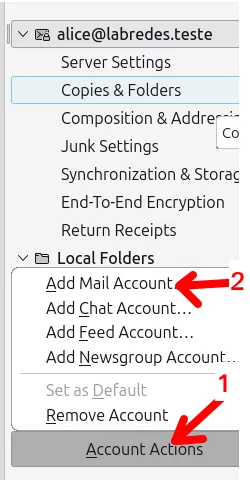
After that, let’s follow the steps shown in the figure below.
- 1 = First, let’s click on “Account Actions“.
- 2 = Click on “Add Mail Account“.
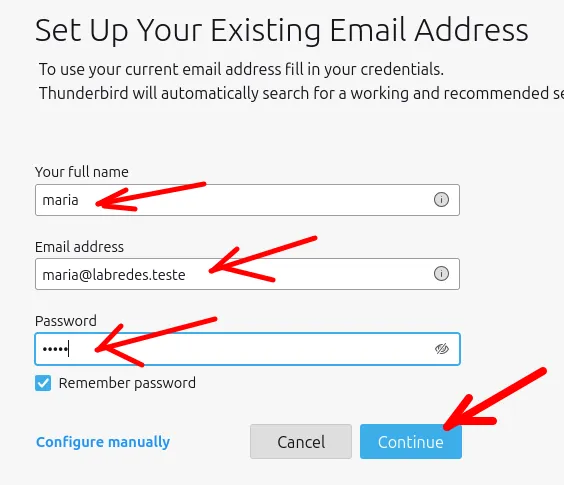
After that, let’s start setting up the second email user account. In this case, we are configuring the account for the user “maria“.
Therefore, we will make a similar configuration to what we did for the user “alice“, differentiating by username and password.
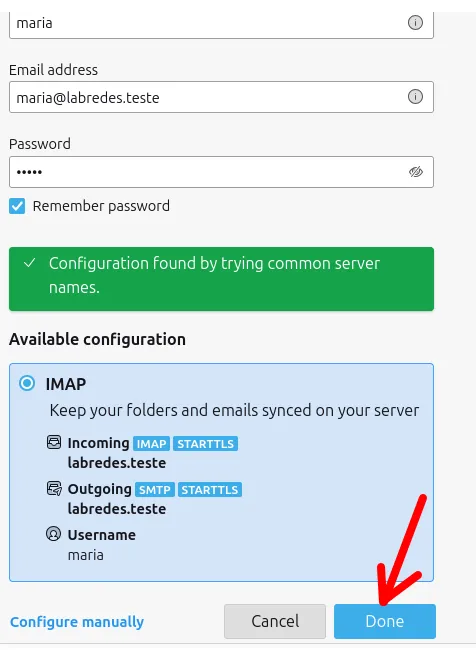
After setting up the new user’s account, let’s click on “Continue” and then on “Done“.
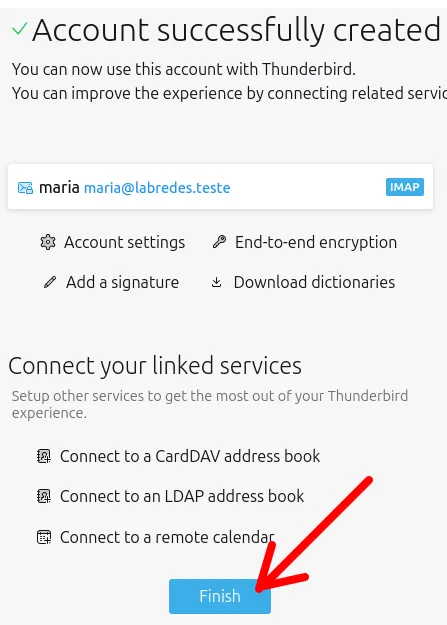
Now, we can see that the second email user account has been successfully created in “Thunderbird” and we can click on “Finish“.
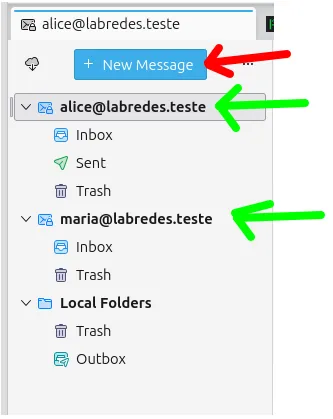
Sending an email from one user to another in Thunderbird.
Now that we have two user accounts set up in “Thunderbird,” we can send an email from one user to another and see if the email has arrived at the other user’s inbox.
To perform the test, we will click “New Message” and start writing the message.
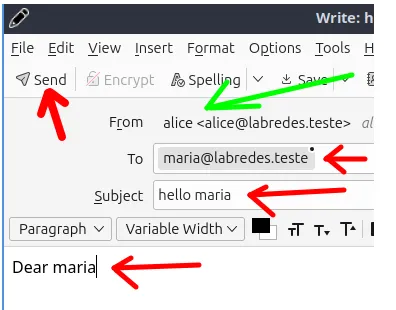
Notice, in the figure below, that we are sending the email with the origin being user “alice” and the recipient being user “maria“. After entering the information, we will click “Send“.
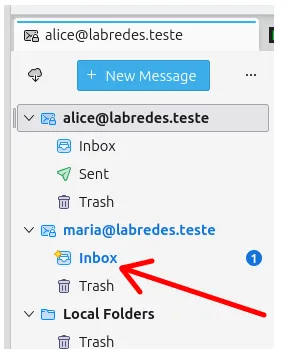
We can see, in the figure below, that a message has arrived in the “Inbox” of the user “maria“.
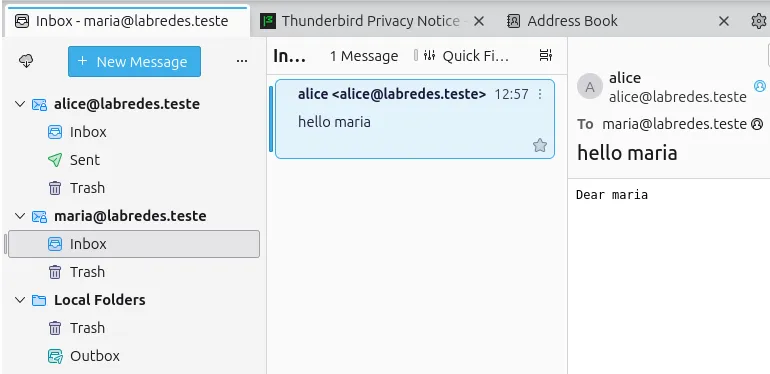
By clicking on “Inbox” for user Maria, we will see the message that was sent by Alice.
See more:
Build Your Own DNS Server: A Step-by-Step Guide using BIND9
Tutorial for SSH Public Key Authentication
Install ubuntu 24 on virtualbox
How to X11 Forwarding using SSH
Squid Proxy for Linux Installation and Configuration

Juliana Mascarenhas
Data Scientist and Master in Computer Modeling by LNCC.
Computer Engineer

